Chapter 3: Relative Behavior
Min. Requirements to beat Ch.3: level 90/5x echelons [with good equipment] by the end.
E3-1
S-Rank Condition: Establish supply route and maintain it for 2 turns by turn 9
Required Squads: 2 AR SMG echelon + 1 Dummy
Shown Enemy Strength: 18,000


Sometimes you will have a spare move point here because you were able to take the helipad on turn 2. If you have spare turn, you can work on some of moves that dummy echelon will make later turn early.


Deploy 2nd combat echelon to take node at the crossroads.

Deploy 2nd dummy echelon here, can be combat echelon, doesn't make a difference.

1st combat echelon and 1st dummy will be moving to finish connecting the right side of the route.


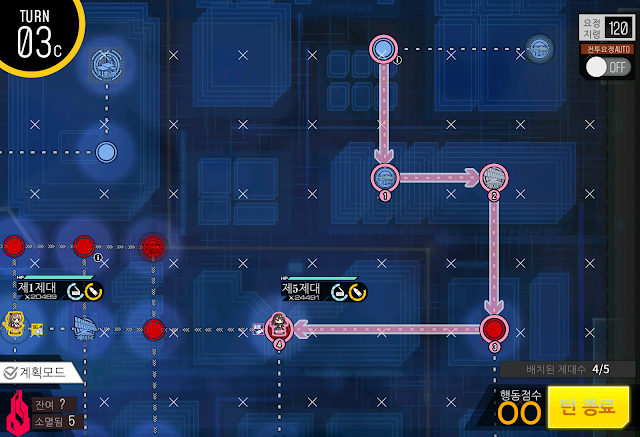
Once you finish it like this, just end turns until map is clear.

Map View: Another supply route map. you won't be connecting from the shortest route as it will be hard to take on Jupiter without parachute fairy. S rank is still achievable with follow method.

This is the route we are going for.


Sometimes you will have a spare move point here because you were able to take the helipad on turn 2. If you have spare turn, you can work on some of moves that dummy echelon will make later turn early.


Deploy 2nd combat echelon to take node at the crossroads.

Deploy 2nd dummy echelon here, can be combat echelon, doesn't make a difference.

1st combat echelon and 1st dummy will be moving to finish connecting the right side of the route.


Once you finish it like this, just end turns until map is clear.
E3-2
S-Rank Condition: Establish supply route and maintain it for 3 turns by turn 16
Required Squads: Night AR + RF/HG + MG/SG or 2nd RF/HG + 1 Dummy
Shown Enemy Strength: 20,000


Night AR echelon moves to take care of spawning helipad on the top right while center echelon takes care of goylat on the center.

MAKE SURE to spawn Dummy Echelon on HQ before moving away from HQ with RF/HG echelon.

Move dummy right behind the RF/HG echelon to speed up the supply route process.

Continue moving RF/HG echelon and Dummy along the route.

Night AR echelon comes back all the way to secure the starting helipad and preventing any enemy unit from entering the loop in the center.


Night AR echelon begins the long journey to the enemy HQ moving 1 node at a time. IF you do have additional echelon you can spawn, I strongly recommend that, I just limited myself to 4 echelon for starters.


Night AR echelon resupplies before continuing its task.


Echelon in the middle moves to kill the weakened golyat in the center, location could differ depending on your RNG.

Now that golyat plus [red beans] are in ideal position, we throw in 2 echelon on each side to start connecting the route all the way to the enemy HQ.

And as usual night AR team is making its way to the end.


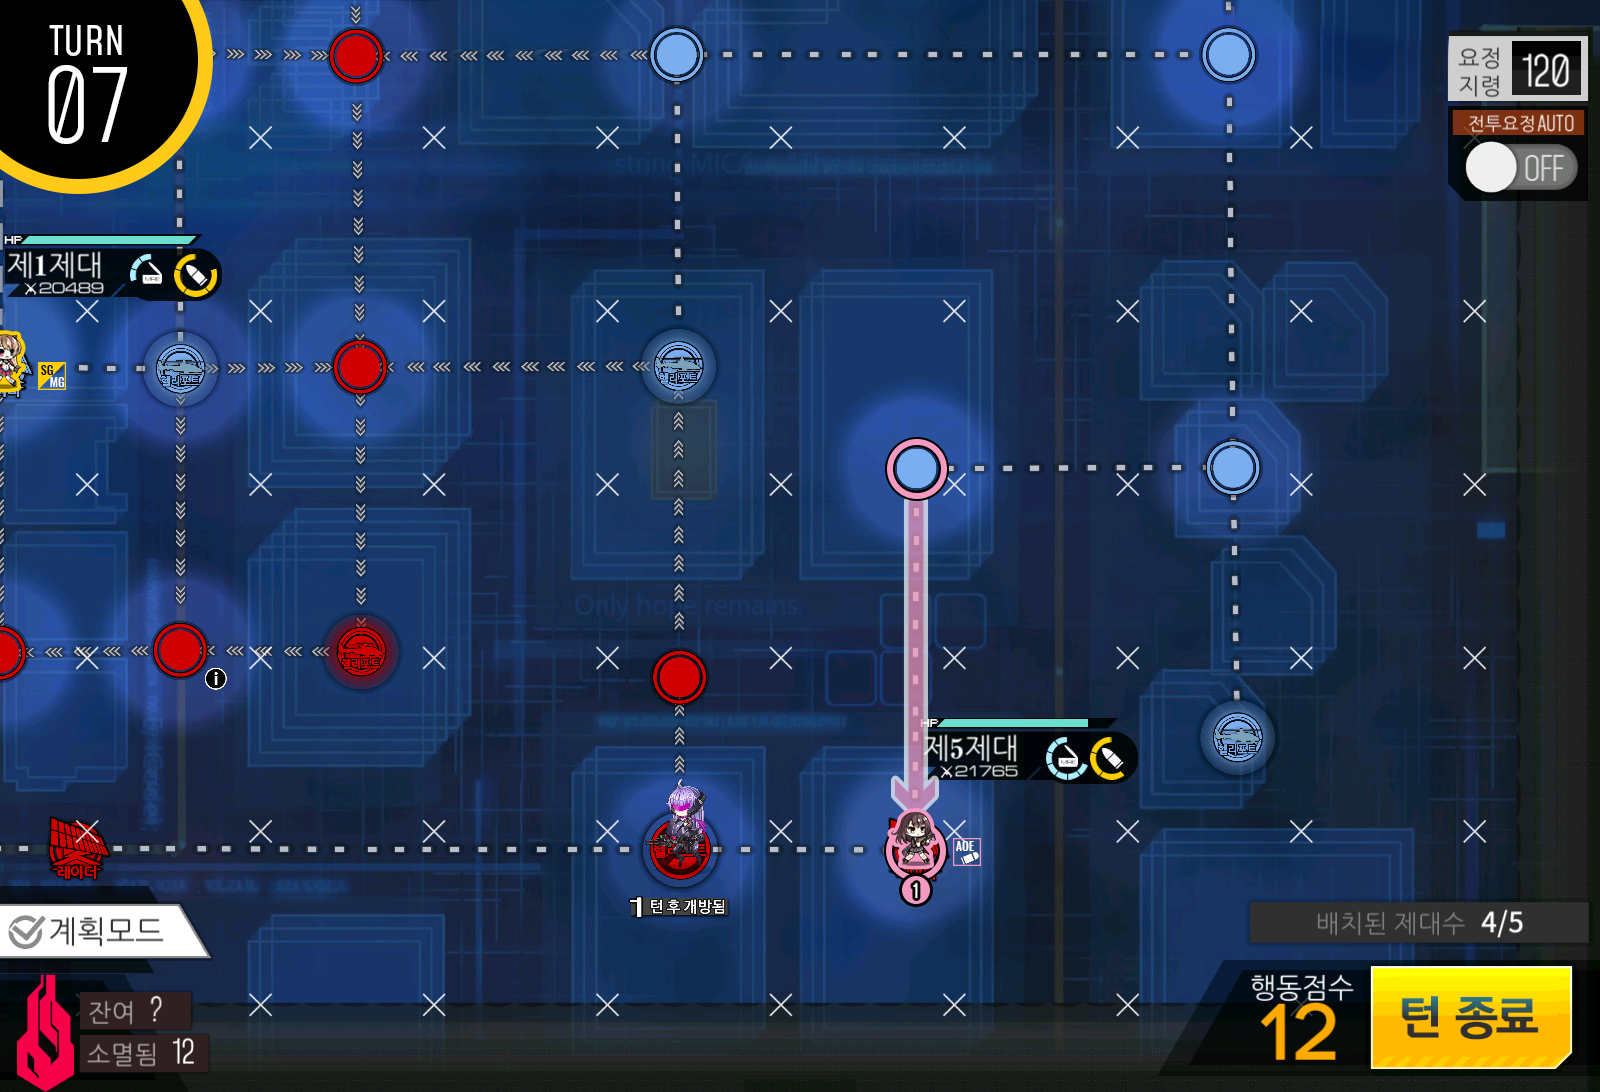
By end of turn 10, you should have the supply route established and all you have to do is making sure that echelons in the loop does not run into goylat plus until map is cleared.


Map View: This map can be divided into armor side and non armor side. Night AR echelon and RFHG team will be sufficient here to beat the mission along with 1 echelon that can kill golyat that has 13.4k health + 6 Aegis armor unit.

Night AR echelon moves to take care of spawning helipad on the top right while center echelon takes care of goylat on the center.

MAKE SURE to spawn Dummy Echelon on HQ before moving away from HQ with RF/HG echelon.

Move dummy right behind the RF/HG echelon to speed up the supply route process.

Continue moving RF/HG echelon and Dummy along the route.


Night AR echelon comes back all the way to secure the starting helipad and preventing any enemy unit from entering the loop in the center.


Night AR echelon begins the long journey to the enemy HQ moving 1 node at a time. IF you do have additional echelon you can spawn, I strongly recommend that, I just limited myself to 4 echelon for starters.


Night AR echelon resupplies before continuing its task.


Echelon in the middle moves to kill the weakened golyat in the center, location could differ depending on your RNG.

Now that golyat plus [red beans] are in ideal position, we throw in 2 echelon on each side to start connecting the route all the way to the enemy HQ.

And as usual night AR team is making its way to the end.


By end of turn 10, you should have the supply route established and all you have to do is making sure that echelons in the loop does not run into goylat plus until map is cleared.

E3-3
S-Rank Condition: Rescue least 4 dolls by turn 10
Required Squads: 3 Combat able Echelon [RF/HG and AR/SMG recommended] + 1 Dummy
Shown Enemy Strength: 22,000


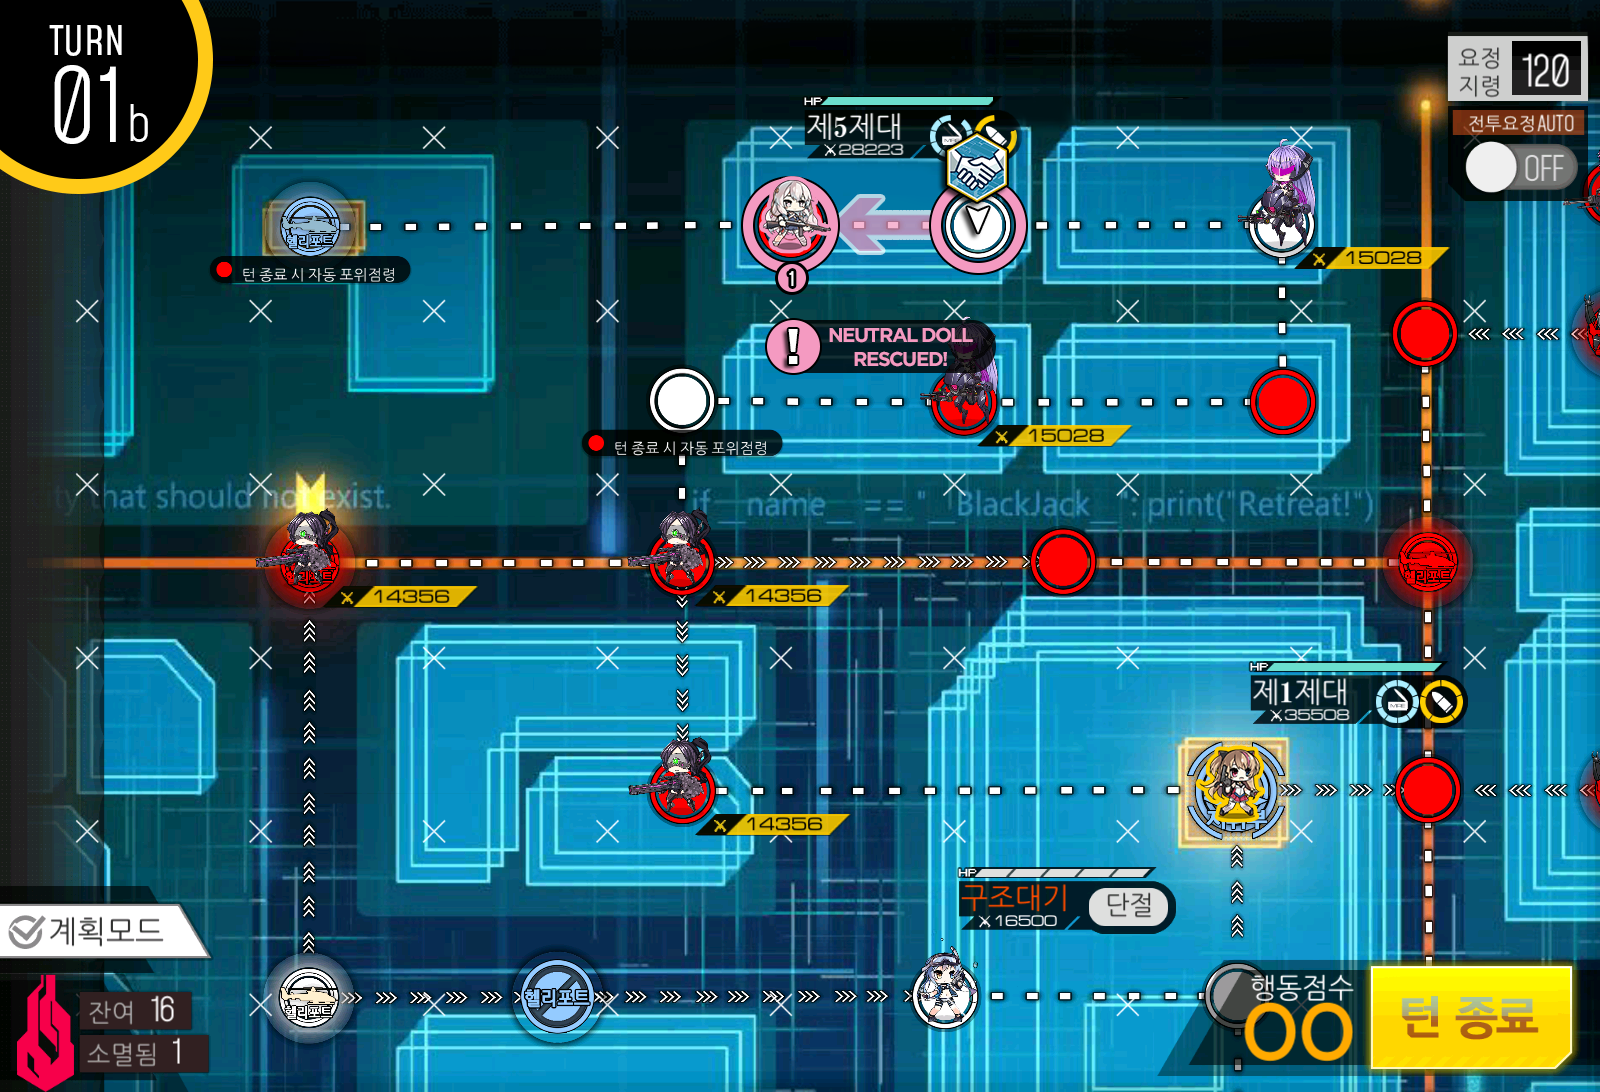
Move AR echelon to rescue the hostage but only after swapping position. This is to maintain the helipad under friendly control. [IF you have parachute fairy, go straight for taking control of neutral helipad just bottom left of the image after rescuing.]


RF/HG or MG/SG Echelon moves towards netural doll and rescue.

With remaining 3 moves, spawn a dummy and position as such.

If you don't have parachute fairy, AR echelon on the left side will move to the enemy helipad using entire turn's move points.

If you don't have Parachute fairy but has 5th echelon slot and can field another combat echelon, you want to spawn another one instead of retreating, which forfeits the S rank clear. If you only have 4 echelon, retreating and redploying is must.

Echelon on the right runs to the resupplying node and dummy echelon following close behind.


Dummy Echelon moves up to last remaining hostage, again to save the move point, make sure to swap before rescuing.


Swap and move the remaining echelon with hostages to helipad/HQ to manually extract them. This ends the map.

Map View: Rescue map that can't get S rank if you are looking to beat with just 4 Echelons. If you have 1 more available or have parachute fairy, your work will be lot easier.

Move AR echelon to rescue the hostage but only after swapping position. This is to maintain the helipad under friendly control. [IF you have parachute fairy, go straight for taking control of neutral helipad just bottom left of the image after rescuing.]

RF/HG or MG/SG Echelon moves towards netural doll and rescue.

With remaining 3 moves, spawn a dummy and position as such.

If you don't have parachute fairy, AR echelon on the left side will move to the enemy helipad using entire turn's move points.

If you don't have Parachute fairy but has 5th echelon slot and can field another combat echelon, you want to spawn another one instead of retreating, which forfeits the S rank clear. If you only have 4 echelon, retreating and redploying is must.

Echelon on the right runs to the resupplying node and dummy echelon following close behind.


Dummy Echelon moves up to last remaining hostage, again to save the move point, make sure to swap before rescuing.


E3-4
S-Rank Condition: Rescue least 2 dolls by turn 10
Required Squads: Night AR + MG/SG or 2nd Night AR team.
Shown Enemy Strength: 24,000


Map View: Final map with a puzzle to solve. Your goal is to find a quadrant that has no enemy unit near the neutral doll, and another quadrant with Garm. While this might give some people PTSD of CUBE, it's much easier.

Looking at the map, if you split the map in half left side will be consists of armor and right side with guard and Jaeger normal. Because Garm is considered an armor unit, it seems to be spawning on the left side always.

For MG/SG Echelon I am using just conventional set up, and if you are able to, having armor fairy is not a bad option since it can fight against guards and Jaeger which has dmg of 40. Small boost from the skill can make SG last.

This is Boss Kill unit set up that can skip the Gaia Pattern. Recommend putting your strongest fairy here, either command or mortar fairy that grands FP boost.
As you can see, there's one that is a row attack with Gaia lifting her weapon skyward. Second one is large AoE with clear warning that can be avoided if doll is situated between tiles. To minimize damage, retreat the doll that is targeted.

With Night AR set up above or with contender it is possible to skip all patterns using burst. It is important to time it right around when Gaia is doing her row attack animation or she will enter the invulnerable phase.

Start with MG/SG Echelon or RF/HG Echelon with airstrike or Taunt fairy. Move up one and spawn Boss kill echelon.

Move up to capture the temporary helipad and end turn. Each echelon should be able to take on enemy unit near by if equipped properly.

For my situation, it was top right that did not show any red node being taken near neutral doll. Avoid as much battle as possible on your way to the doll.

Rescue the doll and move MG/SG echelon on the center to take another helipad just next to it.

Park the Boss echelon near circle to prepare the final fight.

By beginning of turn 4, you should be able to see the Garm unit peeking out, and that's where you want to go. Battle should be similar to 2-4.


If top left helipad near the circle is possible to be taken by single echelon, you can use that helipad instead of moving to center. I moved mine because i was unable to do so.

It seems that Night AR echelon would be short rations at this point so I used MG SG echelon to clear the area near by so that Boss kill unit can resupply without issue.


Enter the circle of death, where only way out is fight to the death.

It is okay to enter the circle on turn 8 if you are near by, you just have to make sure that you end your echelons right behind the Golyat plus units.

Boss kill echelon defeats the Gaia boss and end turn to capture the helipad with help of 2nd echelon.


Move the last remaining echelon and manually extract the doll to clear the map.
Looking at the map, if you split the map in half left side will be consists of armor and right side with guard and Jaeger normal. Because Garm is considered an armor unit, it seems to be spawning on the left side always.

For MG/SG Echelon I am using just conventional set up, and if you are able to, having armor fairy is not a bad option since it can fight against guards and Jaeger which has dmg of 40. Small boost from the skill can make SG last.

This is Boss Kill unit set up that can skip the Gaia Pattern. Recommend putting your strongest fairy here, either command or mortar fairy that grands FP boost.
Gaia Boss Pattern
As you can see, there's one that is a row attack with Gaia lifting her weapon skyward. Second one is large AoE with clear warning that can be avoided if doll is situated between tiles. To minimize damage, retreat the doll that is targeted.
With Night AR set up above or with contender it is possible to skip all patterns using burst. It is important to time it right around when Gaia is doing her row attack animation or she will enter the invulnerable phase.

Start with MG/SG Echelon or RF/HG Echelon with airstrike or Taunt fairy. Move up one and spawn Boss kill echelon.

Move up to capture the temporary helipad and end turn. Each echelon should be able to take on enemy unit near by if equipped properly.

For my situation, it was top right that did not show any red node being taken near neutral doll. Avoid as much battle as possible on your way to the doll.

Rescue the doll and move MG/SG echelon on the center to take another helipad just next to it.

Park the Boss echelon near circle to prepare the final fight.

By beginning of turn 4, you should be able to see the Garm unit peeking out, and that's where you want to go. Battle should be similar to 2-4.


If top left helipad near the circle is possible to be taken by single echelon, you can use that helipad instead of moving to center. I moved mine because i was unable to do so.

It seems that Night AR echelon would be short rations at this point so I used MG SG echelon to clear the area near by so that Boss kill unit can resupply without issue.


Enter the circle of death, where only way out is fight to the death.

It is okay to enter the circle on turn 8 if you are near by, you just have to make sure that you end your echelons right behind the Golyat plus units.

Boss kill echelon defeats the Gaia boss and end turn to capture the helipad with help of 2nd echelon.

You can retreat the echelon here and still get S rank. It's designed to be done that way.

Comments
Post a Comment