Area 10

Area 10 introduces new level of difficulty as well as 3rd phase by new faction: KCCO. They will have yellow as their color for the node, and some of them will even be controllable [in blue] working just like friend echelon. It will be important to control them to our advantage to get S-rank clears, but majority of them will be easy to achieve. Additionally this is first time that armor units are introduced to normal/emergency missions in storyline.
It will be important to bring elite echelons to this battle as there will be tough battles that will require counters [i.e. large number of strikers and 199 armor unit]. Additionally if you have a parachute fairy, you will be able to save some time and resources, but for those who have yet to get one, this guide will not use it.
**** It is important to be flexible in mission due to Girls Frontline does not have fixed enemy movements. This means S-rank might not be achievable even if you do everything right. So adopt accordingly.****
- 10-1
Required Squads: 1 Combat + 2 Dummy + 2 Friend

Map View: Standard establish supply route and defend it for x turn. Recommend ARSMG echelon.

After moving combat echelon, deploy friend echelon at set it to 'eliminate'.

Move combat echelon up one, then deploy 2nd combat echelon. We will swap back after setting it to 'eliminate'.

Combat echelon move to surround capture the helipad to the right of HQ.

with last remaining move, spawn dummy echelon on helipad.

Beginning of 3rd turn, enemy units spawning from top helipad should be taken care of by friend echelon. Spawn 2nd dummy echelon on helipad. If you have yet to resupply combat echelon, now would be a good time to before moving.

continue to establish supply route towards supply point.

Combat echelon moves around the long way to capture node on the other side of one way path. Once you establish the route, you should be fine just clicking end turn until map is cleared.

- 10-2
Required Squads: 2 Combat + 1 Dummy + 2 Friend

Map View: Map that introduces KCCO faction and their... OPness. Since enemy HQ is blocked from direct approach, surround capture is the only way. We only have to focus what's going on the bottom half of the map for the S-rank clear.

Move 1st combat echelon down 1 towards helipad then spawn 2nd Combat echelon.

Move combat echelon up one on HQ, then spawn Friend echelon, then set to eliminate.

Swap back to return to HQ.

Repeat the steps by moving to left of HQ, then spawning 2nd combat echelon, also set to 'eliminate'.

After deploying 2 friend echelons to north of HQ, resupply and move down one.

Deploy Dummy to HQ as last move.

both combat echelons move to clear enemy units nearby. If you are short on kills, combat echelon near HQ can swap with Friend echelon to left. Just swap back at the beginning of next turn.

Combat echelon moves up to capture node near enemy HQ, if you need to use the additional moves to kill more units, move only up one, then capture node adjacent to enemy HQ on 5th turn.

On 5th turn you should have both nodes near HQ taken, and kills either already complete or just shy of 1 or 2.
- 10-3
Required Squads: 1 Combat + 3 Dummy

Map View: If this was just to clear the map, it would be relatively easy to let Hydras to do the work. But it will be relatively simple.

You can set all but 2 of Hydras to wait, then two mentioned to 'eliminate'. Spawn dummy echelon on HQ after combat echelon move up one.

Move combat echelon right one, then form dummy conga line following the combat echelon.

Move combat echelon up one so it's between hydras.

Swap with hydra on the bottom right. Also make sure that hydra units are in wait command so it won't kill more units.

Clear units around the area with remaining move.

Combat echelon resupplies than move to clear units around the helipad. Use last move to spawn 3rd Dummy echelon.

Swap back with dummy to resupply. This is where you have to map out your remaining kills and ending it on enemy HQ. RNG may vary. I will post my example below.


- 10-4
Required Squads: 1

Map View: Map itself is pretty similar to 10-2 that we are letting Hydra unit to do the work for capturing HQ. Jaeger units and Striker units are force to be reckoned with, so either take proper counter measures or take Airstrike fairy at max level.

We are starting with dummy at the north helipad and combat echelon at the HQ. Move to center helipad on the center of the map.

Dummy echelon moves to radar just north of the helipad. Then spawn 2nd Dummy echelon. Combat echelon moves towards HQ after resupplying.

Deploy Friend Echelon on both HQ and center helipad, both set to eliminate.

Combat echelon Swaps with Friend Echelon then sweeps in large circle back towards center HQ. Either you should be at kill requirement or just shy of it.

If you are shy of requirement, move around to fill that remaining kills. Also Stop the Friend echelon from moving unless you want it to run into Jupiter cannon.
- 10-5
Required Squads: 1 Combat + 3 Dummy

Map View: This map looks easy but in reality most of battles are done by us, and you can read why if you don't skip dialogues. There are heavy hitters of Jaegers and scouts, so I recommend AR echelon with AoE skills.

Combat echelon move up one, then spawn Friend echelon that is set to 'eliminate'.

Combat echelon swaps back to HQ then move to take out dinergate.

Combat echelon move to take helipad to the south of HQ.

At the beginning of turn 3, turn all friend echelons [including KCCO units] to wait.

After moving combat echelon up towards winding path, spawn dummy echelon on HQ then Friend echelon on Helipad, set to 'eliminate'

Move Combat echelon in front of friend echelon, then spawn 2nd dummy echelon on the helipad. This allows combat echelon to swap to resupply.


Since it's going to be a long track to HQ, we are going to spawn 3rd dummy at the HQ, and using remaining move to push combat echelon closer to enemy HQ.

If for some reason if your kill requirement is not met, take out the Jaeger units near HQ before continuing, you should have plenty move points spare in this case.
- 10-6
Required Squads: 1 Combat + 3 Dummy + 2 Friend

Map View: Judge is back! but we don't have to fight her in this map unless you want to. We are going to rescue two hostage dolls that has 3 health points which are rather close to HQ.

Start by deploy Friend Echelon at the HQ after moving combat echelon to right.

Swap back then take out striker unit to north of HQ.

Deploy friend echelon at set it to eliminate.

Deploy Dummy echelon on HQ.

After moving dummy to right, deploy 2nd Dummy on HQ. Then change order to friend echelon on the left to 'standby'.

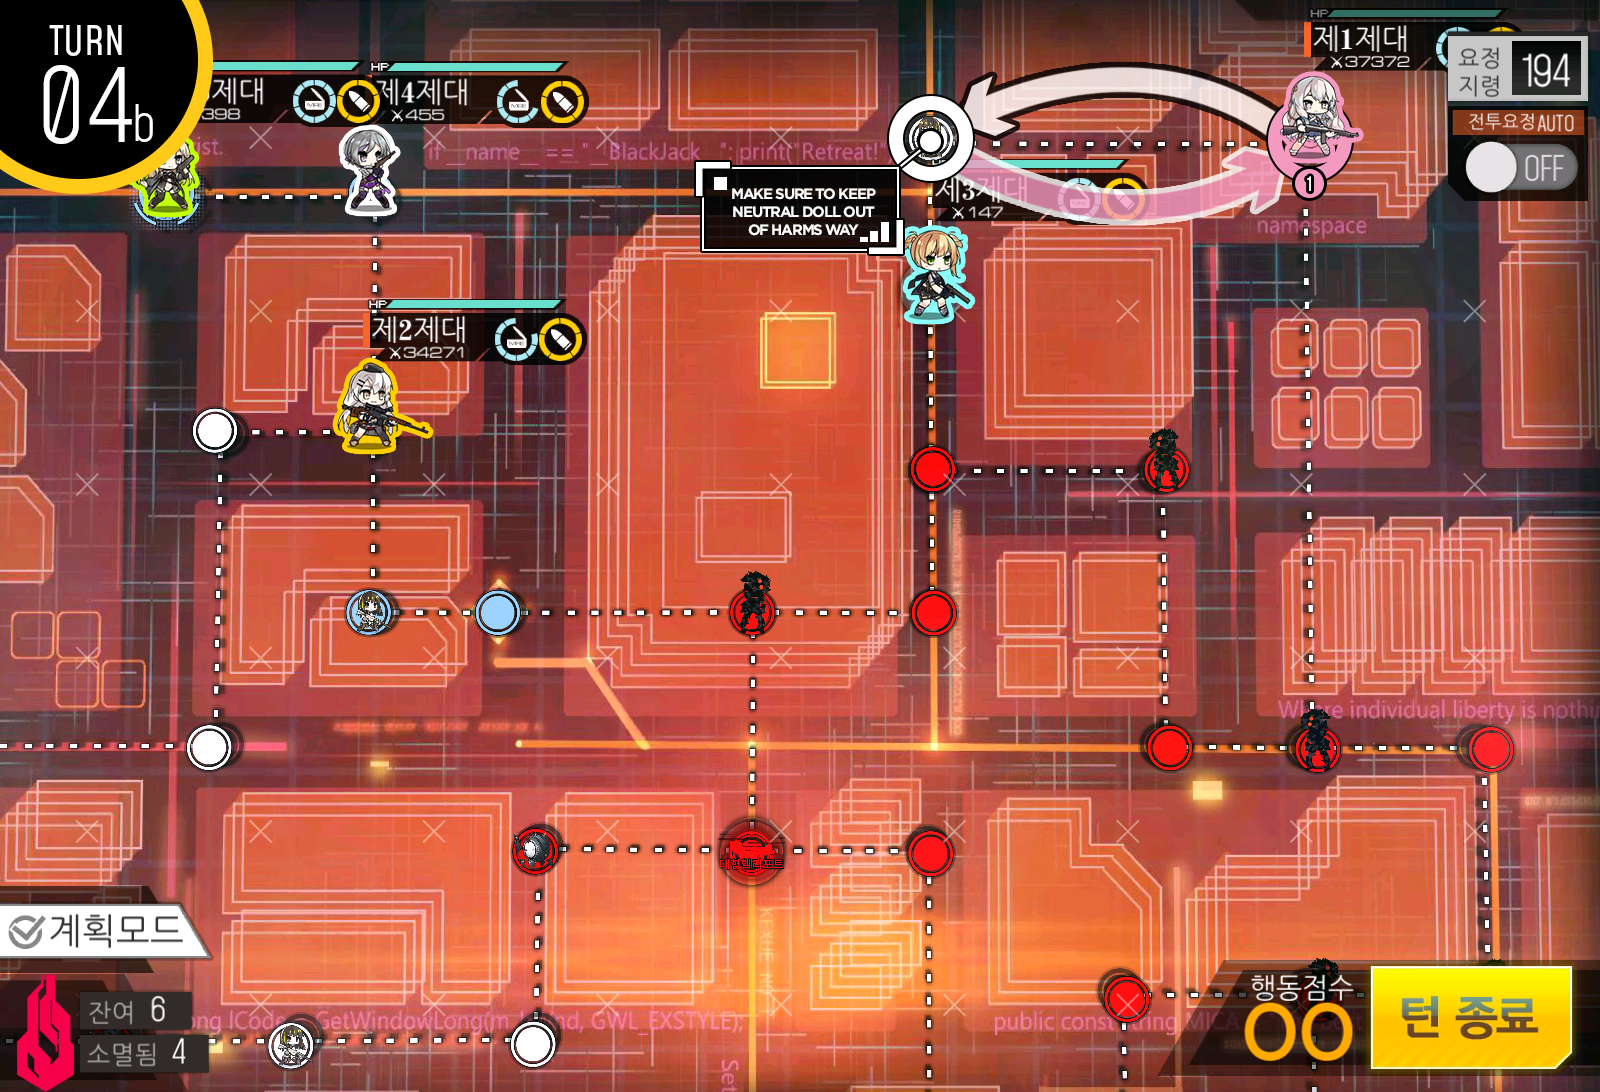
Turn 3 is where RNG decides which route you take. Either Judge will block shortest route to hostage to left, or leave it open like image shown above. If so, take direct route to hostage.

Return back towards HQ and swap with Friend echelon. Manually extract hostage at the helipad now or let it auto extract at the beginning of next turn.

Swap your way up to helipad on the right. Then move towards hostage, don't forget to swap before rescuing to save a move.

Manually extract at the helipad once rescued.

This is when HQ path is blocked by Judge. In this case, swap your way to Friend echelon on the left.

This path will be longer, so you will not reach back to helipad this turn. Don't forget to swap before rescuing to save a move point.

Don't use all move points but use last move point to spawn 3rd dummy echelon on empty helipad.

After this point, it will be same as other route. Manually extract hostage then swap your way to friend echelon to the right of HQ.


Emergency Difficulty
- 10-1E
Required Squads: 2 Combat

Map View: Relatively simple map but each enemy units are strong and hard to use general team. Would recommend getting counter teams on each side.

I decided to deploy RFHG echelon to bottom side and AR SMG as 2nd echelon which will take care of top half of the map. throw in AoE skill for Scouts in the middle.

Move each echelon through top and bottom path as shown.

As it turns out, middle scout units do not move. Spawn dummy echelon as extra move.

Wipe out remaining enemy units and you are set.
- 10-2E
Required Squads: 2 Combat + 3 Dummy + 2 Friend

Map View: Map requires bit of RNG for S rank clear as one of helipad can be impossible to capture. This map is also first map that requires 5 echelons if you do not have parachute fairy. [I hope by the time you are doing chapter 10 S-rank, you have 5th echelon] You can also clear the map early just like Rank maps if you rescued 4 hostages. This of course disqualifies you for S-rank.


Protect the hostage by swapping with combat echelon.

In the beginning of 2nd turn, you want the helipad on the top right side of the map to be free of red node to north of it. Restart if that is the case.

Deploy 2nd combat echelon on starting helipad.

Swap with dummy echelon that has hostage doll.

Combat echelon moves to capture helipad on the top right side of the map.

Deploy remaining dummy echelons on each helipad.
If there are enemy units nearby, swap accordingly to prevent loss.

Swap hostage all the way to helipad.

Combat echelon will be heading down the path on the left so swap to T-junction.

Move all the way down to helipad on the bottom left corner.

Rescue the hostage on the top right side of the map with remaining move. You should be also be able to rescue hostage near starting helipad.

Combat echelon at the bottom left helipad move up to rescue hostage doll behind black bean. Then to save move points we are going to use Friend Echelons.

Move back and swap onto helipad and manually extract.

Then move to right towards last remaining hostage doll. Make sure to swap to save move point. Then deploy 2nd Friend echelon at the helipad again.

You should have enough move points to swap with friend echelon and manually extract to end mission.
- 10-3E
Required Squads: 1 Combat

Map View: This map is more designed to tell a story rather than to be played. All you need is one combat echelon defending HQ.

Hit

End Turn

Until

You

Win!

Then watch as story unfolds... Nani
- 10-4E
Required Squads: 1 Combat + 2 Dummy + 2 Friend

Map View: Now we know true nature of these KCCO faction robots. While looking daunting, establishing route is relatively easy. However now with armor units, RFHG echelon is highly recommended. Start by deploying combat echelon at HQ then Dummy on bottom helipad.

KCCO robots near supply point will not move 1st turn as they are set on "Expand" AI logic. Spawn 2nd Dummy Echelon on helipad.

Move dummy up one, then spawn Friend Echelon with 'eliminate' command.

Swap to north of helipad.

With remaining move, move combat echelon down 2 then spawn friend echelon at the HQ [Preferably strongest echelon you can find. MG recommended].

Combat echelon continues to move down the right side of the map.

Move Dummy echelon to Supply point.

We are making sure the Friend Echelon moves to the center area near Supply point. so if there is enemy unit near it, clear it out using Combat echelon.

Swap Friend Echeln and Dummy so that friend echelon can take care of KCCO robot near supply point.

Combat echelon resupplies and sweeps bottom half of the map. If echelon took lot of damage, spawn 2nd echelon just for hydra.

As long as Friend echelon at HQ holds, you should be fine hitting 'end turn' button until you clear the mission.
Comments
Post a Comment