Area 7
Jump to: [Area 0] [Area 1] [Area 2] [Area 3] [Area 4] [Area 5] [Area 6] [Area 7]

Enemies in Area 7 you will notice that they are stronger than Combat Power shown in the map. Even with 5x links, after few battles, your echelon will take some serious damage. For manageable missions, do not slack on skill levels and equipment enhancements and calibrations. If you are looking to S-Rank an Area 7, I am assuming you have least a 1 Full Echelon full of level 90+ and 5x links with a decent gears to back up the T-dolls. If you are below this setup, more grinding is recommended.
Another thing to keep in mind for Area 7 is that enemy units will have even more random movements. [compared to previous areas] so in unlucky cases S-rank will be impossible. In most cases an adaptation of guide below will be required. On top of that turn limits will be tight so if you don't achieve your S-rank on first try, don't fret and retry.
**** It is important to be flexible in mission due to Girls Frontline does not have fixed enemy movements. So adopt accordingly.****
*** I am using pictures with Korean language on them. Numbers next to arrows indicates movement order. Number on top left of the picture indicated what turn it is in.***
Required Squads: 2 + 1 Friend Echelon [or 2]
*** S-Rank might be impossible depending on Enemy Movement***


If node on left of the HQ is not taken, proceed with option a. IF not, follow option b on the bottom.

Here is some potential path you could take with 5 movement points to kill all 7 and get S-rank.

If your node is taken, this is your option b. This one you might end up using 2nd Friend Echelon in order to meet kill requirements.

There's very rare chance you can't make kill all... but that's really unlucky case.
Required Squads: 2 + 1 Dummy HG


Next turn is going to be impacted by the enemy unit with CP 6564.

I have put potential movements depending on where that unit moves [up or down] You should have enough move points to clear map no issue.
Required Squads: 2


Depending on the situation you can just spawn a Dummy Echelon to save some Manpower. But other case you will need echelon that could fight to defend your HQ.

Required Squads: 2


Required Squads: 2 + 1 Dummy HG


The Green Arrows are path of Dummy Echelon. Move it after 2nd Echelon has taken care of threats.

Required Squads: 2


Now that we cleared path for Dreamer she is going to move... but we are going to let her!


S-Rank condition: Kill 6 unit in 3 turns; control enemy HQ.
Required Squads: 2


Required Squads: 2


Required Squads: 2 + 1 Dummy HG


Required Squads: 2 + 1 Dummy HG


I accidentally missed screen cap for the end of Turn 4, but basically you are spending a turn filling that 12 kill requirement at the bottom remaining enemy units while Dreamer moves out of the way to clear the path to HQ.

Enemies in Area 7 you will notice that they are stronger than Combat Power shown in the map. Even with 5x links, after few battles, your echelon will take some serious damage. For manageable missions, do not slack on skill levels and equipment enhancements and calibrations. If you are looking to S-Rank an Area 7, I am assuming you have least a 1 Full Echelon full of level 90+ and 5x links with a decent gears to back up the T-dolls. If you are below this setup, more grinding is recommended.
Another thing to keep in mind for Area 7 is that enemy units will have even more random movements. [compared to previous areas] so in unlucky cases S-rank will be impossible. In most cases an adaptation of guide below will be required. On top of that turn limits will be tight so if you don't achieve your S-rank on first try, don't fret and retry.
**** It is important to be flexible in mission due to Girls Frontline does not have fixed enemy movements. So adopt accordingly.****
*** I am using pictures with Korean language on them. Numbers next to arrows indicates movement order. Number on top left of the picture indicated what turn it is in.***
- 7-1
Required Squads: 2 + 1 Friend Echelon [or 2]
*** S-Rank might be impossible depending on Enemy Movement***
Map View. Enemy unit on the bottom left of the helipad will decide what movement you should take on the following turns.
If node on left of the HQ is not taken, proceed with option a. IF not, follow option b on the bottom.
Here is some potential path you could take with 5 movement points to kill all 7 and get S-rank.
If your node is taken, this is your option b. This one you might end up using 2nd Friend Echelon in order to meet kill requirements.
There's very rare chance you can't make kill all... but that's really unlucky case.
- 7-2
Required Squads: 2 + 1 Dummy HG
Map view: Relatively compact map.
Next turn is going to be impacted by the enemy unit with CP 6564.
I have put potential movements depending on where that unit moves [up or down] You should have enough move points to clear map no issue.
- 7-3
Required Squads: 2
Map View: Finally getting tougher in terms of CP rating. Still, things should be manageable.
Depending on the situation you can just spawn a Dummy Echelon to save some Manpower. But other case you will need echelon that could fight to defend your HQ.
You should have plenty of kills to the way to enemy HQ to fill 6 kill requirement.
- 7-4
Required Squads: 2
Map View: oh no we are trapped! If you have two decent Echelons, this map will be a breeze.
Make sure to resupply before going to capture enemy HQ. Other wise an easy chapter.
- 7-5
Required Squads: 2 + 1 Dummy HG
Map View: First larger size map in this area. However it is still well manageable with 2 well equipped Echelons and a Dummy.
The Green Arrows are path of Dummy Echelon. Move it after 2nd Echelon has taken care of threats.
There could be a rare case that last remaining unit [Sniper unit] would move to either left or right of the helipad instead of top on turn 4. If that is that case, you still have enough points to kill all and take HQ so don't panic and just adapt accordingly.
- 7-6
Required Squads: 2
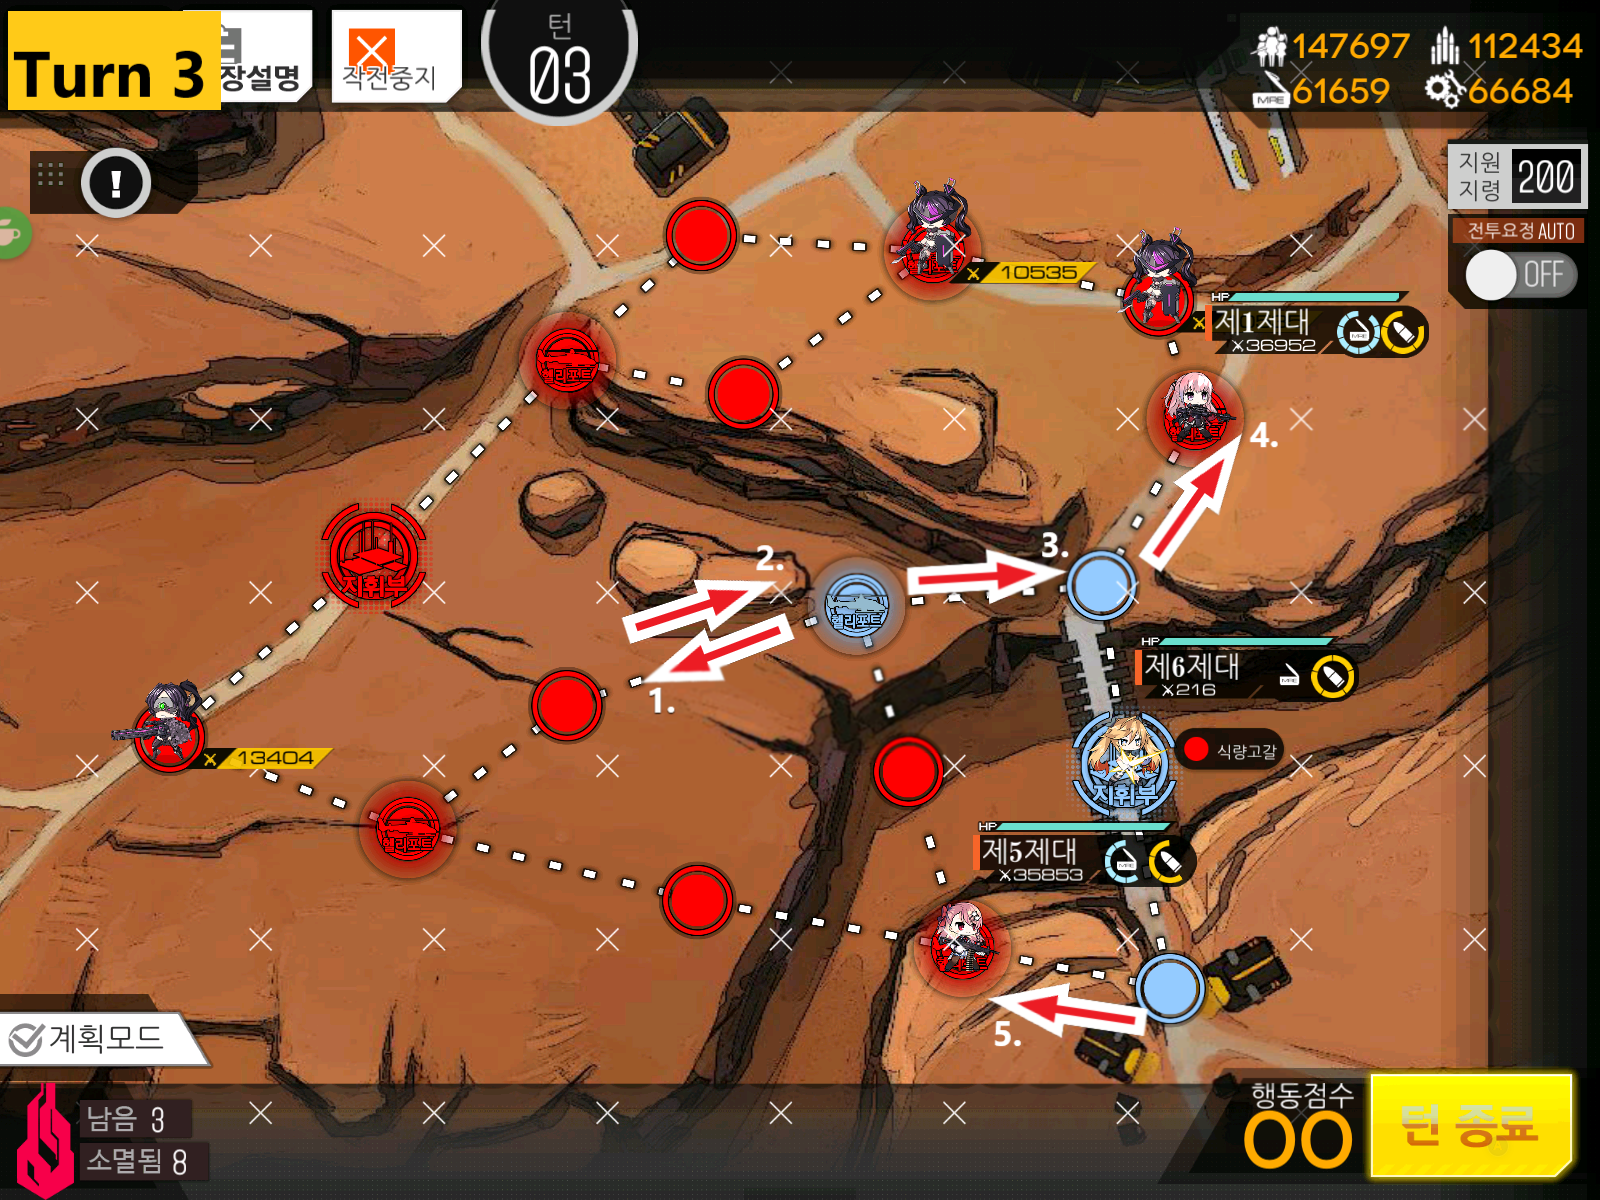
Map View: This map is going to hurt a lot if you don't kite... If you are lazy and have lot of resource, MG echelon is not a bad way to go about this map except for boss. Oh speaking of which, we are not fighting the boss. :D
Now that we cleared path for Dreamer she is going to move... but we are going to let her!
"Run away!"
And... we just take HQ. Yay!
--------------------------------------------------------------------------------------------------------------------------
Emergency Difficulty
- 7-1E
Required Squads: 2
Map view: it's a reuse of normal map with a twist. There's really nothing to describe here, just meet kill requirements before taking HQ.
- 7-2E
Required Squads: 2
Another reuse of normal map with stronger enemies.
- 7-3E
Required Squads: 2 + 1 Dummy HG
Map View
- 7-4E
Required Squads: 2 + 1 Dummy HG
Map View: guess what.. We are dodging the Dreamer Again. :D
I accidentally missed screen cap for the end of Turn 4, but basically you are spending a turn filling that 12 kill requirement at the bottom remaining enemy units while Dreamer moves out of the way to clear the path to HQ.
Then you move in! Simple.