Chapter 2: Lighting Curfew
■ Lighting Curfew I
Shown Enemy Strength: 6,000
Echelon[s] Required: 2 [RF echelon recommended]
S-Rank condition: Kill 5 Units in 6 turns. Take HQ.

Gentleman, I got bad news. Chapter 2 is all Night maps...
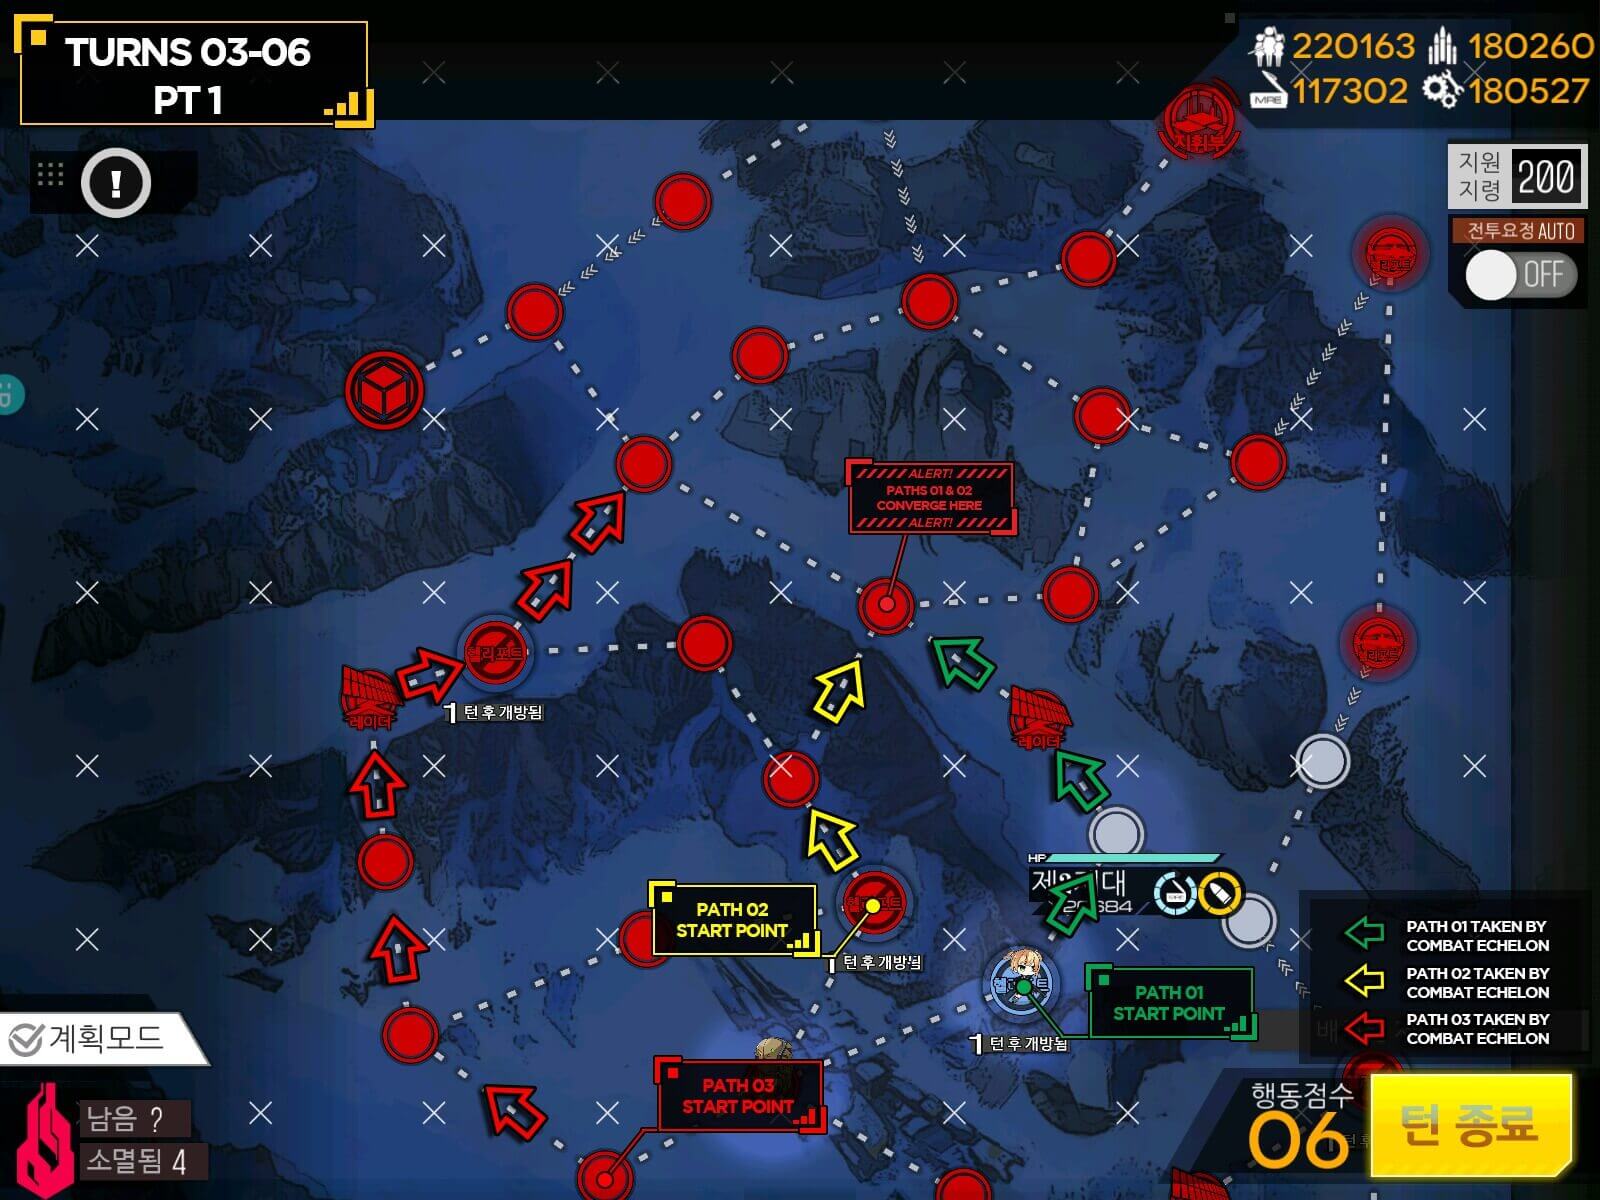
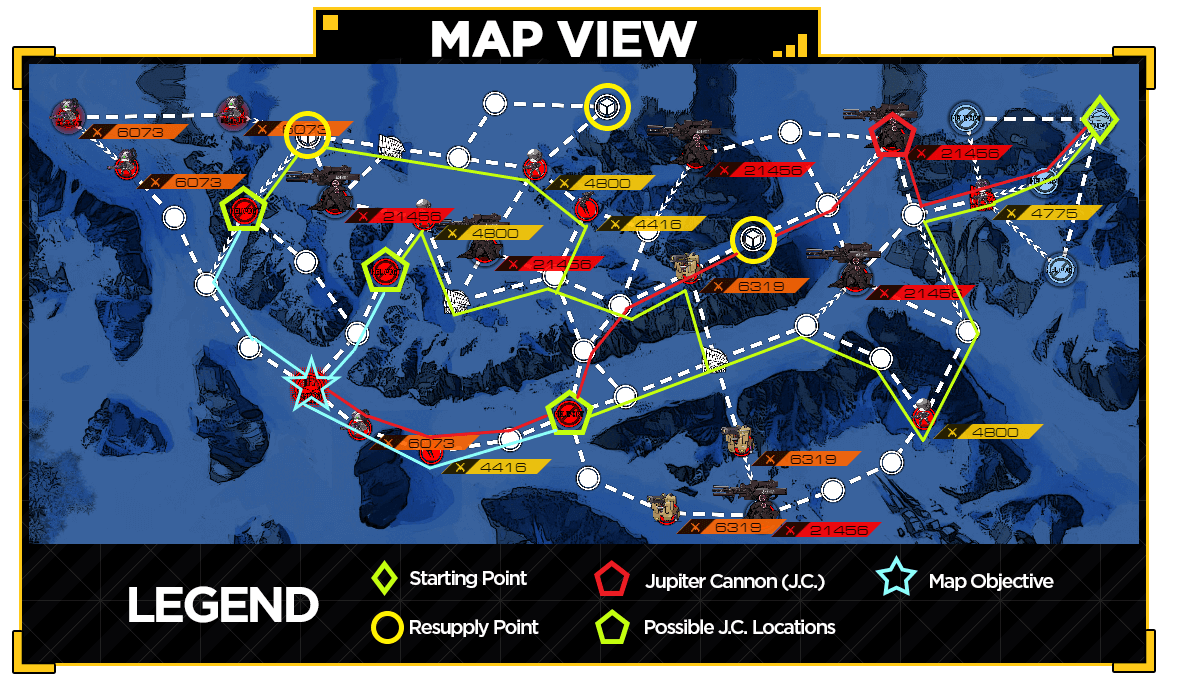
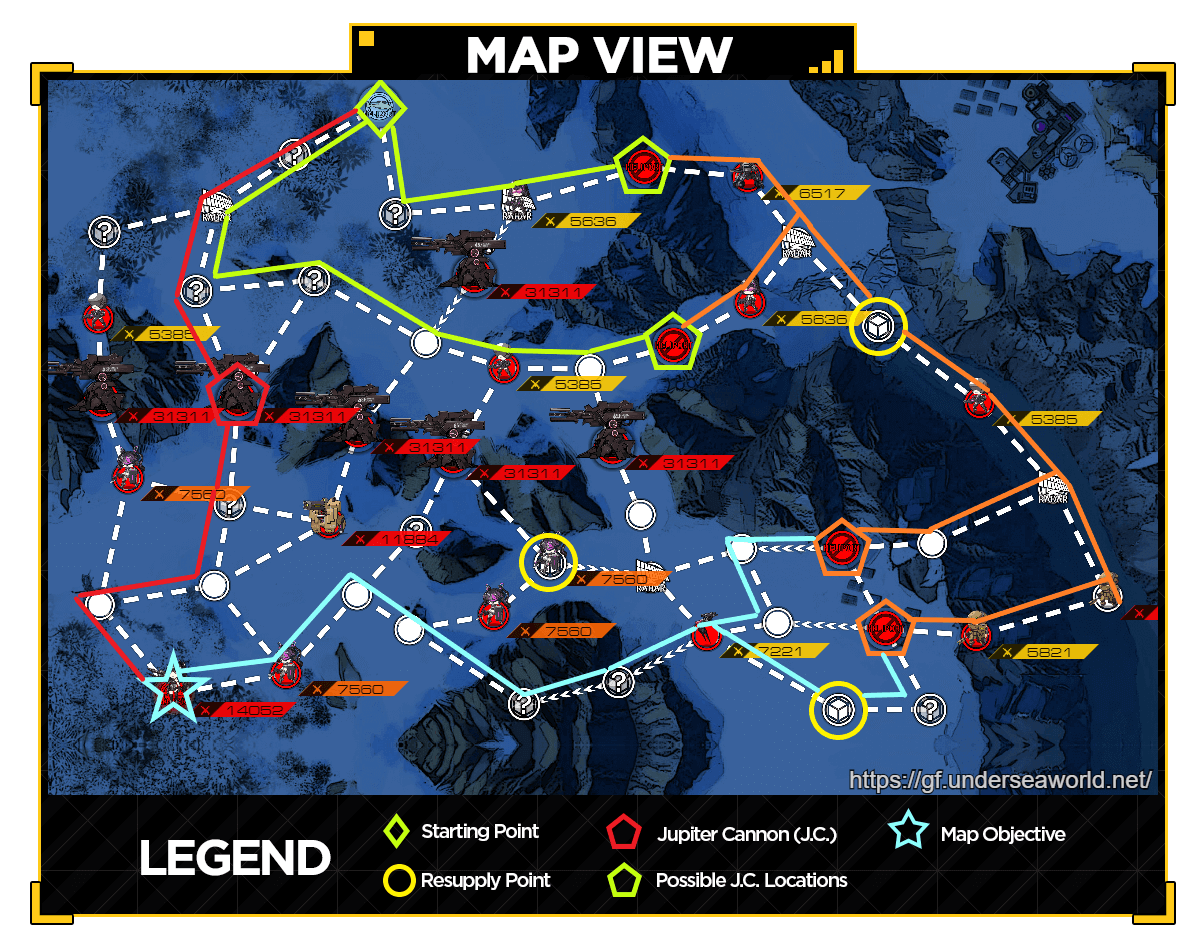
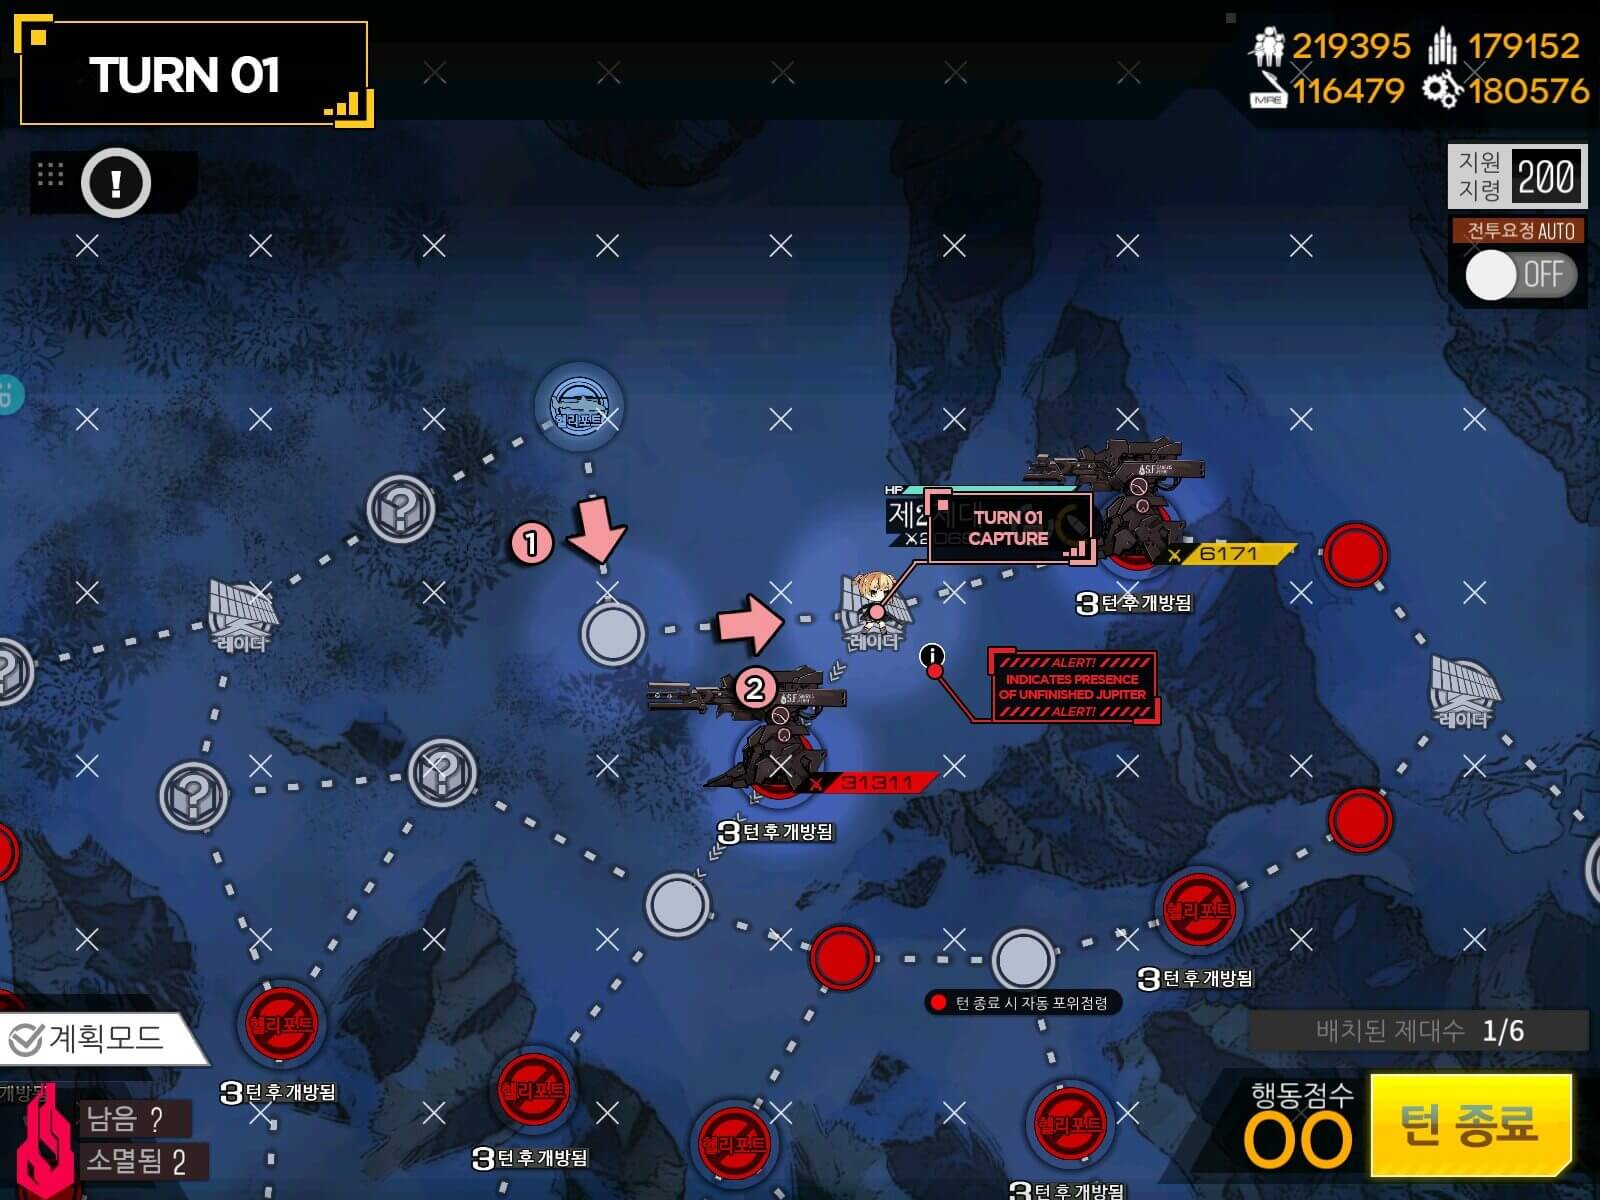
That map has lot of information listed so let me explain: If you are looking to avoid Jupiter cannon, you want to take the long way around [green path], or if you are looking to brute force Jupiter take the Red path. Then follow the rest of the train of light blue to HQ.
For Green path, you will have random location of Jupiter cannons on Helipad marked with Green Pentagon. One of those helipad will not have Jupiter so you will find it and go around the rest. There are 2 Single-use supply points that you can use on the way to HQ. Use them wisely or take time taking over Helipad under Jupiter and resupply if your timing is right.
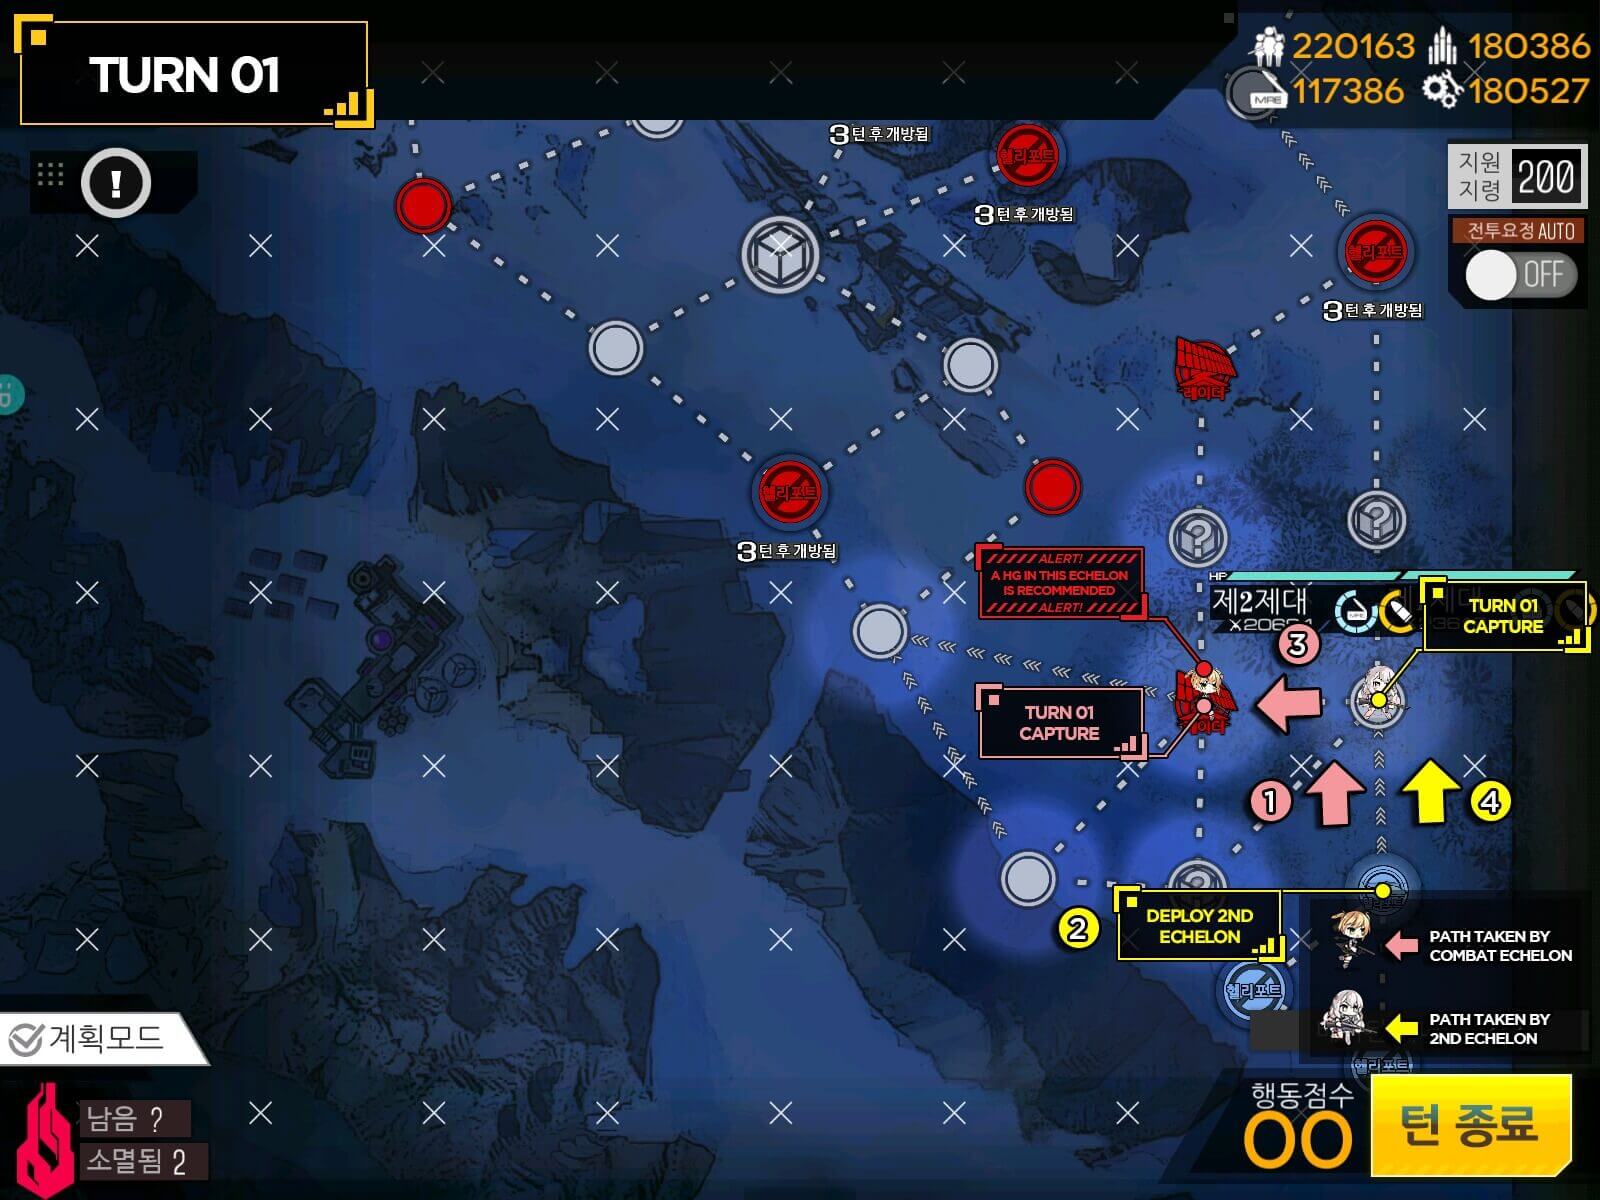
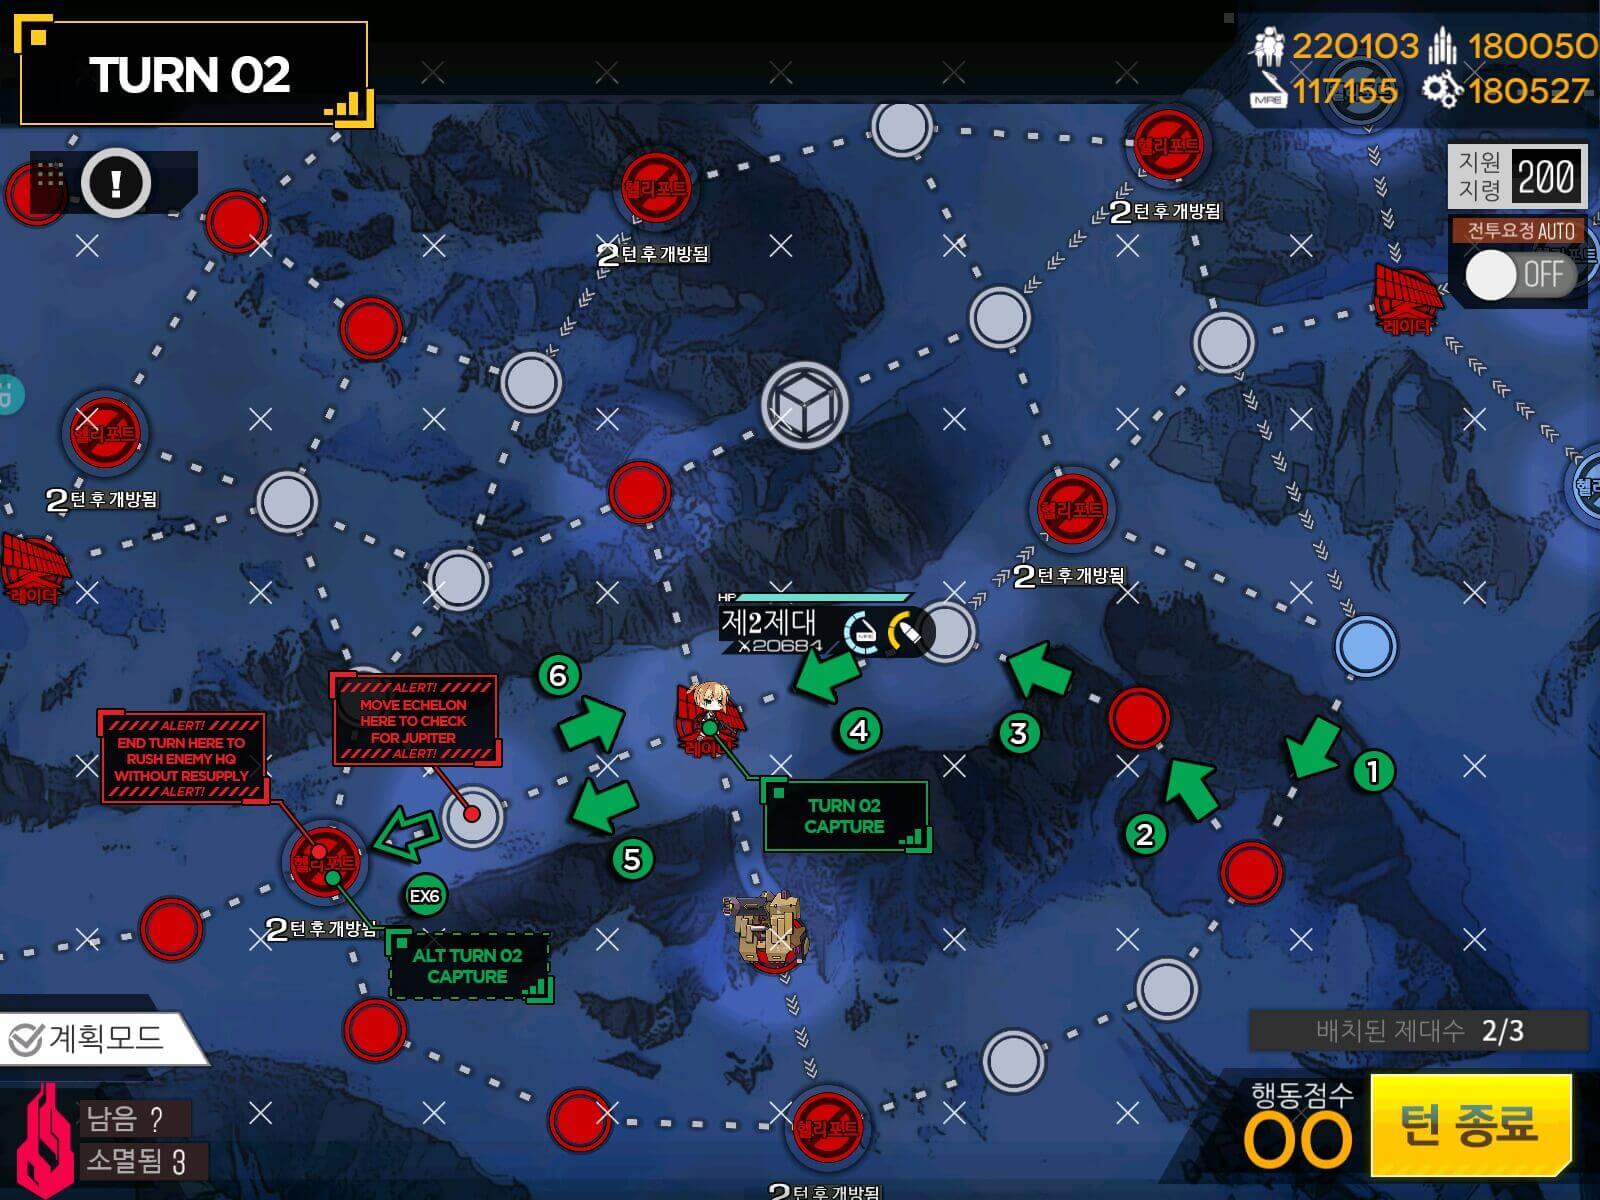
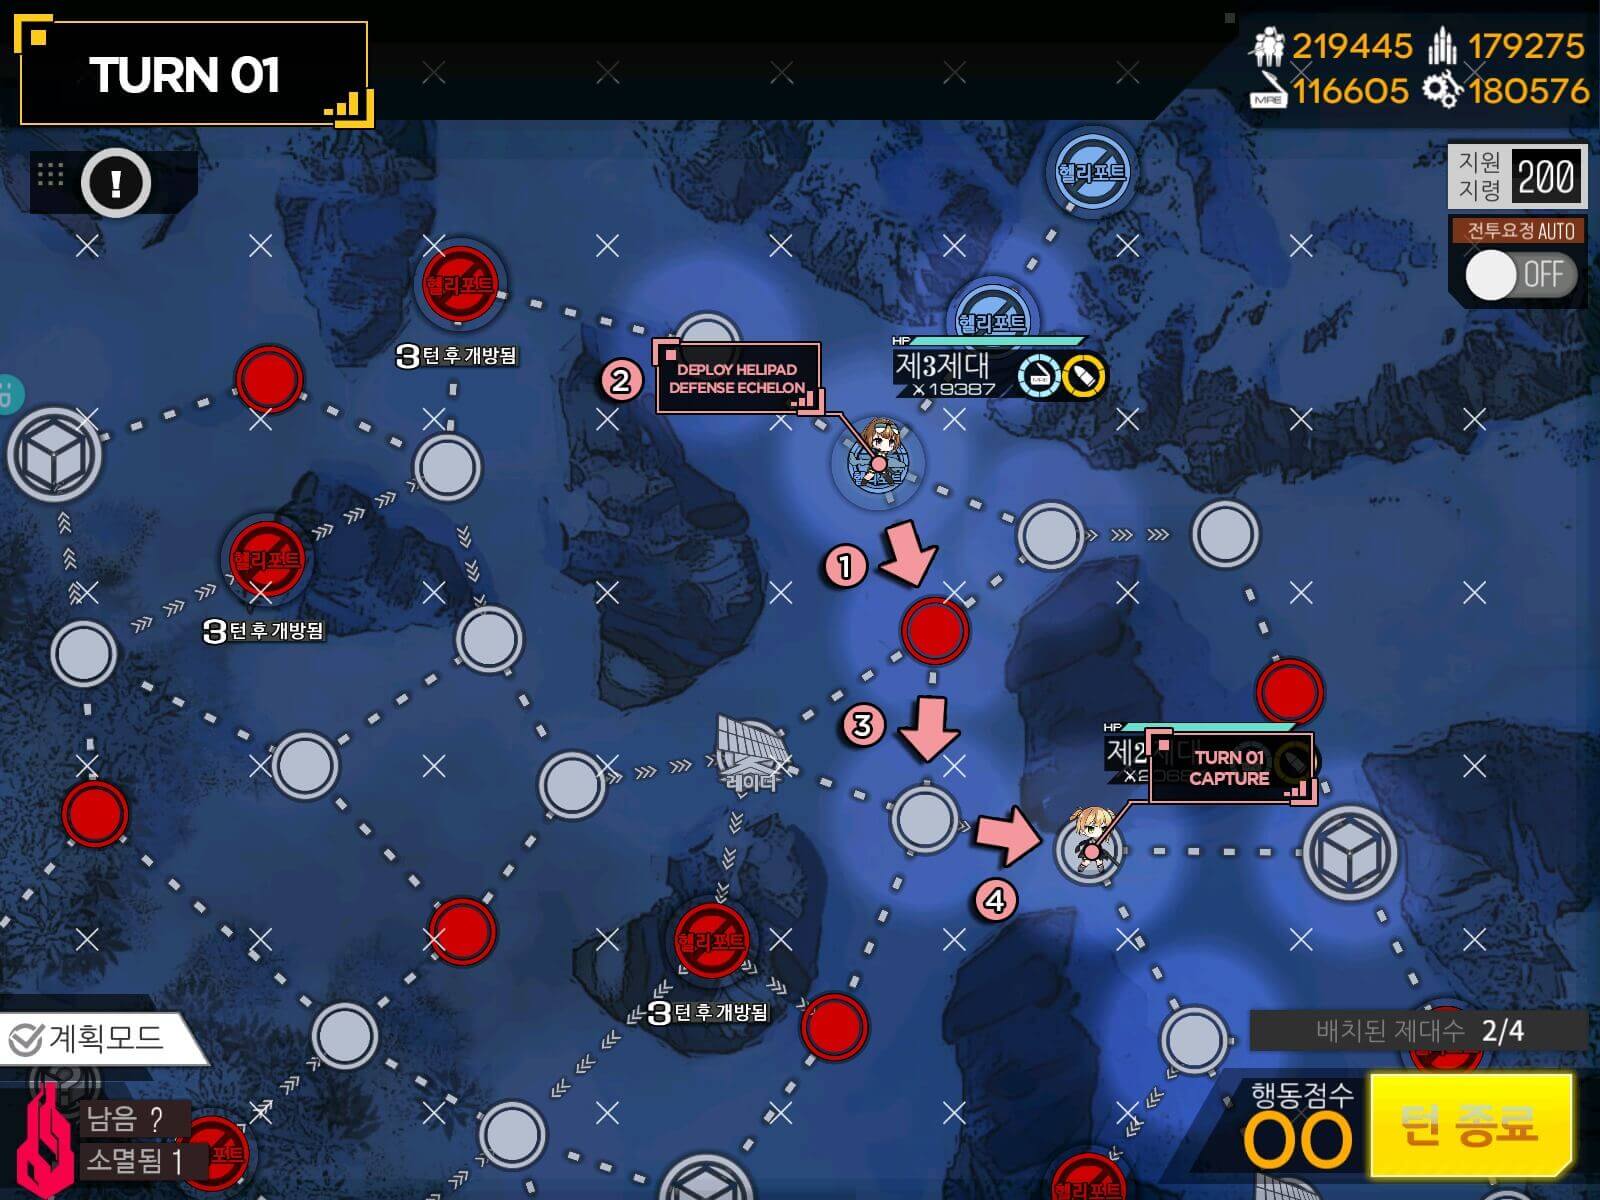
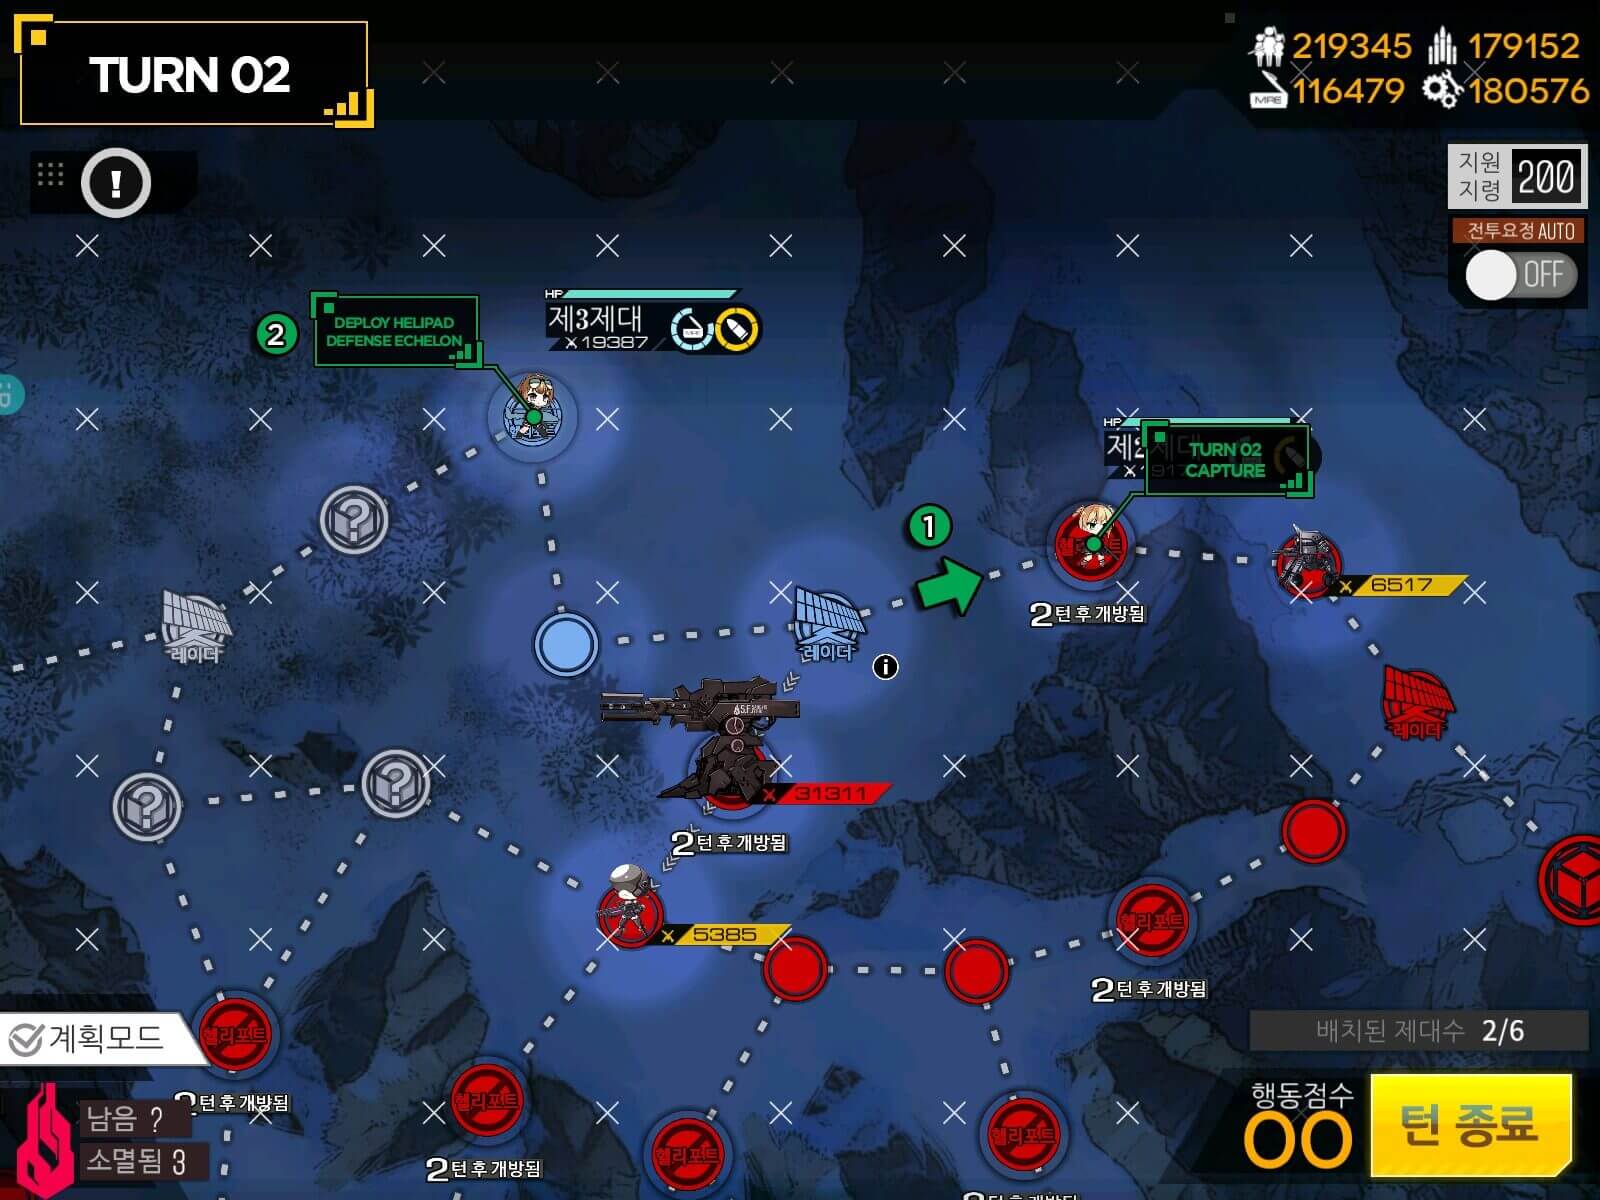
Make sure to spawn 2nd Echelon before moving your 1st Echelon onto radar. And 1st Echelon do need a HG.
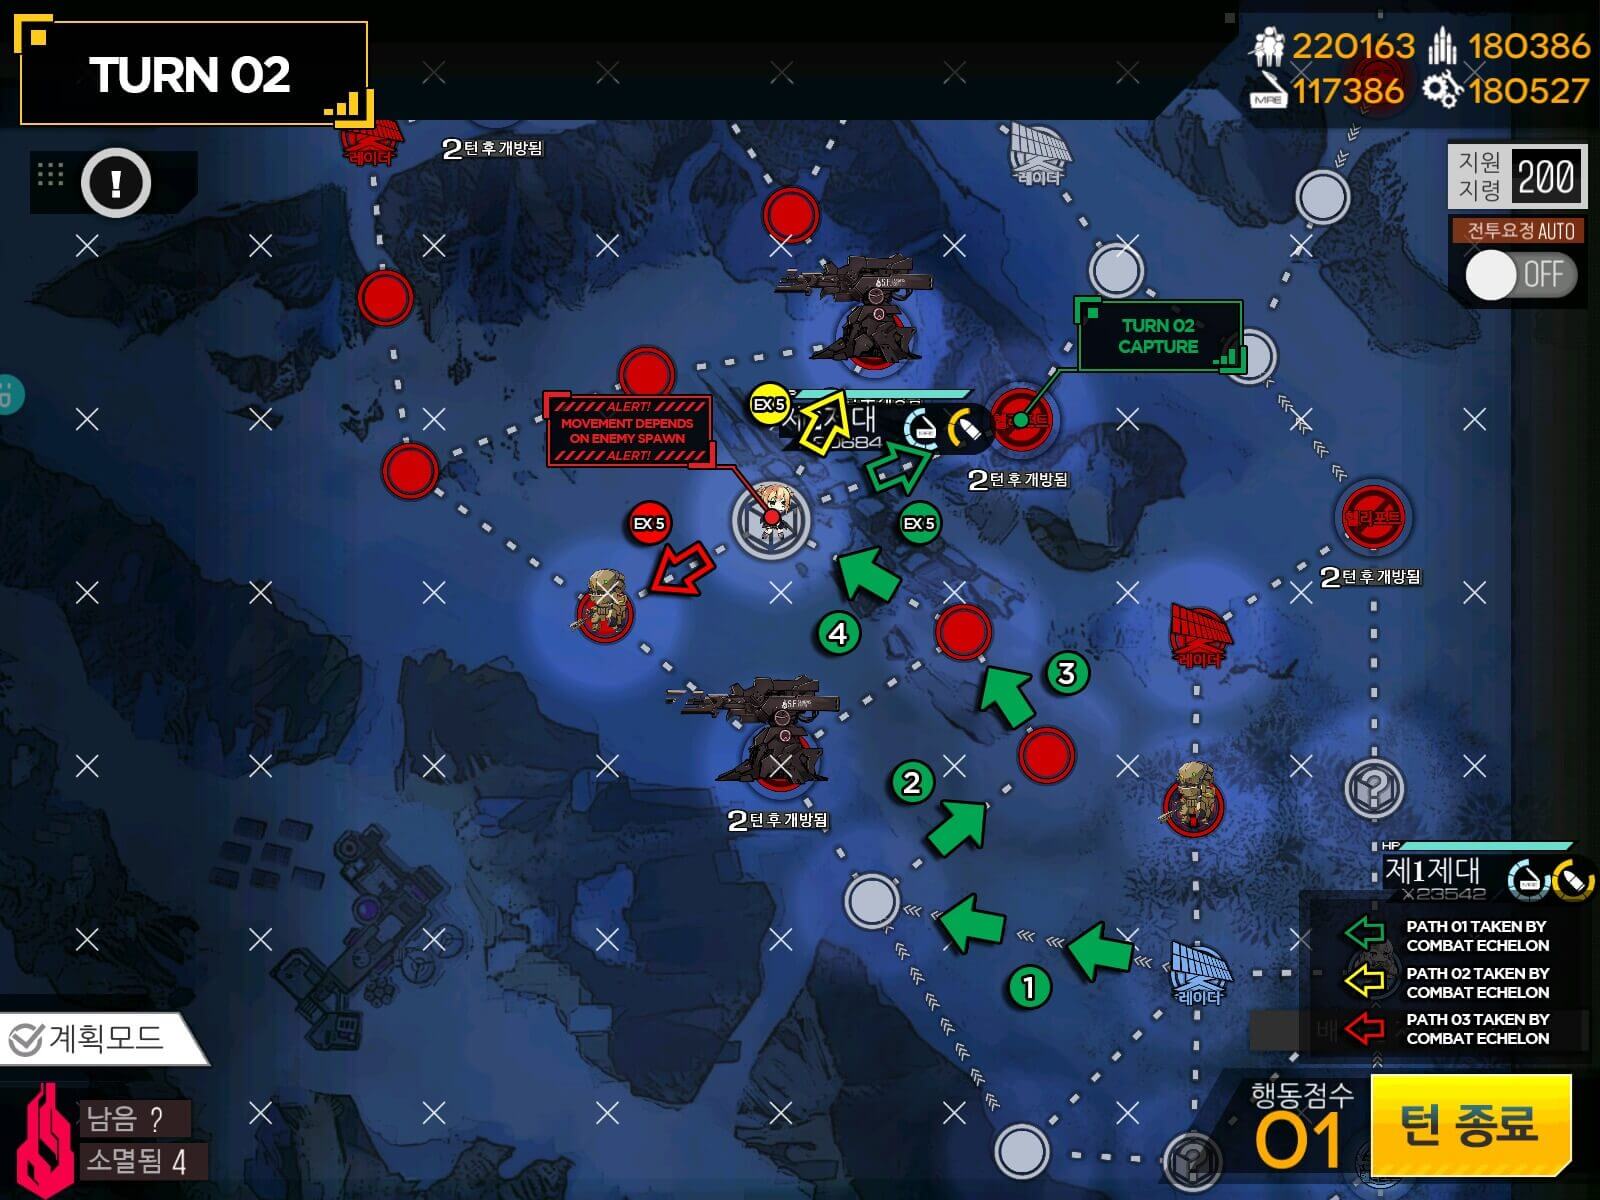
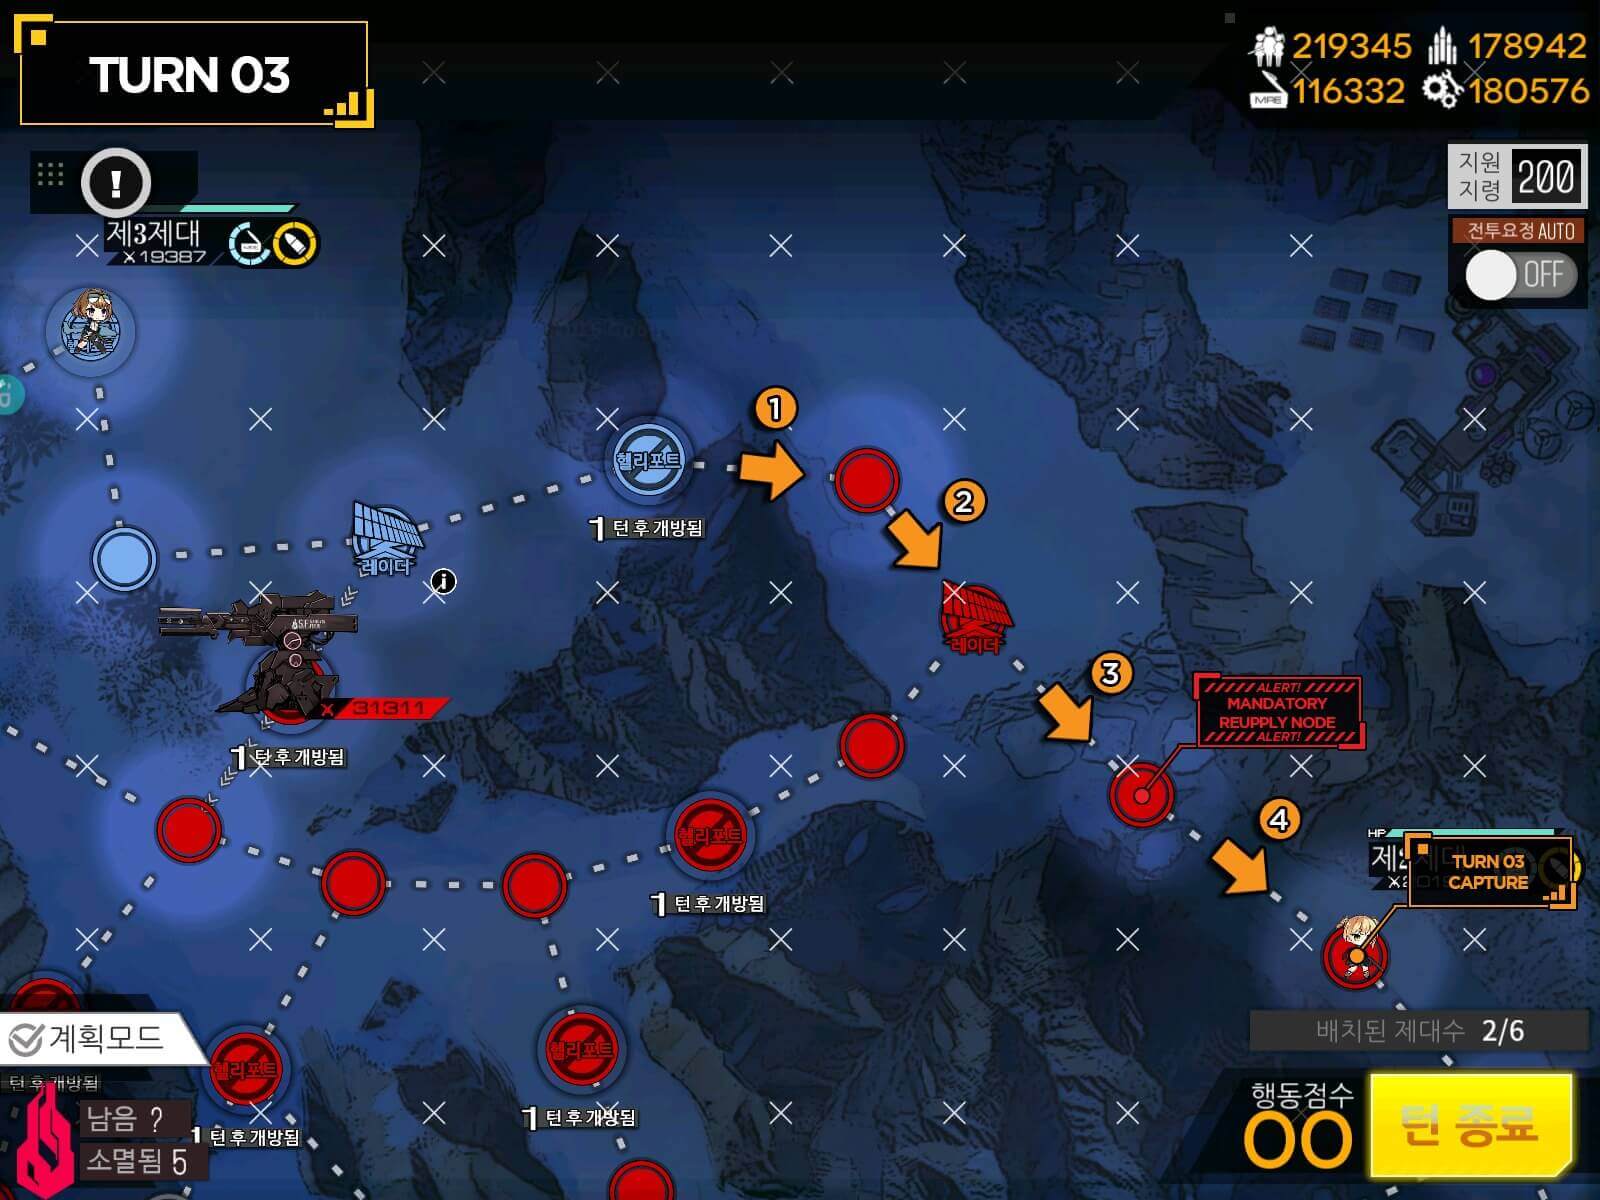
This supply point is where your RNG will be decided. Find that empty helipad without the Jupiter then proceed to move towards HQ. If you need to, cross reference your path with map above.
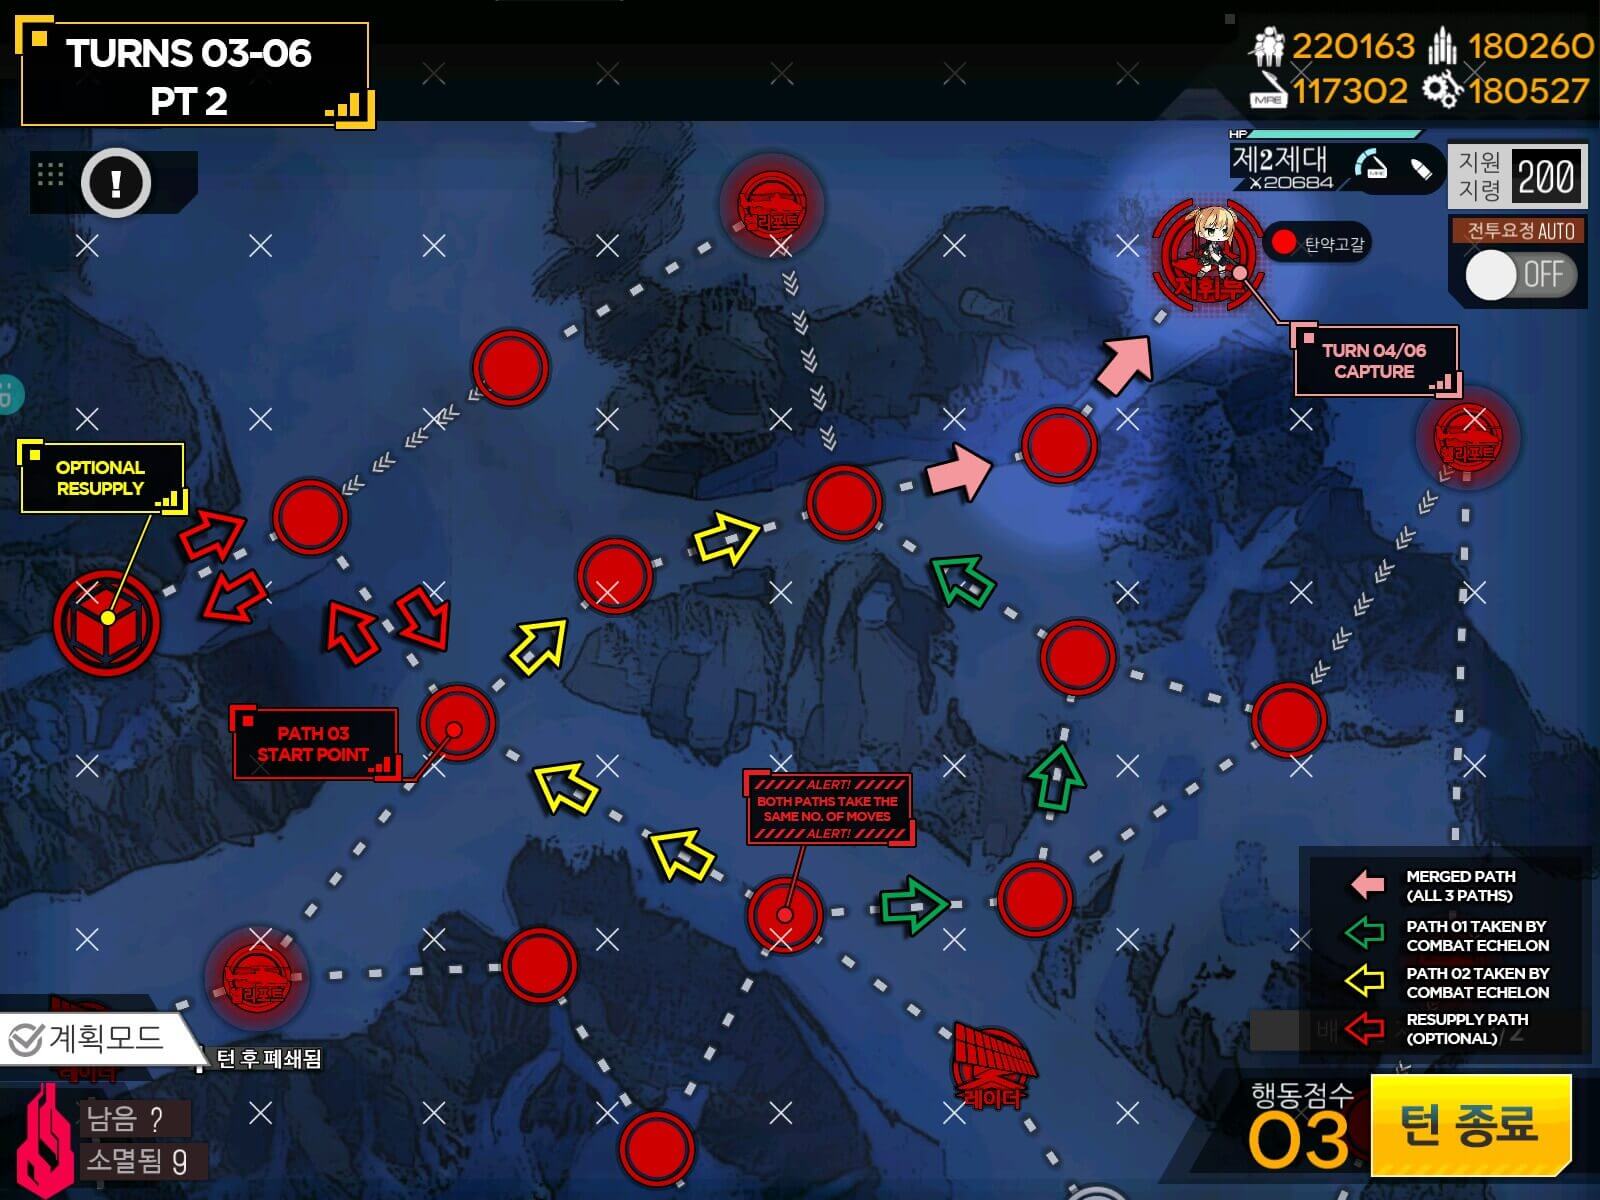
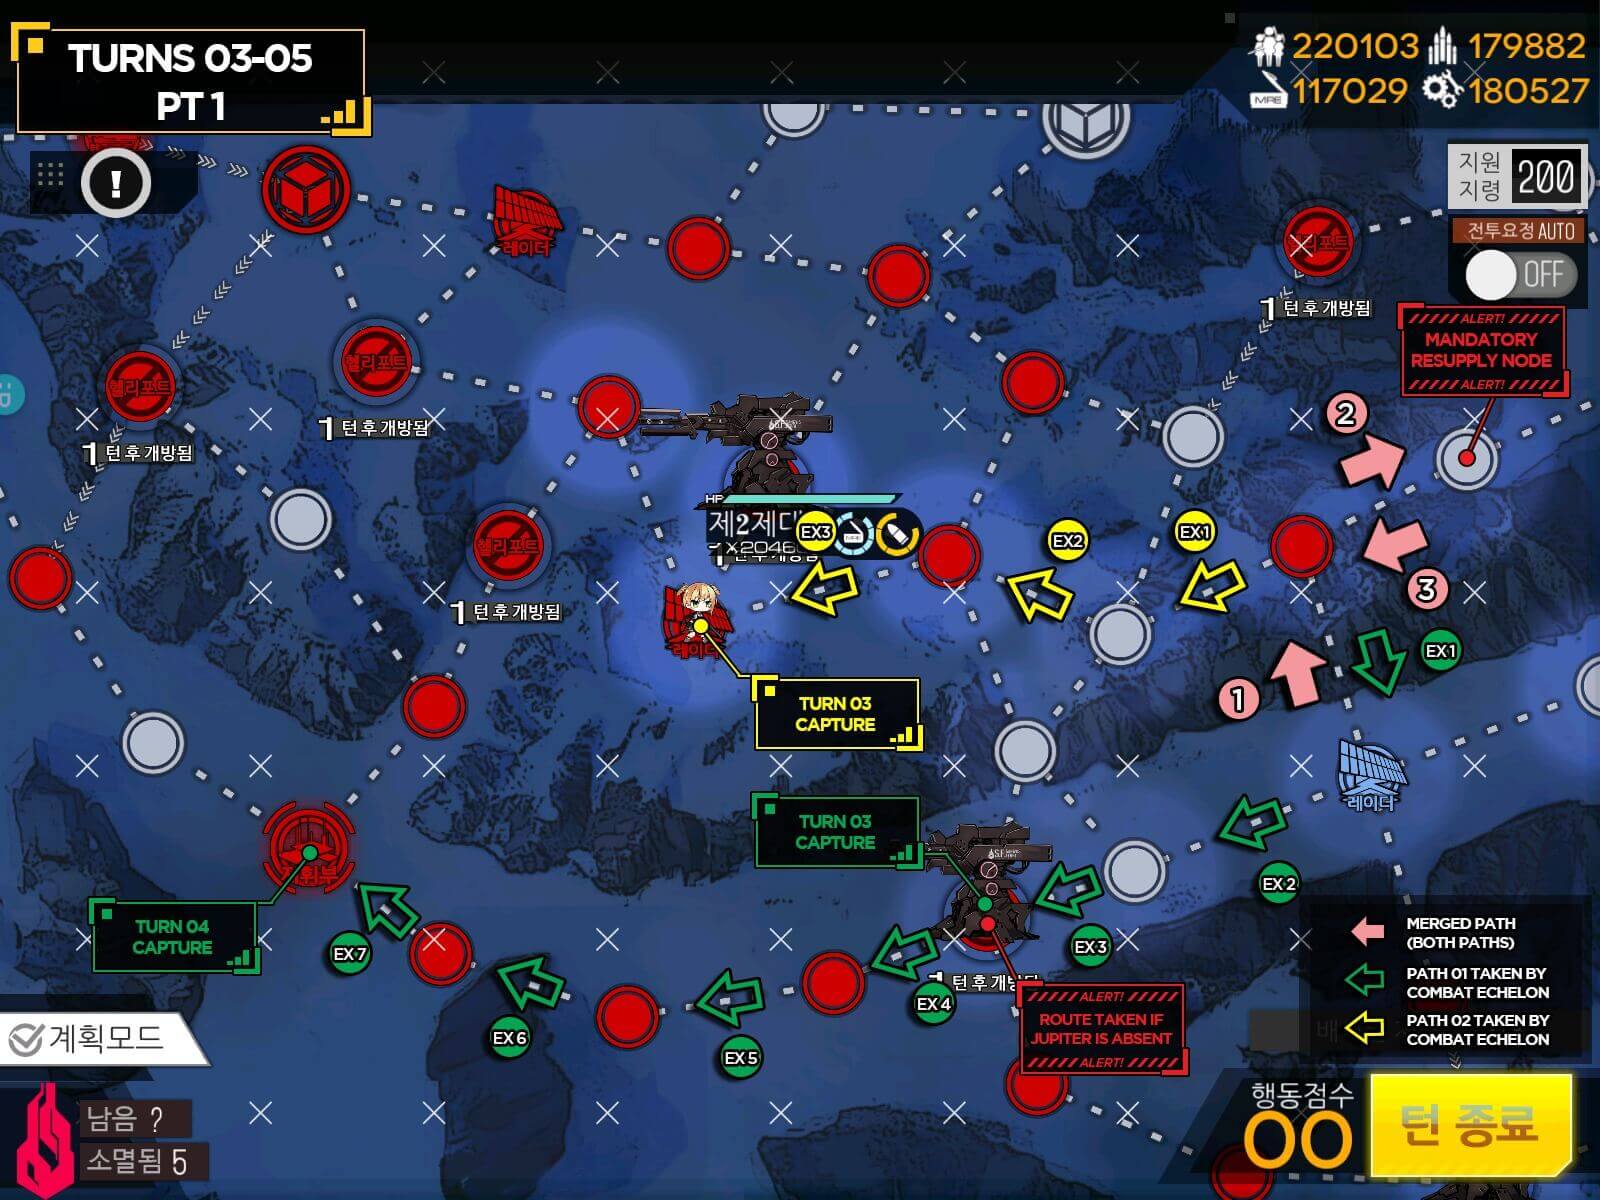
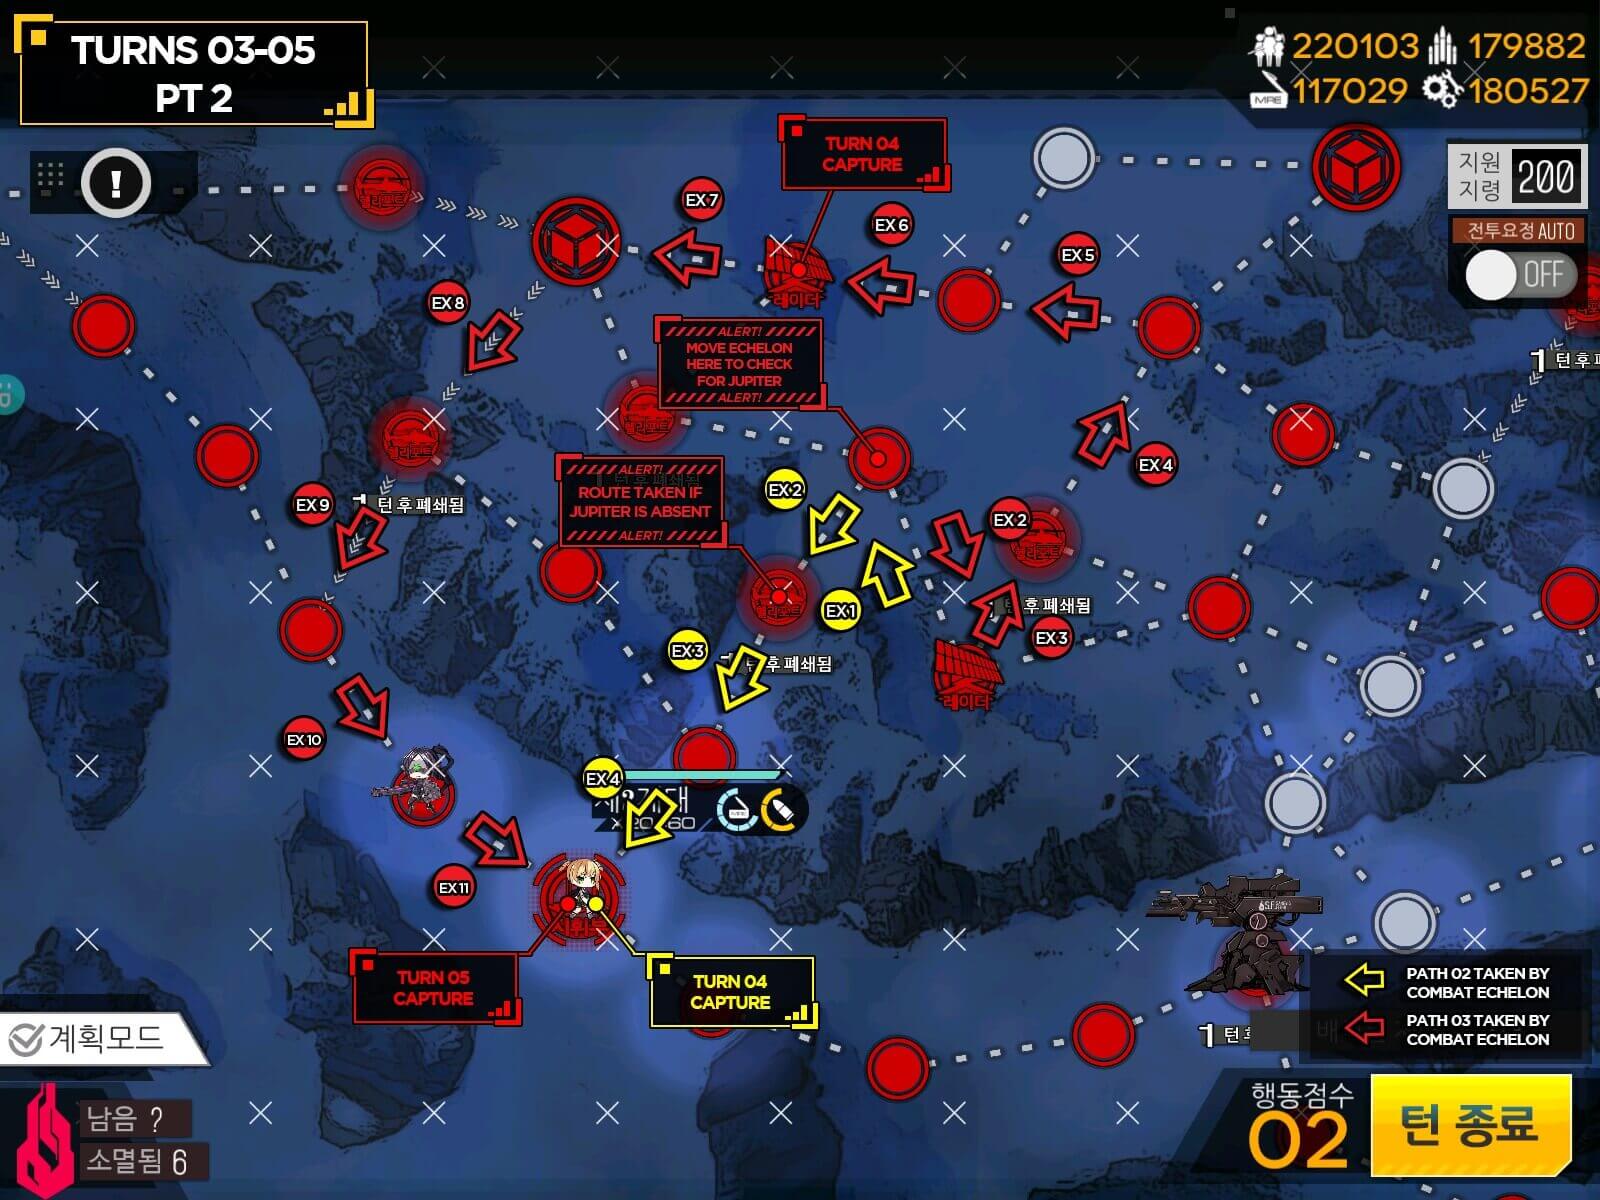
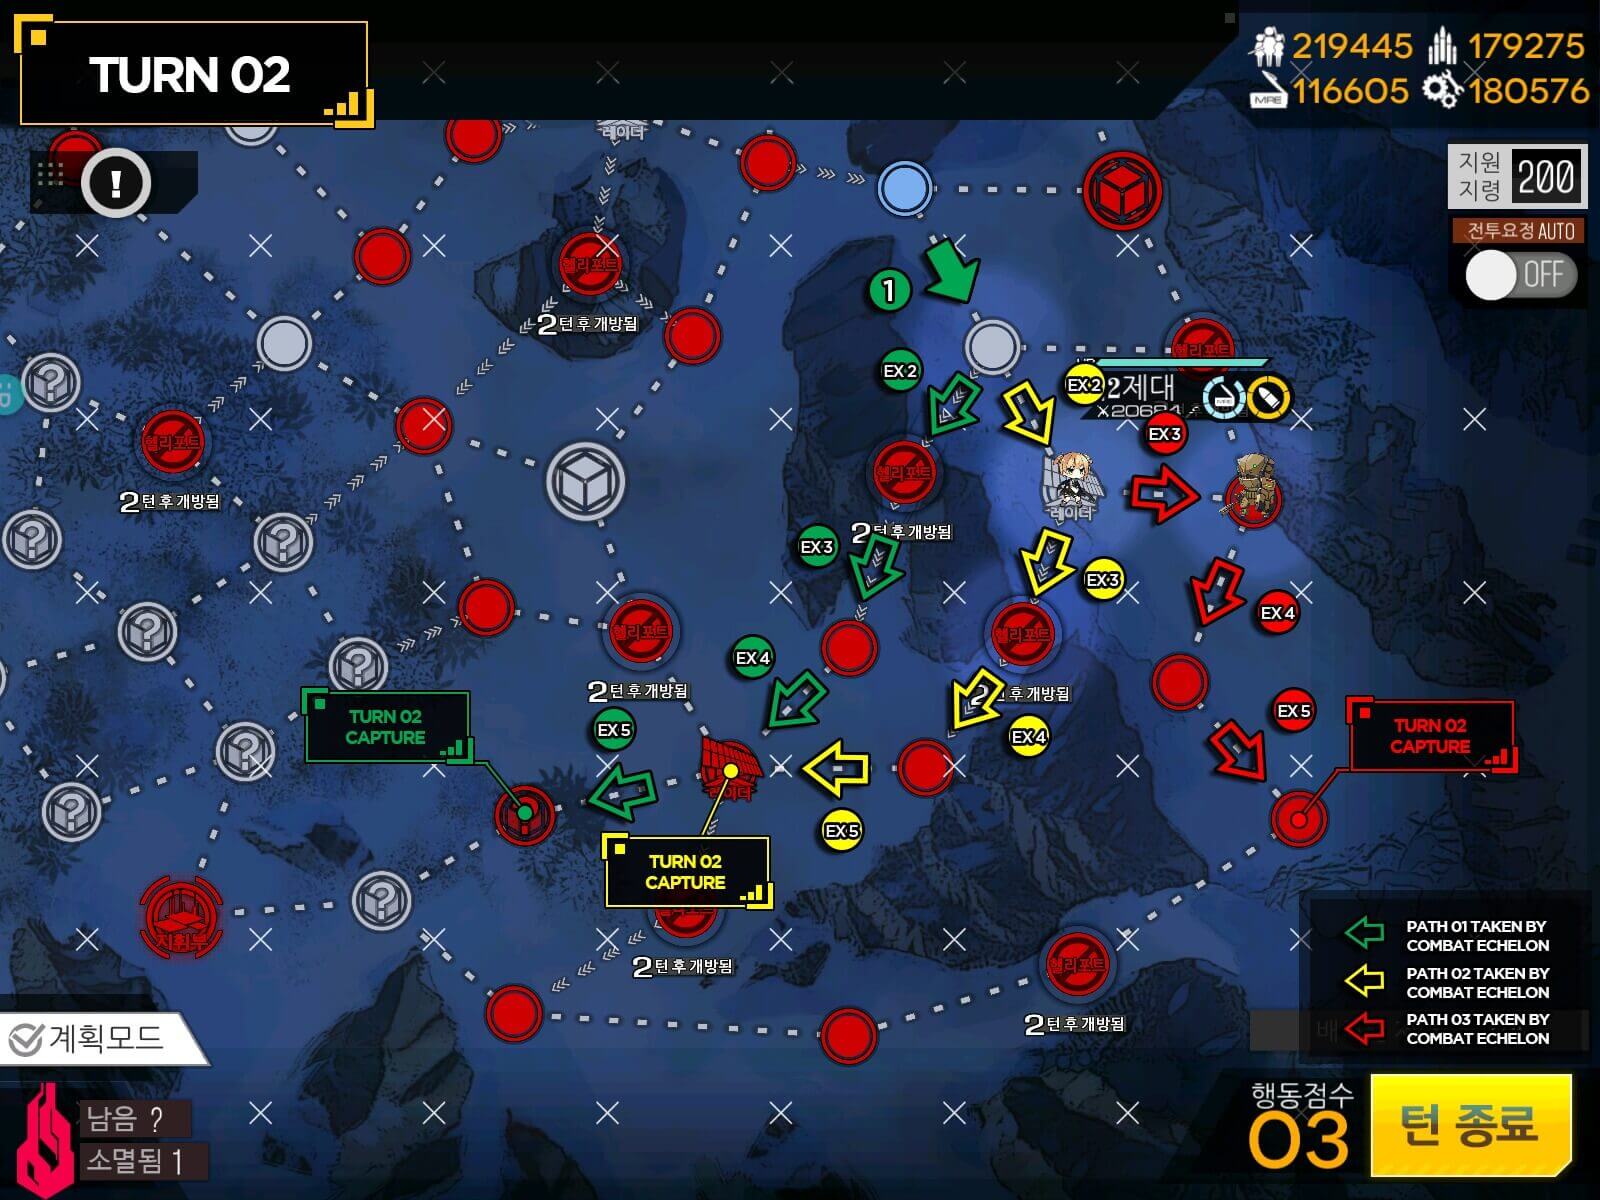
Both paths take the same number of movement points so just pick one that seems to have less enemy if you are worried about running out of ammo. If you are low, go for that supply point on top left of the map to be safe. You should be able to take Helipad next turn.
■ Lighting Curfew II
Shown Enemy Strength: 7,000
Echelon[s] Required: 1 [night AR (OTs-14 & 9A-91) or RF/mix echelon recommended] + 1 Dummy HG
S-Rank condition: No Turn Limit. Take HQ.
Similar Play style as 2-1, but with larger map. Watch out for the scout unit. Green path for bypass, Red for brute forcing Jupiter. You do have to go through 2 fully operational Jupiter Cannons this time, so retreating and swapping aggro between two tanker is optimal.

Dummy here is not mandatory but helps with moving around more. If you take no dummy, movement path is still same.
Same thing here as well, if it is not blocked, go straight for the HQ. If it is blocked, take one extra turn going around and beating units. Make sure to resupply before heading to HQ.
■ Lighting Curfew III
Shown Enemy Strength: 8,000
Echelon[s] Required: 2
S-Rank condition: No Turn Limit. Take HQ.

It's getting messier! Similar play style here with Green being the bypass path and red the brute forcing Jupiter. There is another path that I personally don't recommend but it's an option... path of "!" landmines. It's 99% ambush... Not Advised. However map can be done relatively in short amount of time.
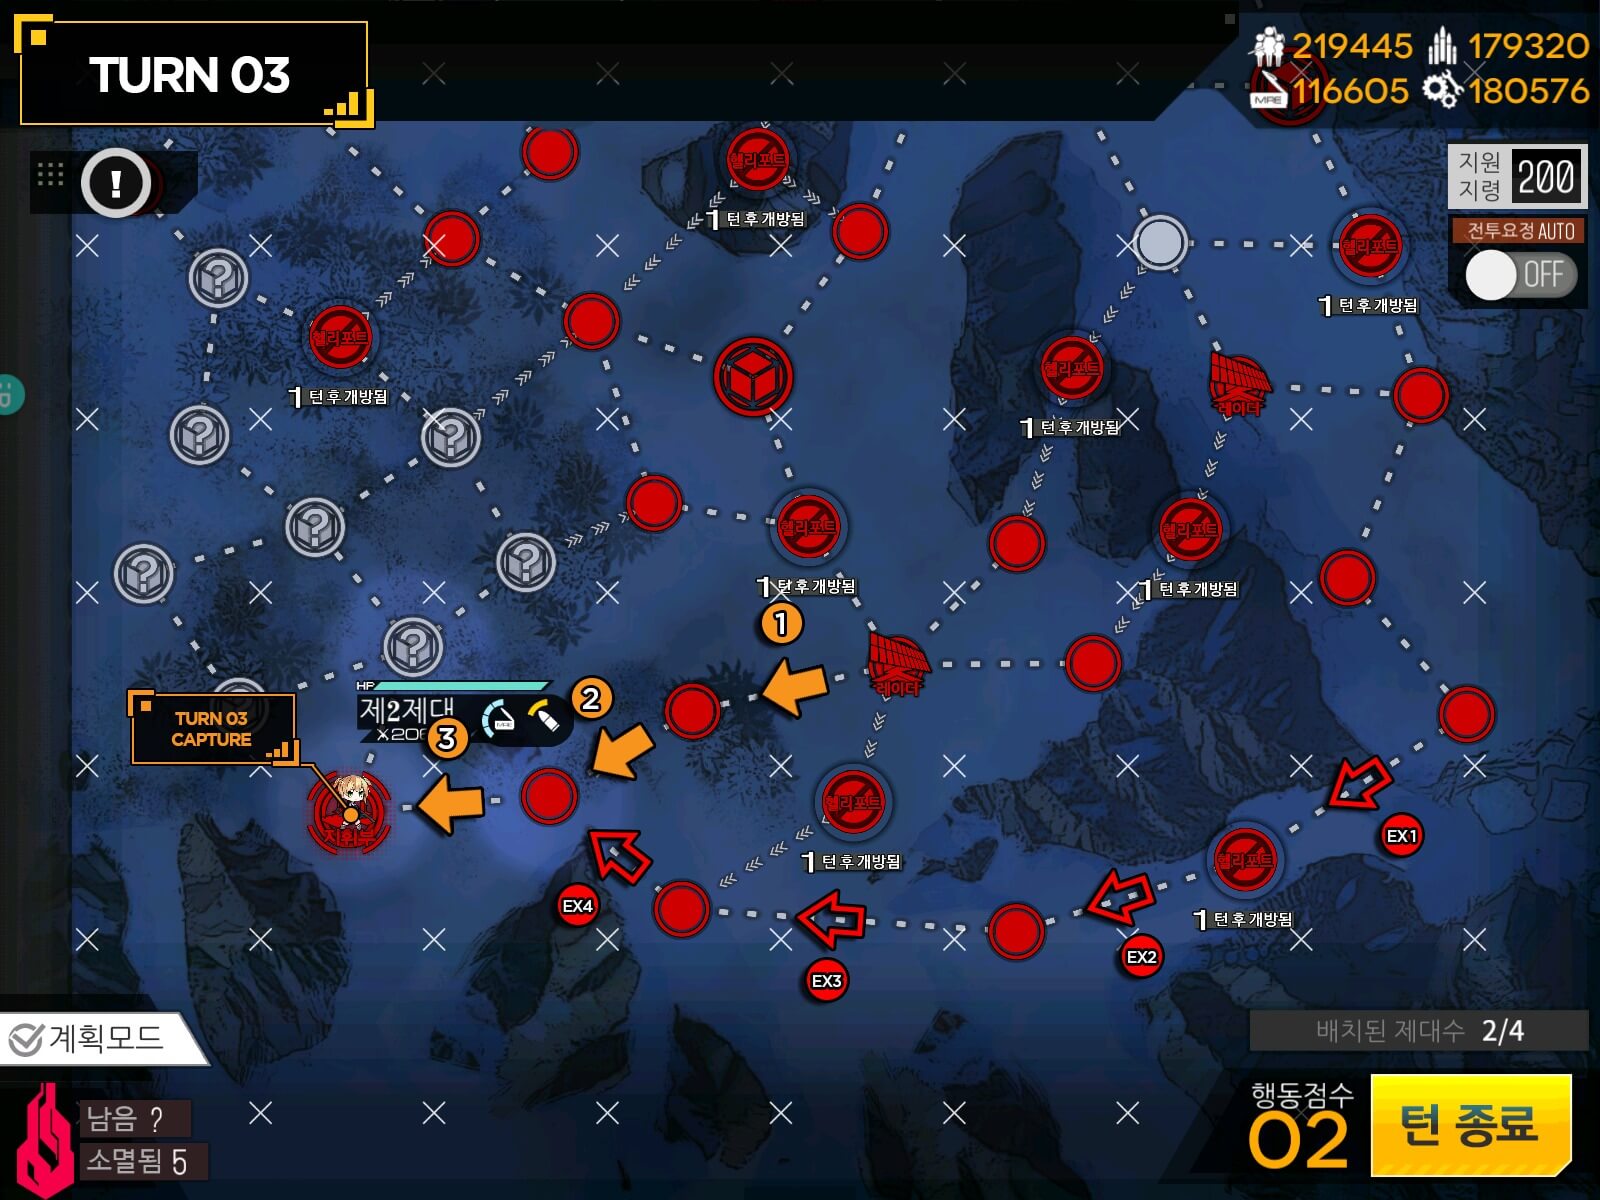
 Spawning 2nd Echelon serves to protect the Helipad just in case enemy unit RNGs on to absent helipad. Also it helps all 3 potential route of bypass to be end by turn 3.
 Pick your path: your supply could potential be an issue if you have less than 4 battles worth of ammo left.
It's getting messier! Similar play style here with Green being the bypass path and red the brute forcing Jupiter. There is another path that I personally don't recommend but it's an option... path of "!" landmines. It's 99% ambush... Not Advised. However map can be done relatively in short amount of time.

Easy Victory.
■ Lighting Curfew IV
Shown Enemy Strength: 10,000
Echelon[s] Required: 2
S-Rank condition: No Turn Limit. Kill BOSS unit.
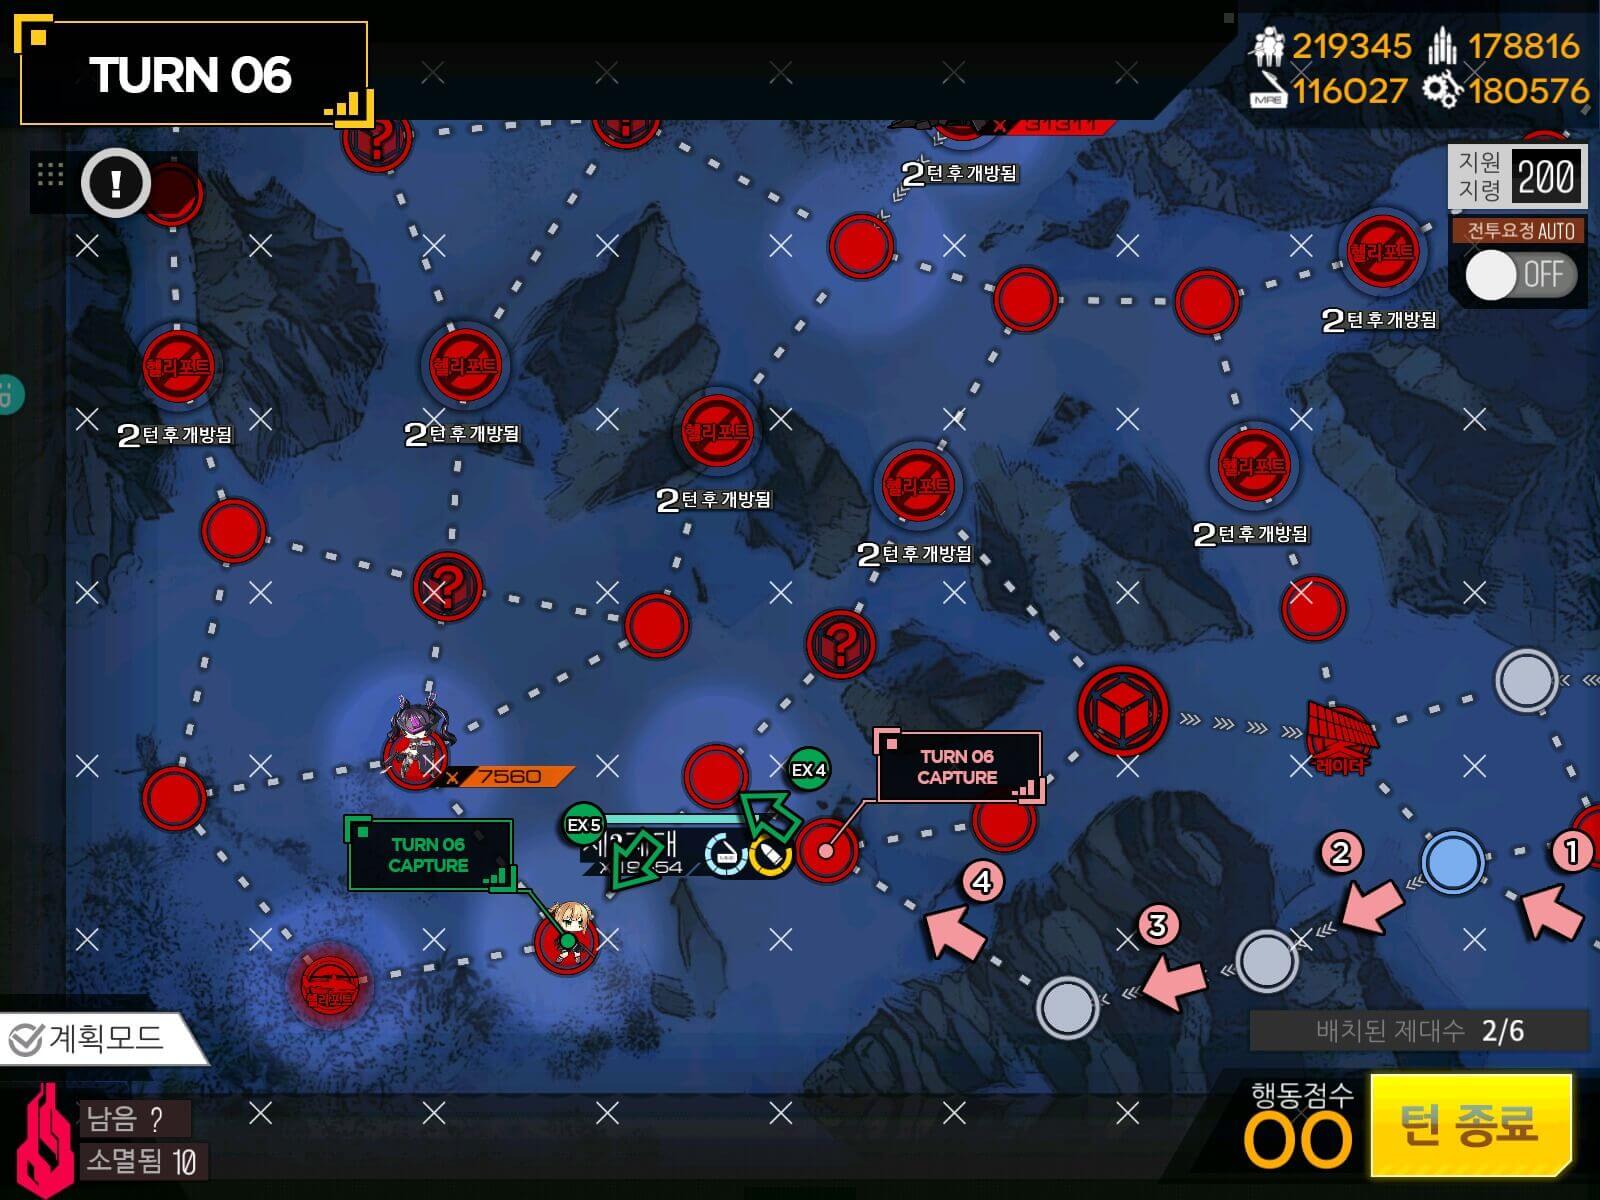
 Focus on taking the radar by the Jupiter Cannons. There's little "i" mark that shows one of Jupiter cannon is unfinished therefore weaker than fully operational platform. That will be our target next turn.
 Now that we have radar it is possible to spawn 2nd Echelon that will be our defense force. Having extra movement points will be important. Even when taking on "weakened" Jupiter cannon, use the same formation as the brute force method to minimize damage.
 Long corridor and make sure you resupply here.
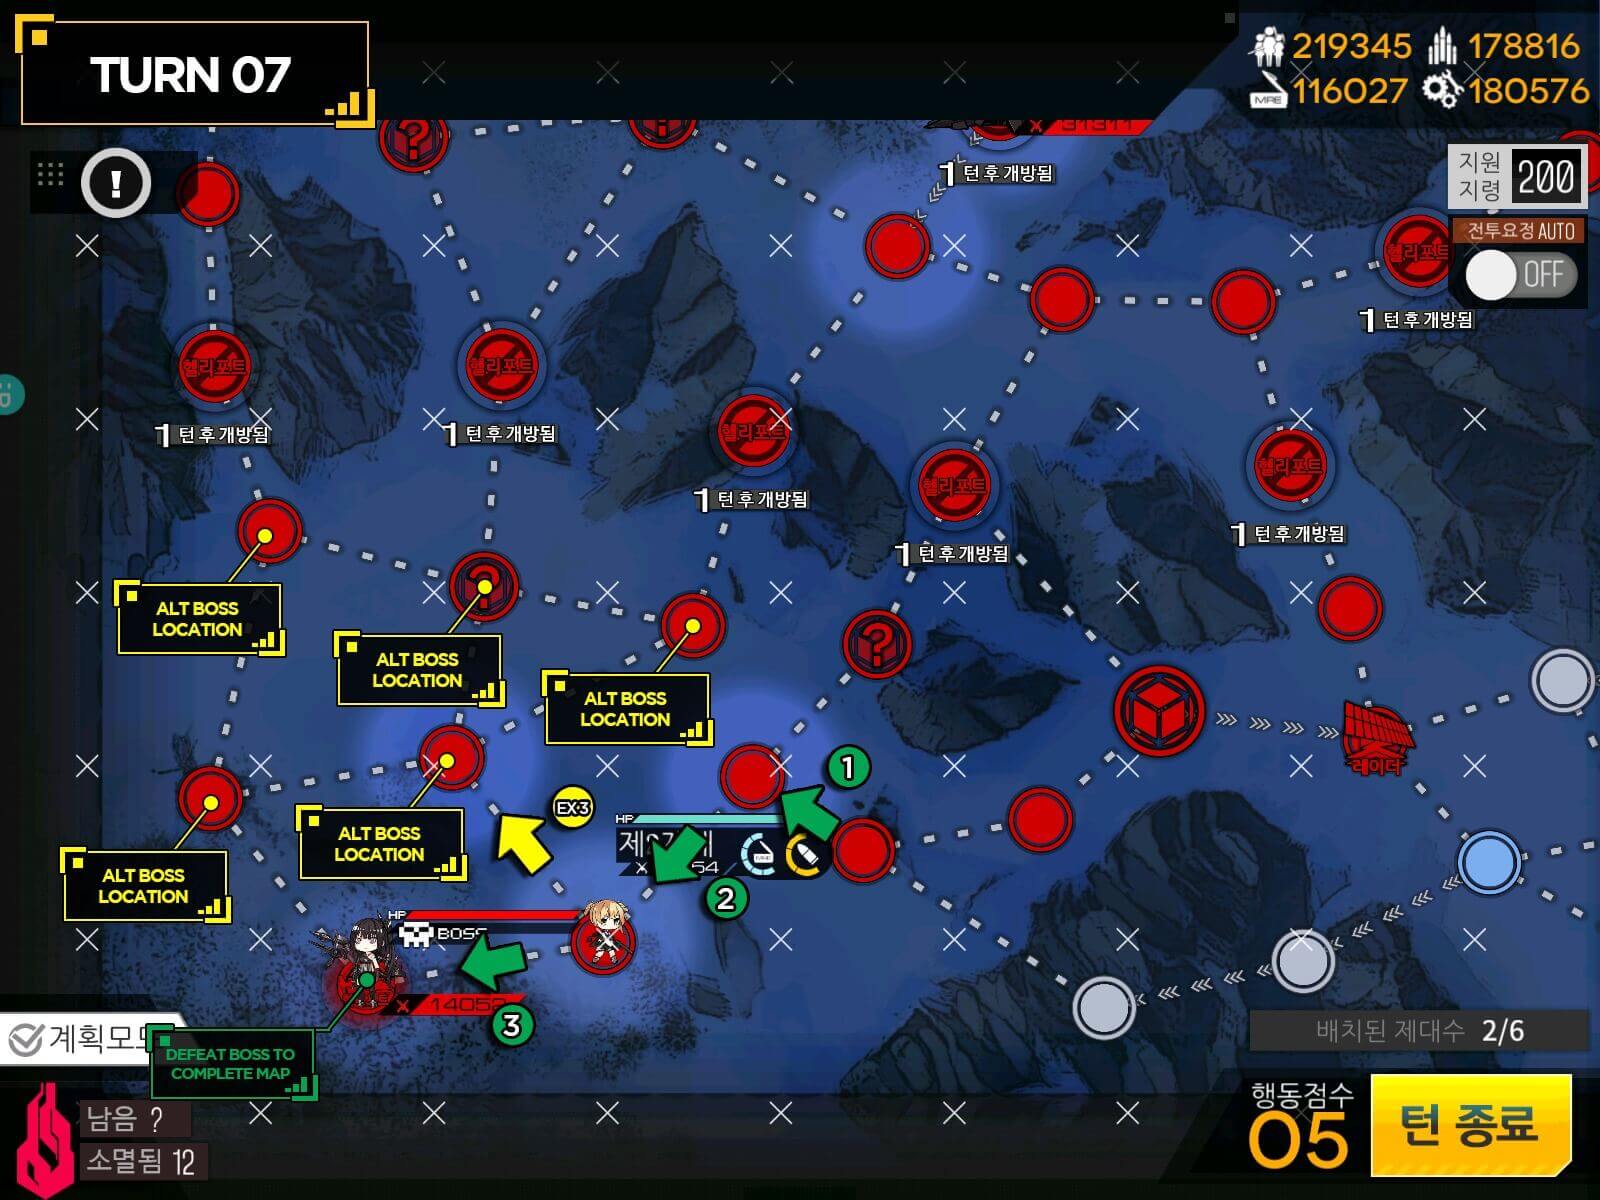
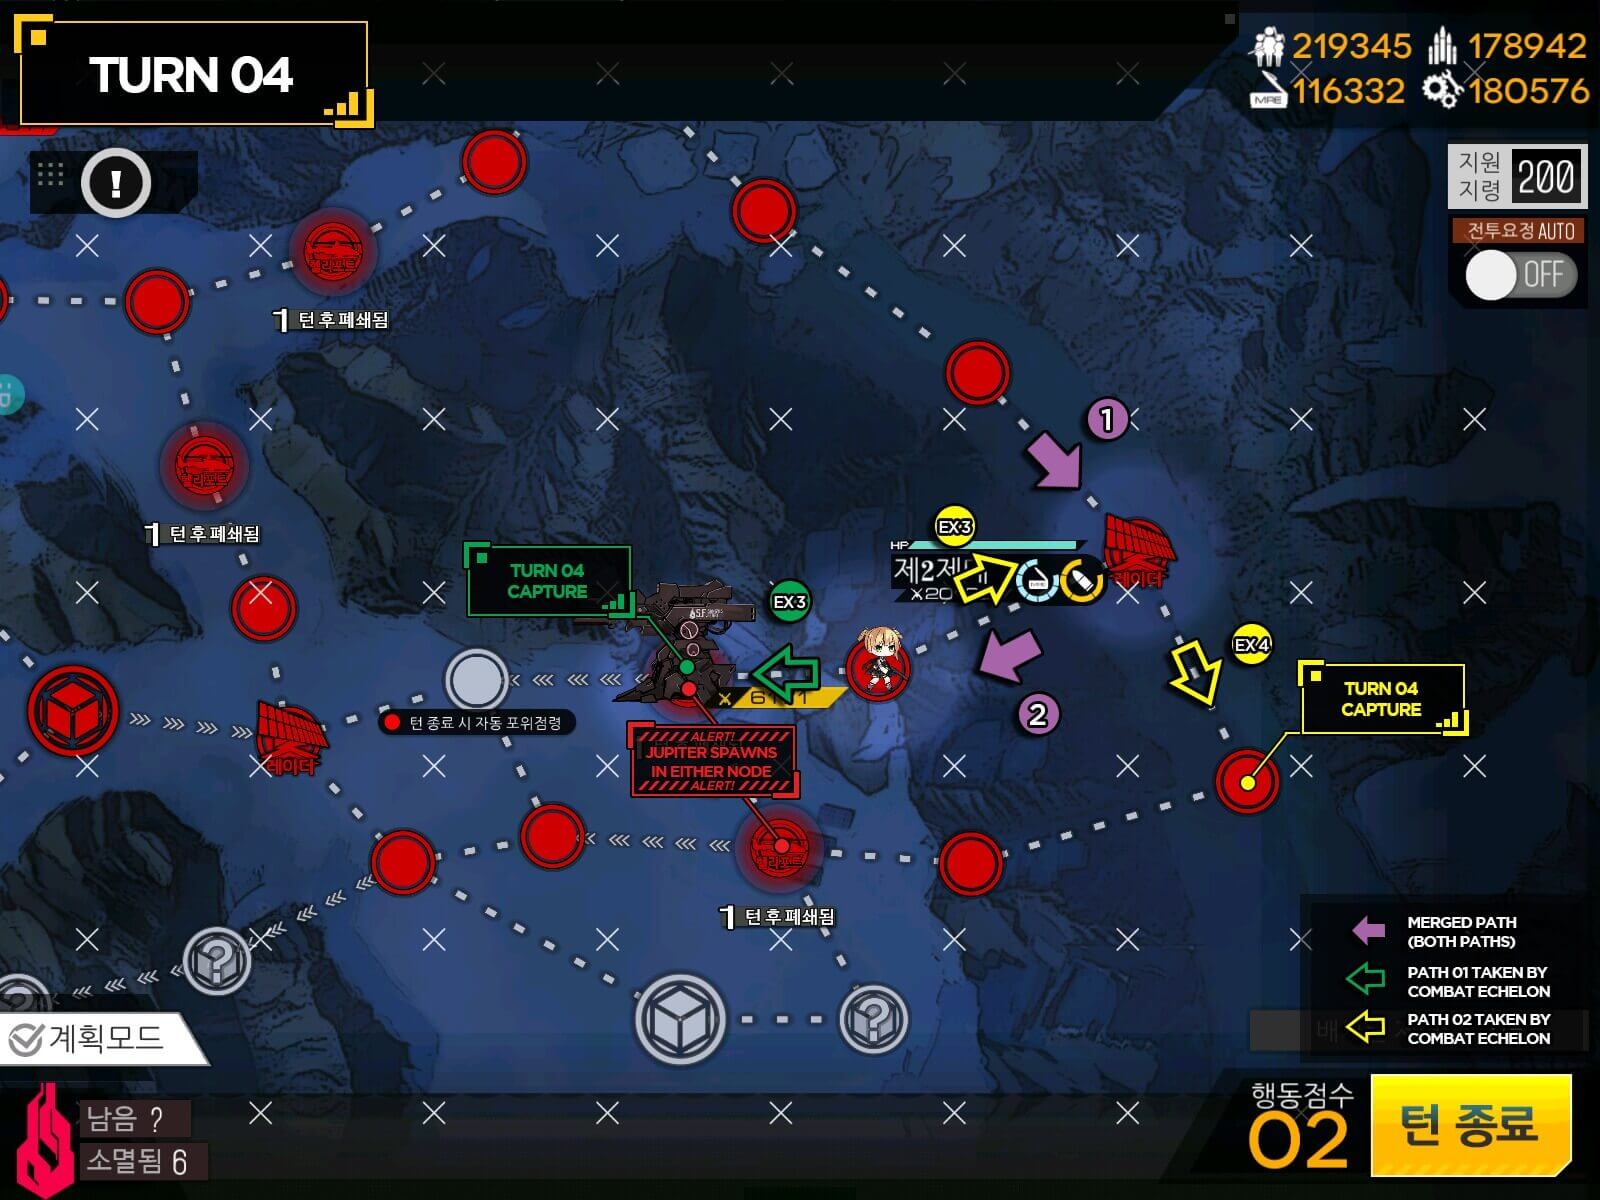 There will be two path options here. Pick the one that either has 1 weakened or 0 Jupiter Cannon on top of the Helipad. For me it was the top path.
 Take time to resupply here before moving on. You will most likely to battle least 4 more times before reaching the boss.
This is the map that will make many Shikikans cry in agony... You better be ready. The easy route is long and treacherous as one mistake can run echelon out of supplies. Green route followed by blue route has only 2 resupply points. you will need to make them last. Other option is to go through the Jupiter... Let's say it's going to take quite a team. [2 SG 3 MG Echelon recommended]
This map is one where I am not shamed to reset if map is not in my favor...
One thing to note about the Boss is that you will benefit greatly from spreading your echelon out to "X" formation when the battle starts, since she uses similar weapon profile as Jupiter cannon. She will launch rockets that will to AoE damage in "+" shape so having your echelon spread out in X minimizes the damage. Don't expect to coming out of this battle unharmed. One recommendation is if Jaeger units are giving your T-dolls a hard time, reset target priority of DPS by doing quick move forward and back. These damages to SMGs add up over time quickly.