Chapter 1: The Wolves Gather
***
If you are looking to brute force Jupiter cannons, Alternative Route will be listed after "standard" route guides.
***
■ The Wolves Gather I
Shown Enemy Strength: 2,000
Echelon[s] Required: 1
S-Rank condition: Kill 5 Units in 6 turns. Take HQ.

The intro stage where You can basically beat it with any echelons you have, not much to explain here but to just move along the path and making sure to resupply in Turn 3 before continuing.
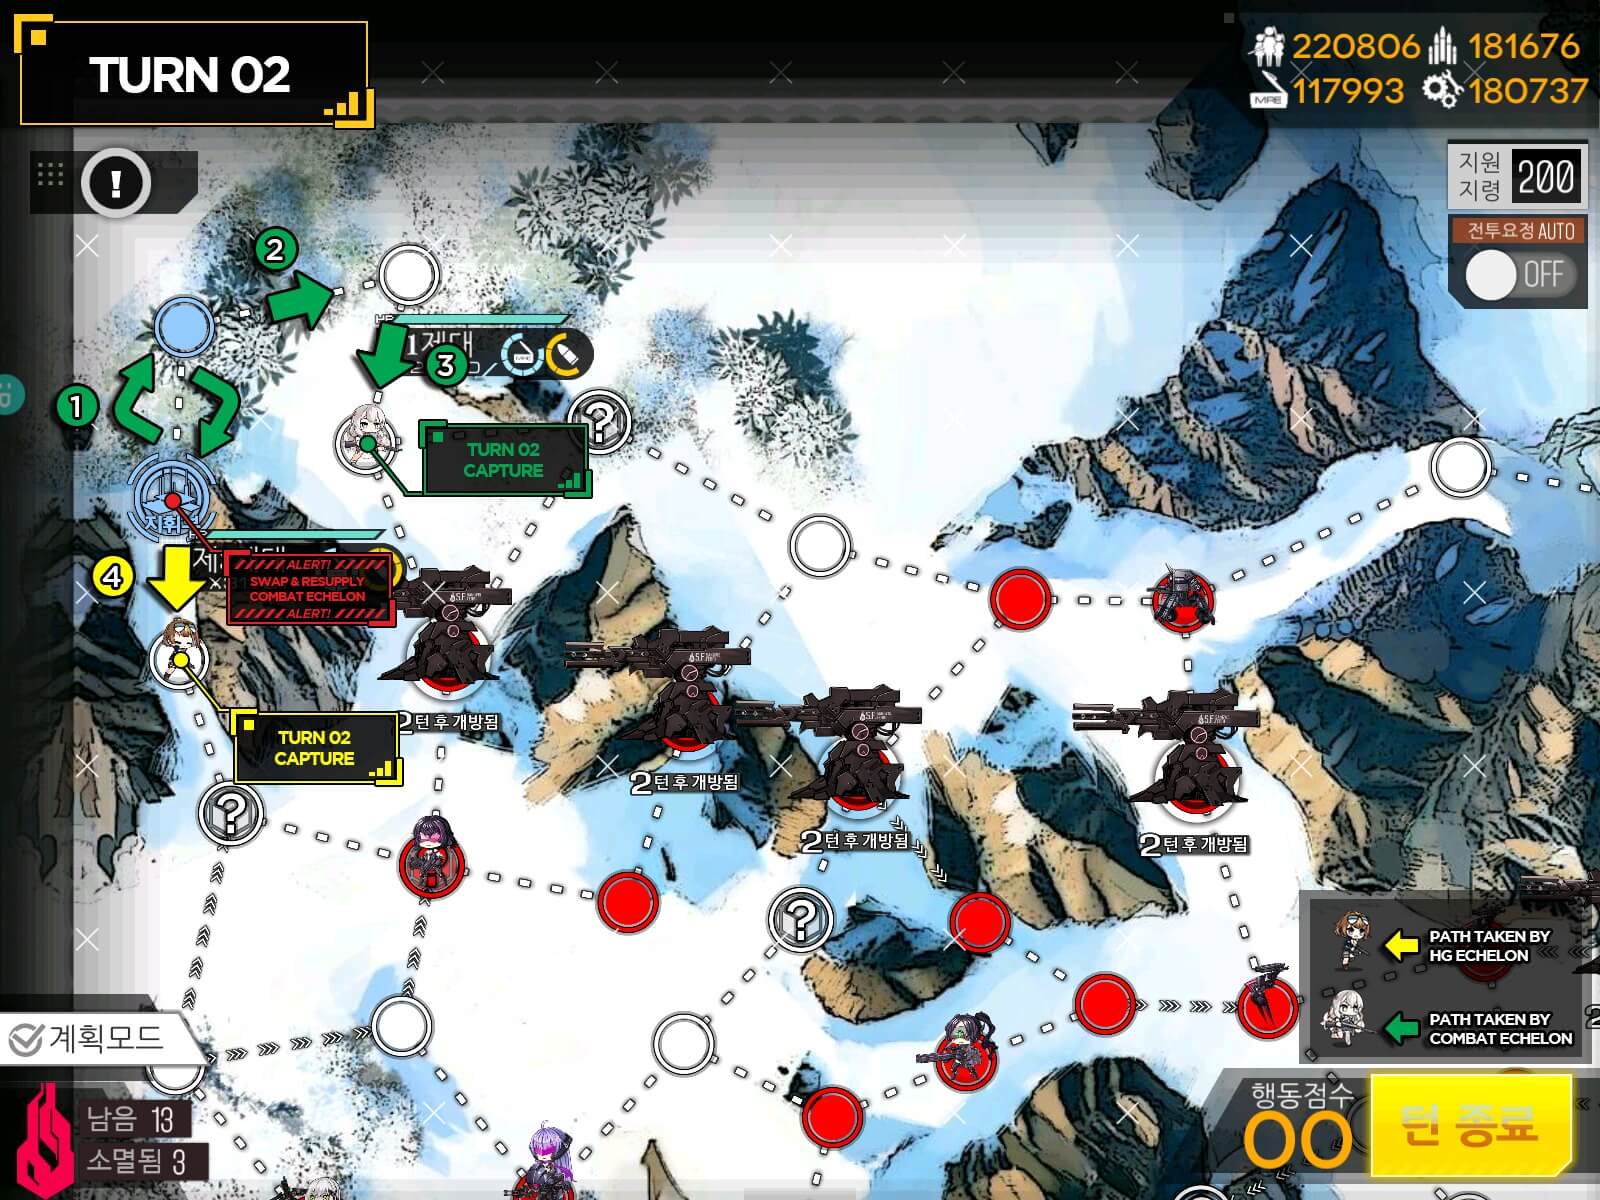
■ The Wolves Gather II
Shown Enemy Strength: 3,000
Echelon[s] Required: 1 + 1 Dummy HG
S-Rank condition: Kill 6 Units in 7 turns. Take HQ.
This map is introductory stage for Jupiter Cannon. I will only cover the minimum echelon required for the mission, for Farming Jupiter Cannons, look for farming guide below mission guides in Primer page.

Green route at turn 6 is if you want to kill extra Jupiter before taking HQ.
Brute Force Route

Make sure that your tanker [Preferably SMG with high health or SG] is positioned away from your DPS as Jupiter in Artillery mode hits in "+" AoE blast. So you don not want any T-dolls to be adjacent. Position 3 or 6 is preferred. This strategy changes as Jupiter gets stronger in later chapters.
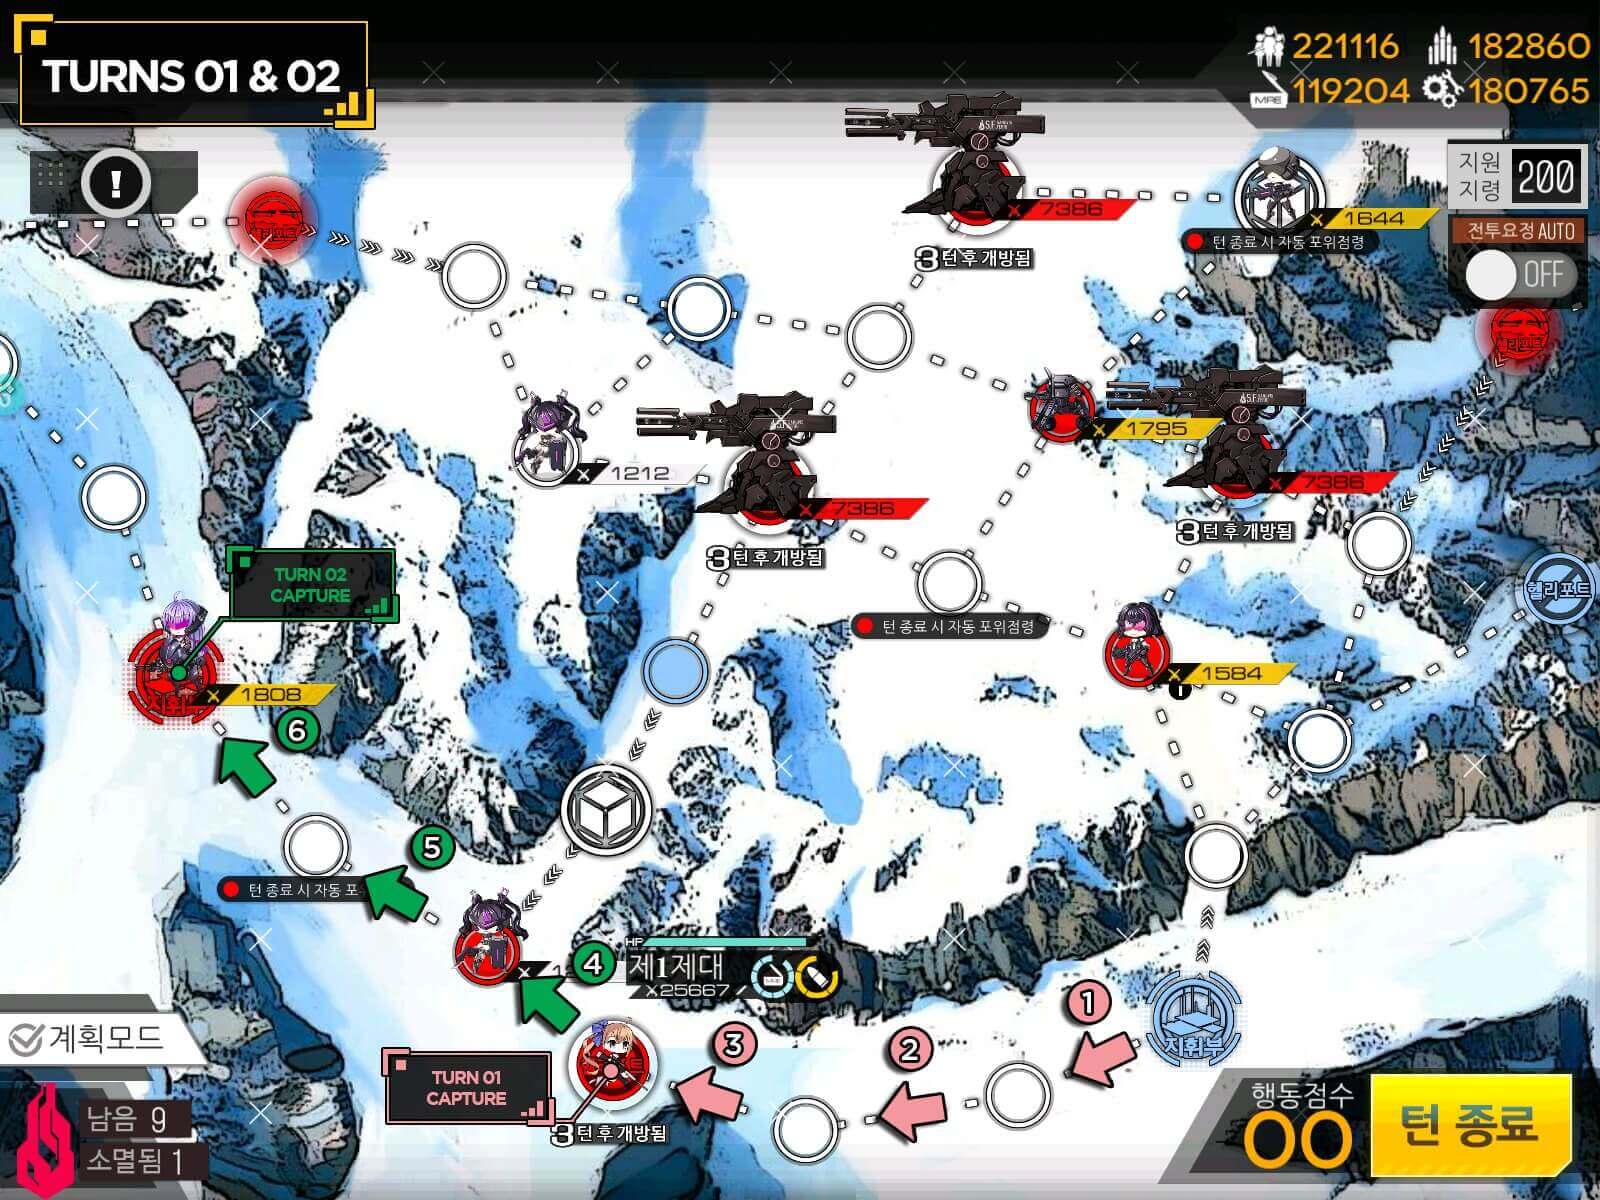
Now just roll over Jupiter cannon and clear the map in 2 turns.
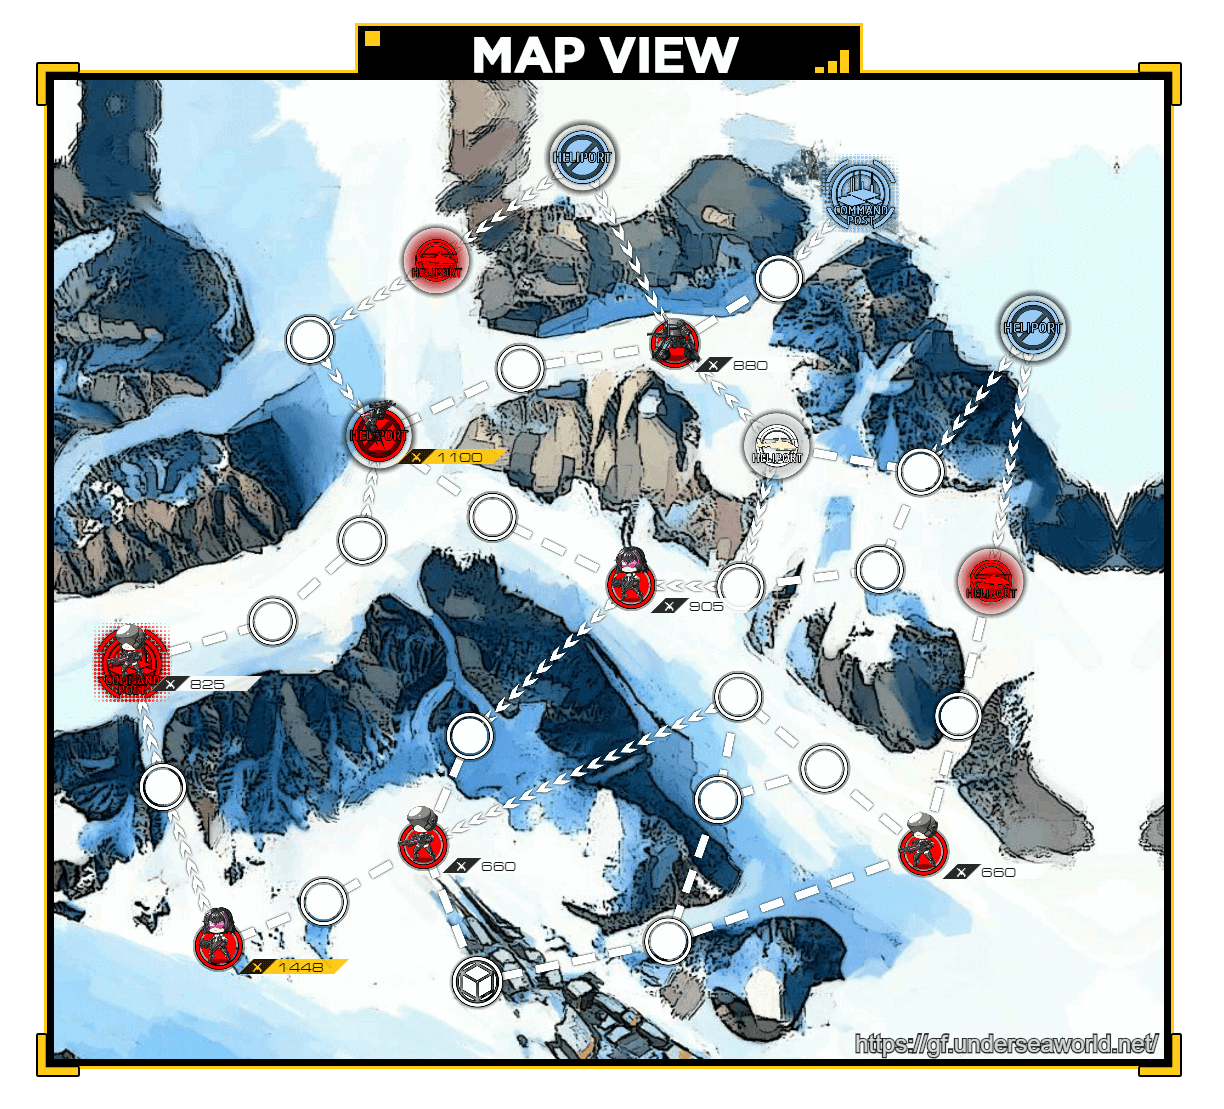
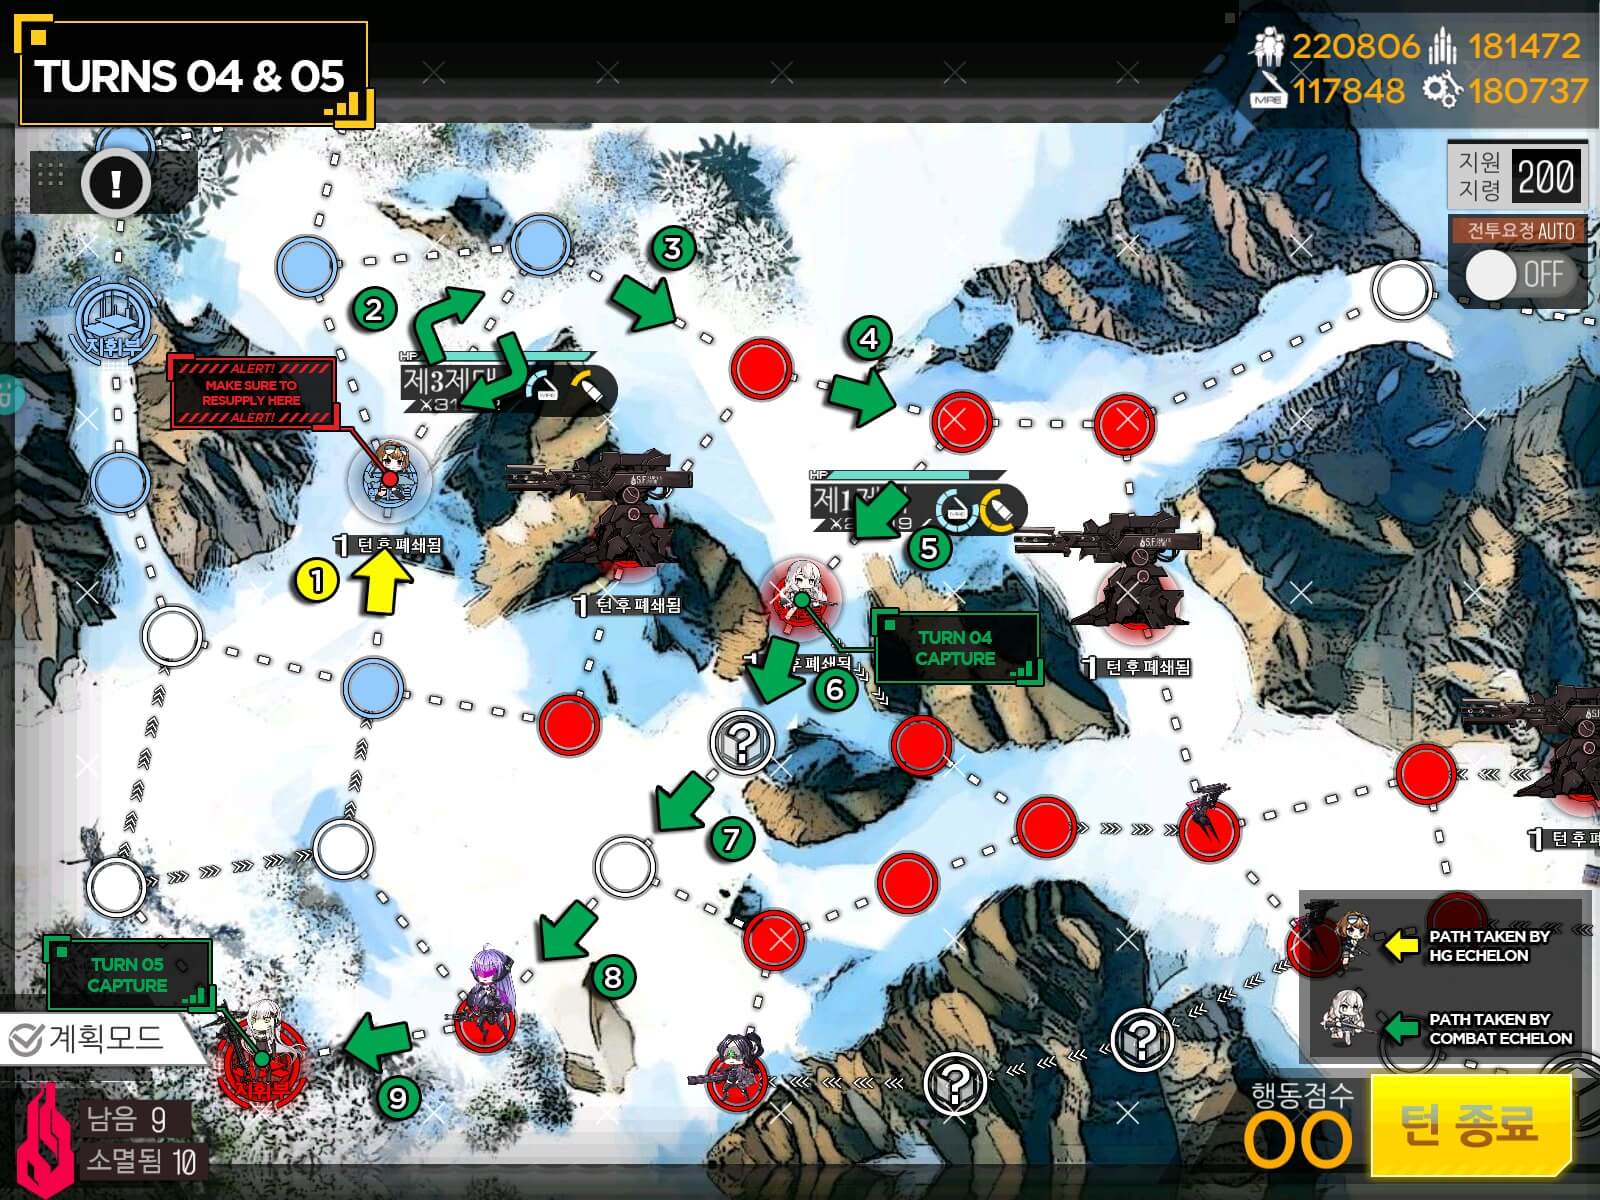
■ The Wolves Gather III
Shown Enemy Strength: 4,000
Echelon[s] Required: 2 + 1 Dummy HG
S-Rank condition: Kill 6 Units in 6 turns. Take HQ.
 Only way in is through "?" minefield where it is almost 100% Ambush combat. This is one of few maps where brute forcing Jupiter is not worth the time save due to last minefield forcing you to fight and run out of resource.


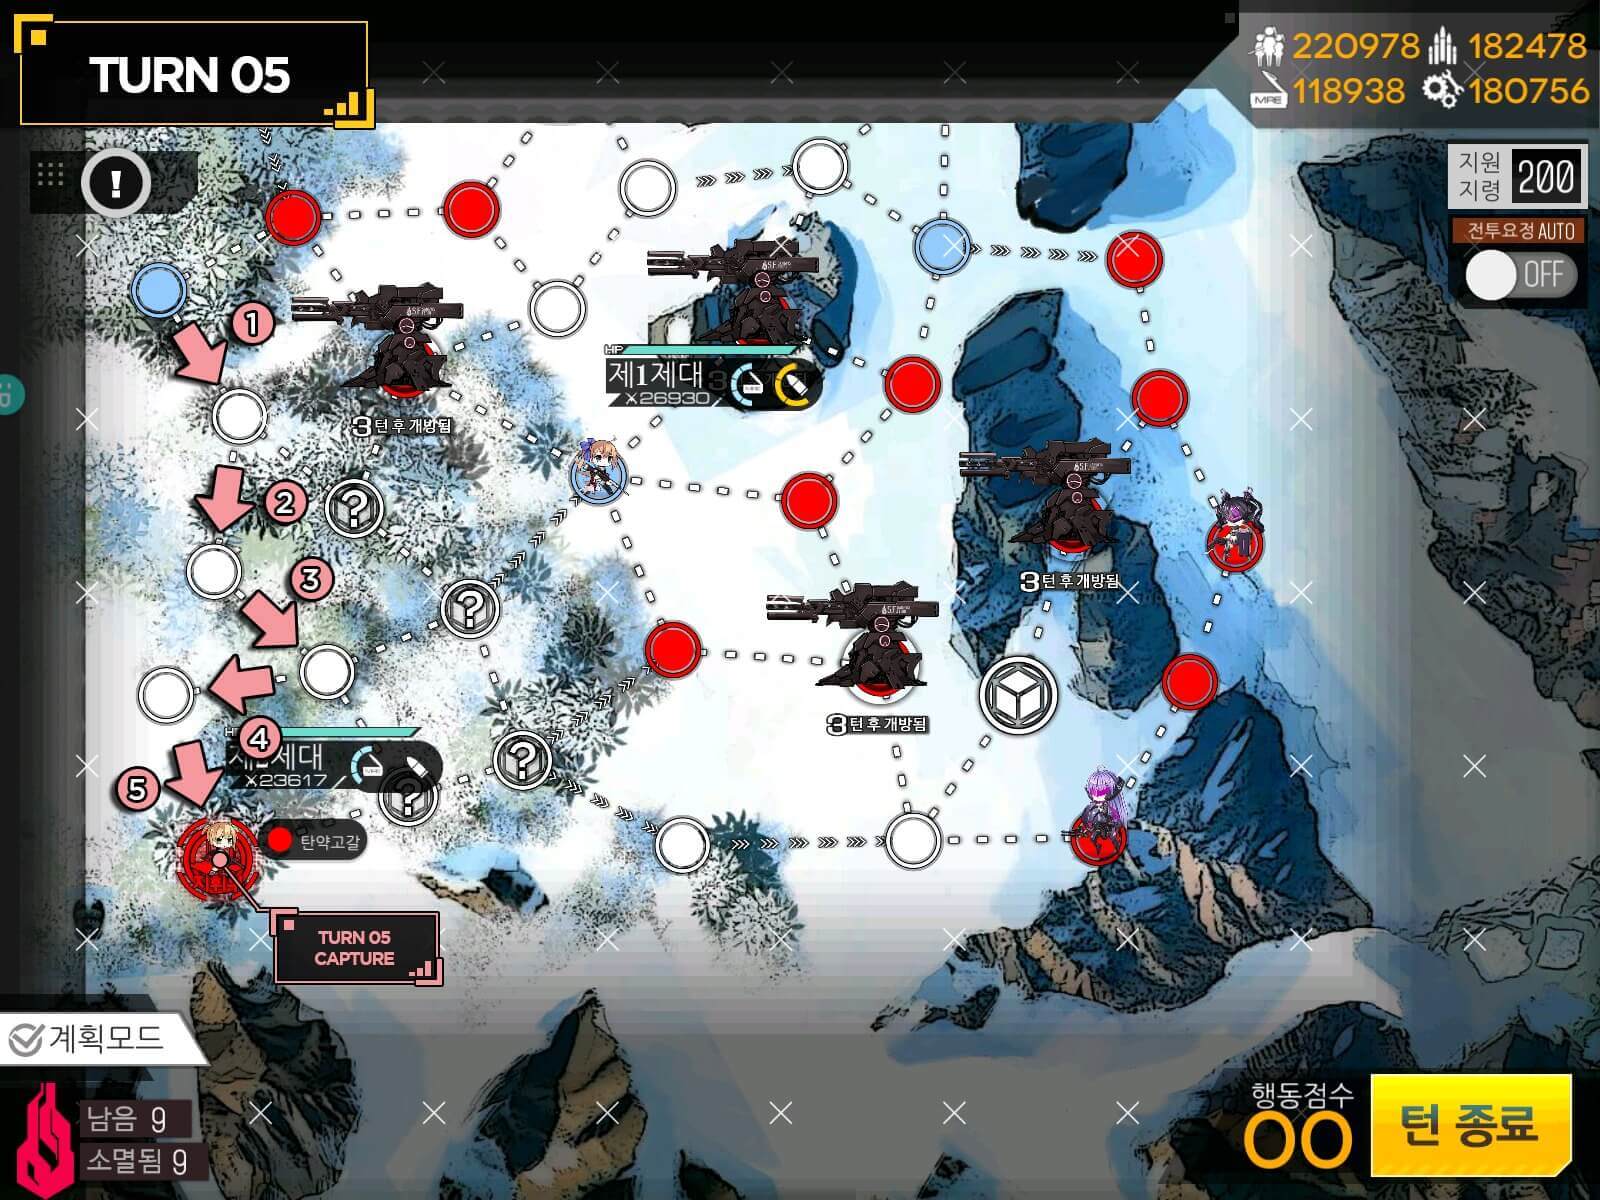
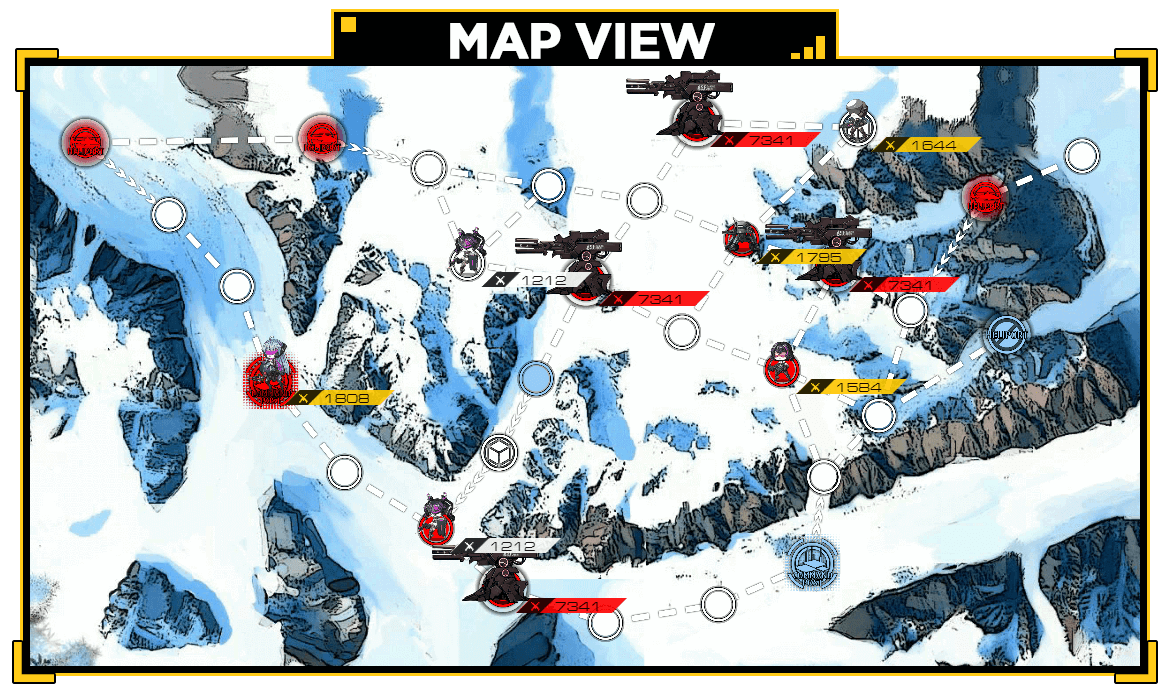
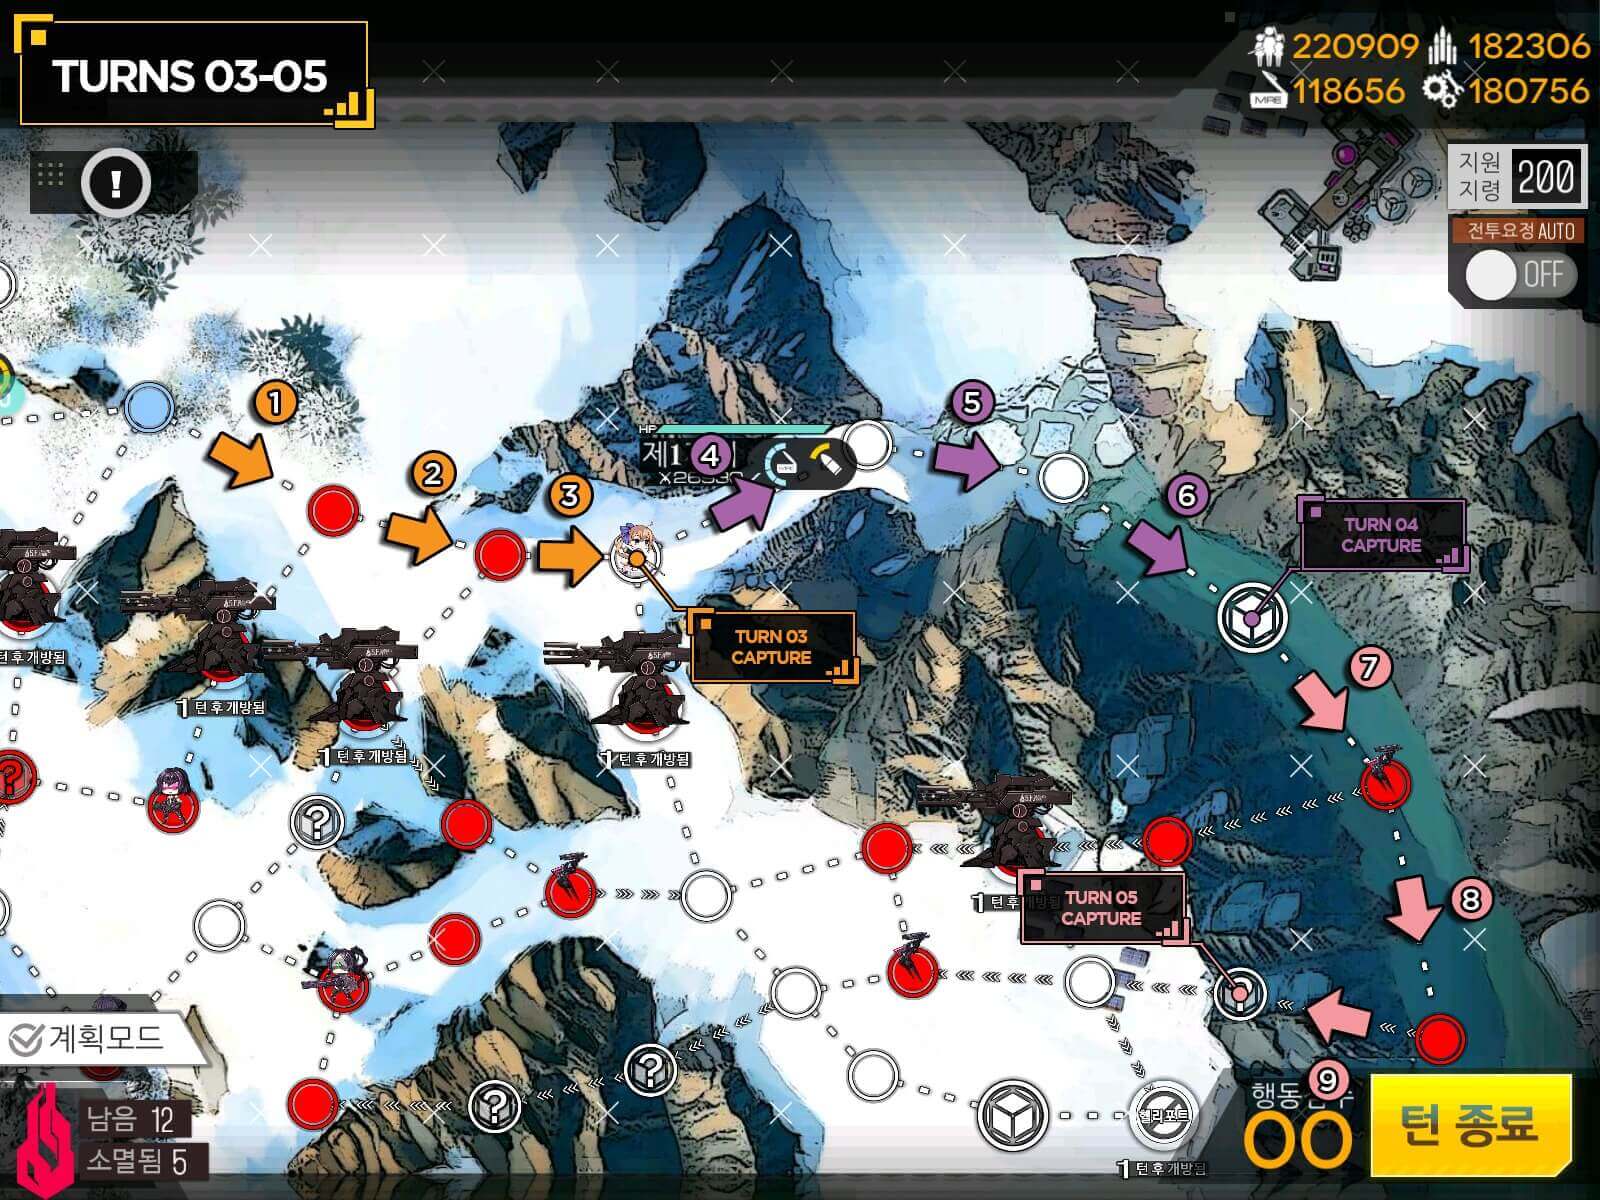
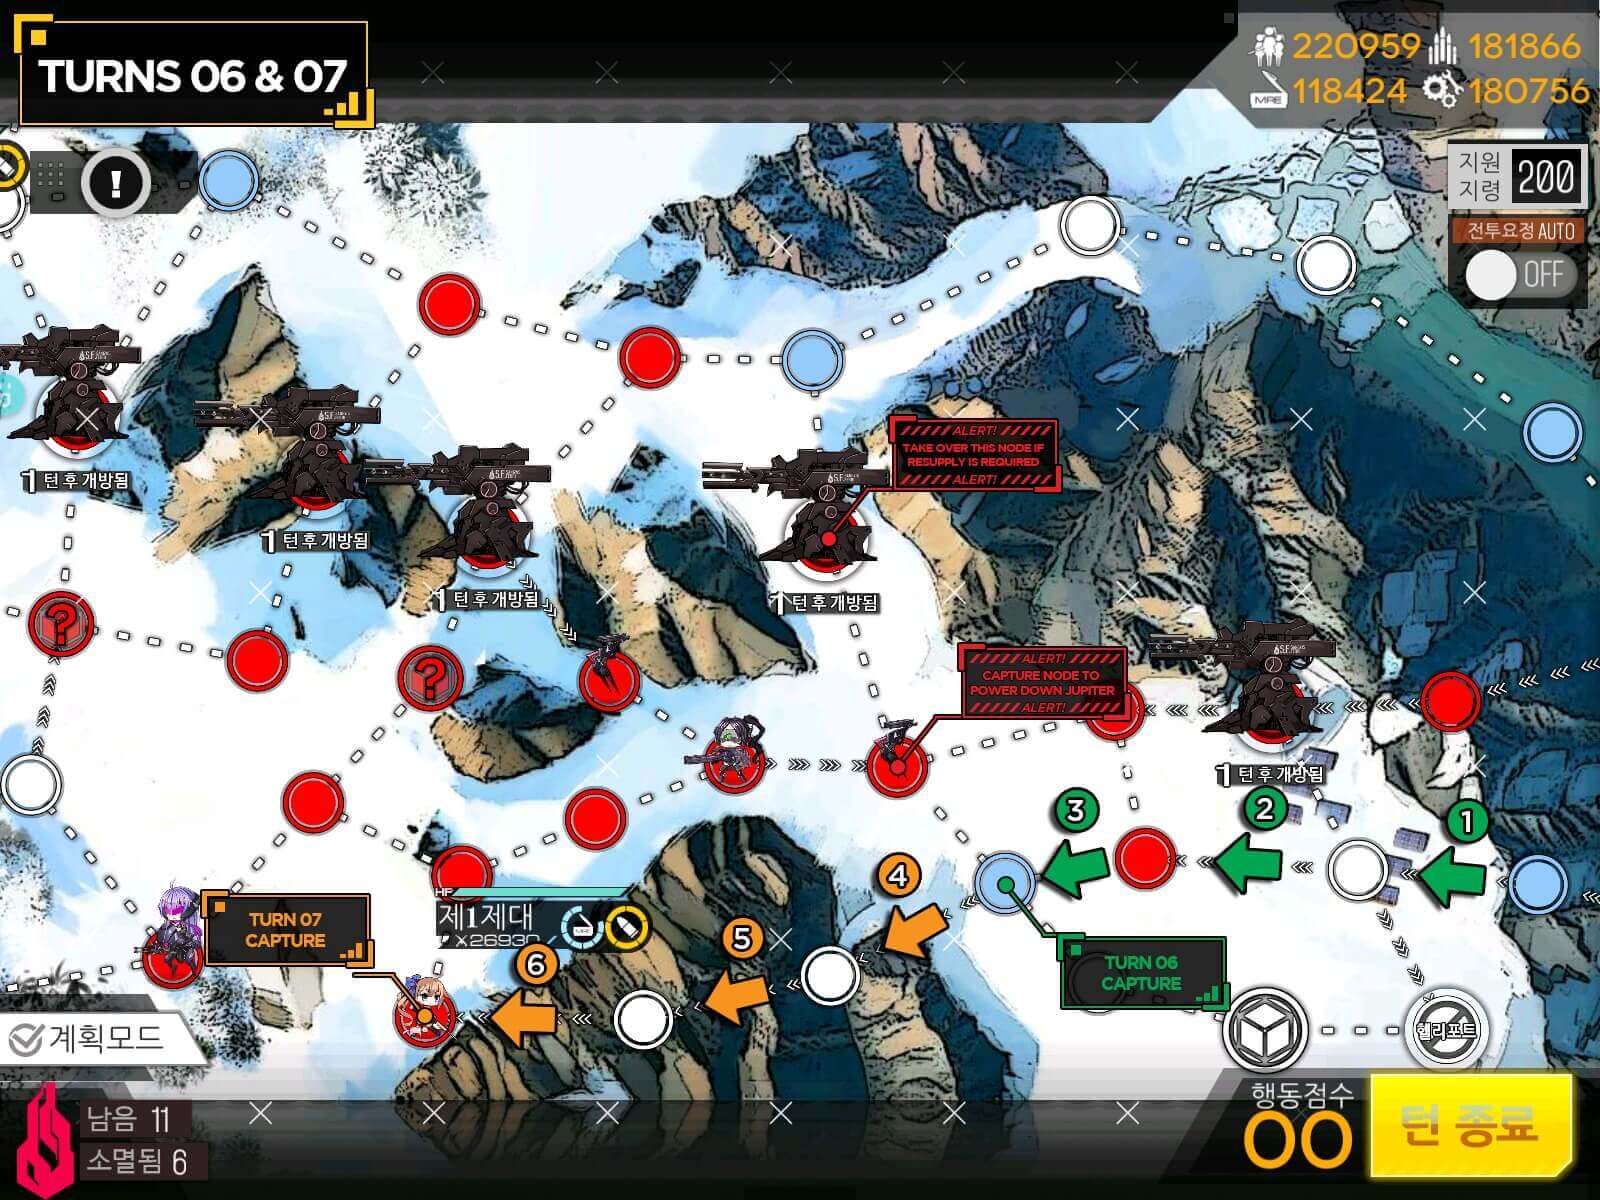
■ The Wolves Gather IV
Shown Enemy Strength: 5,500
Echelon[s] Required: 2
S-Rank condition: Kill 7 Units in 16 turns. Take HQ. // Kill Boss Unit
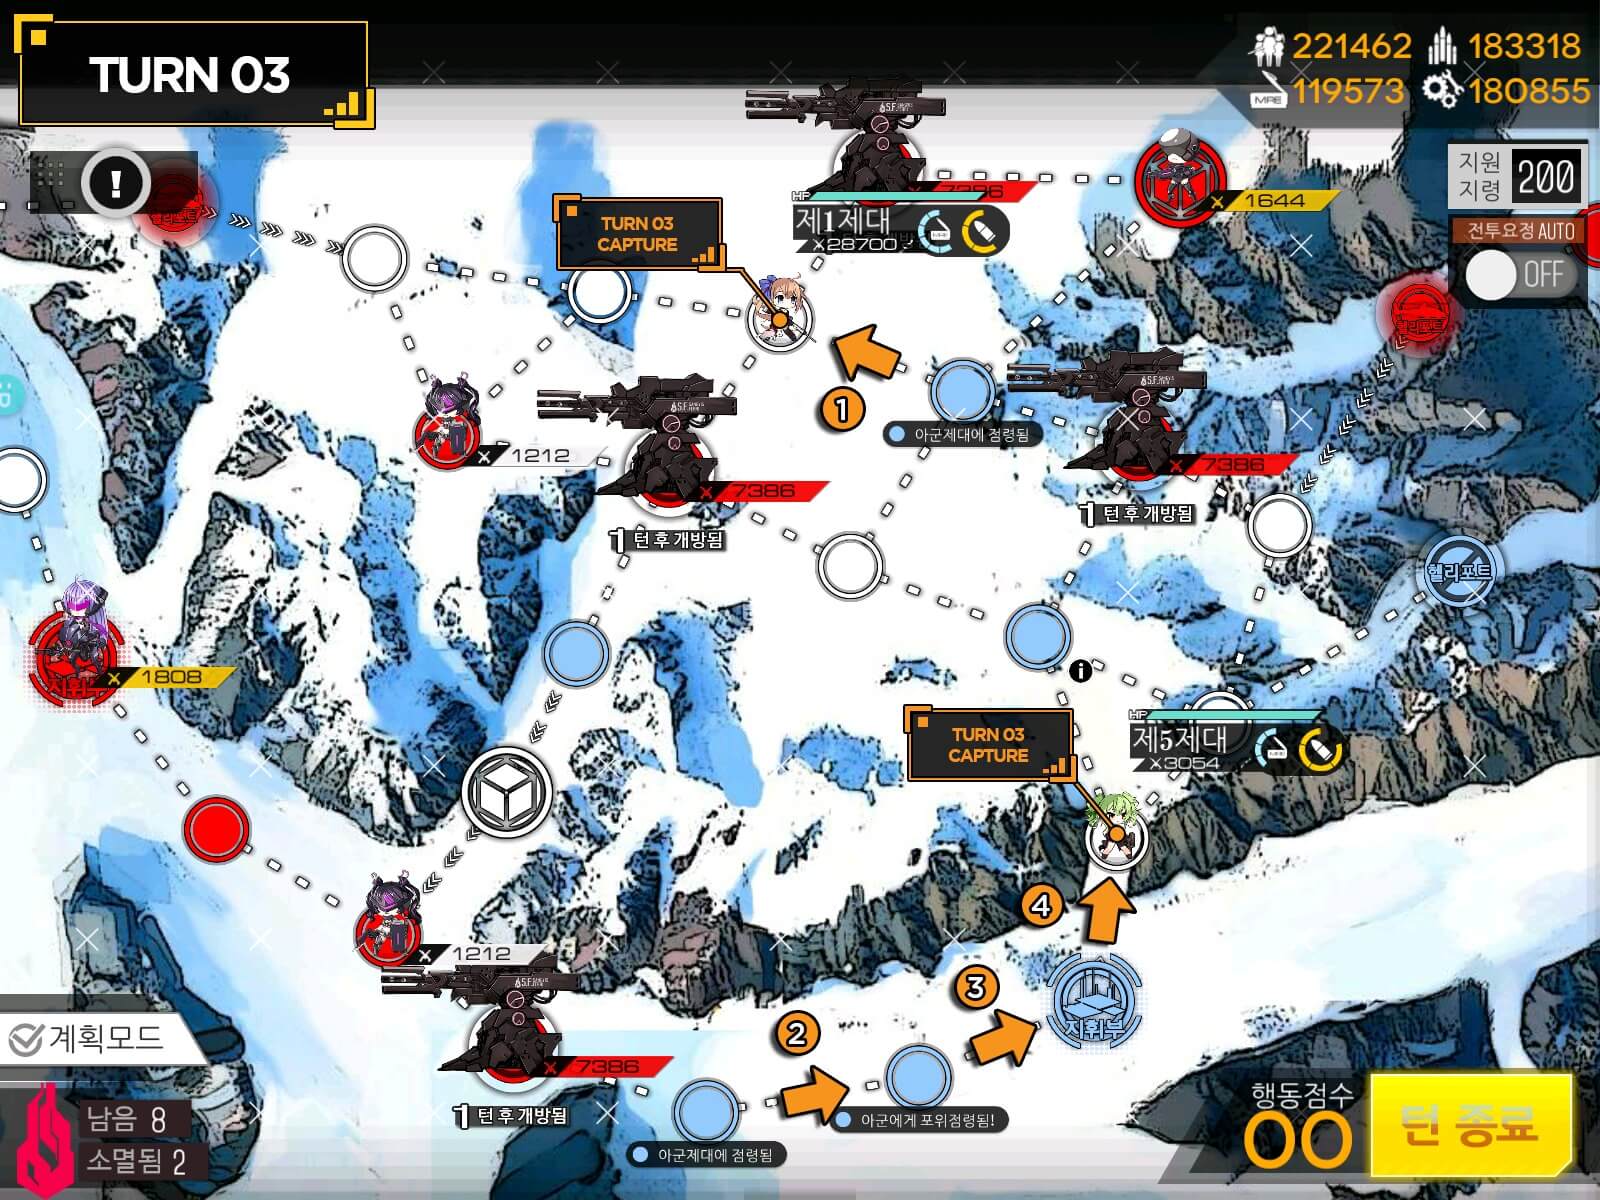
Our first run into Gager. This will cover guide without any assistance from fairies.


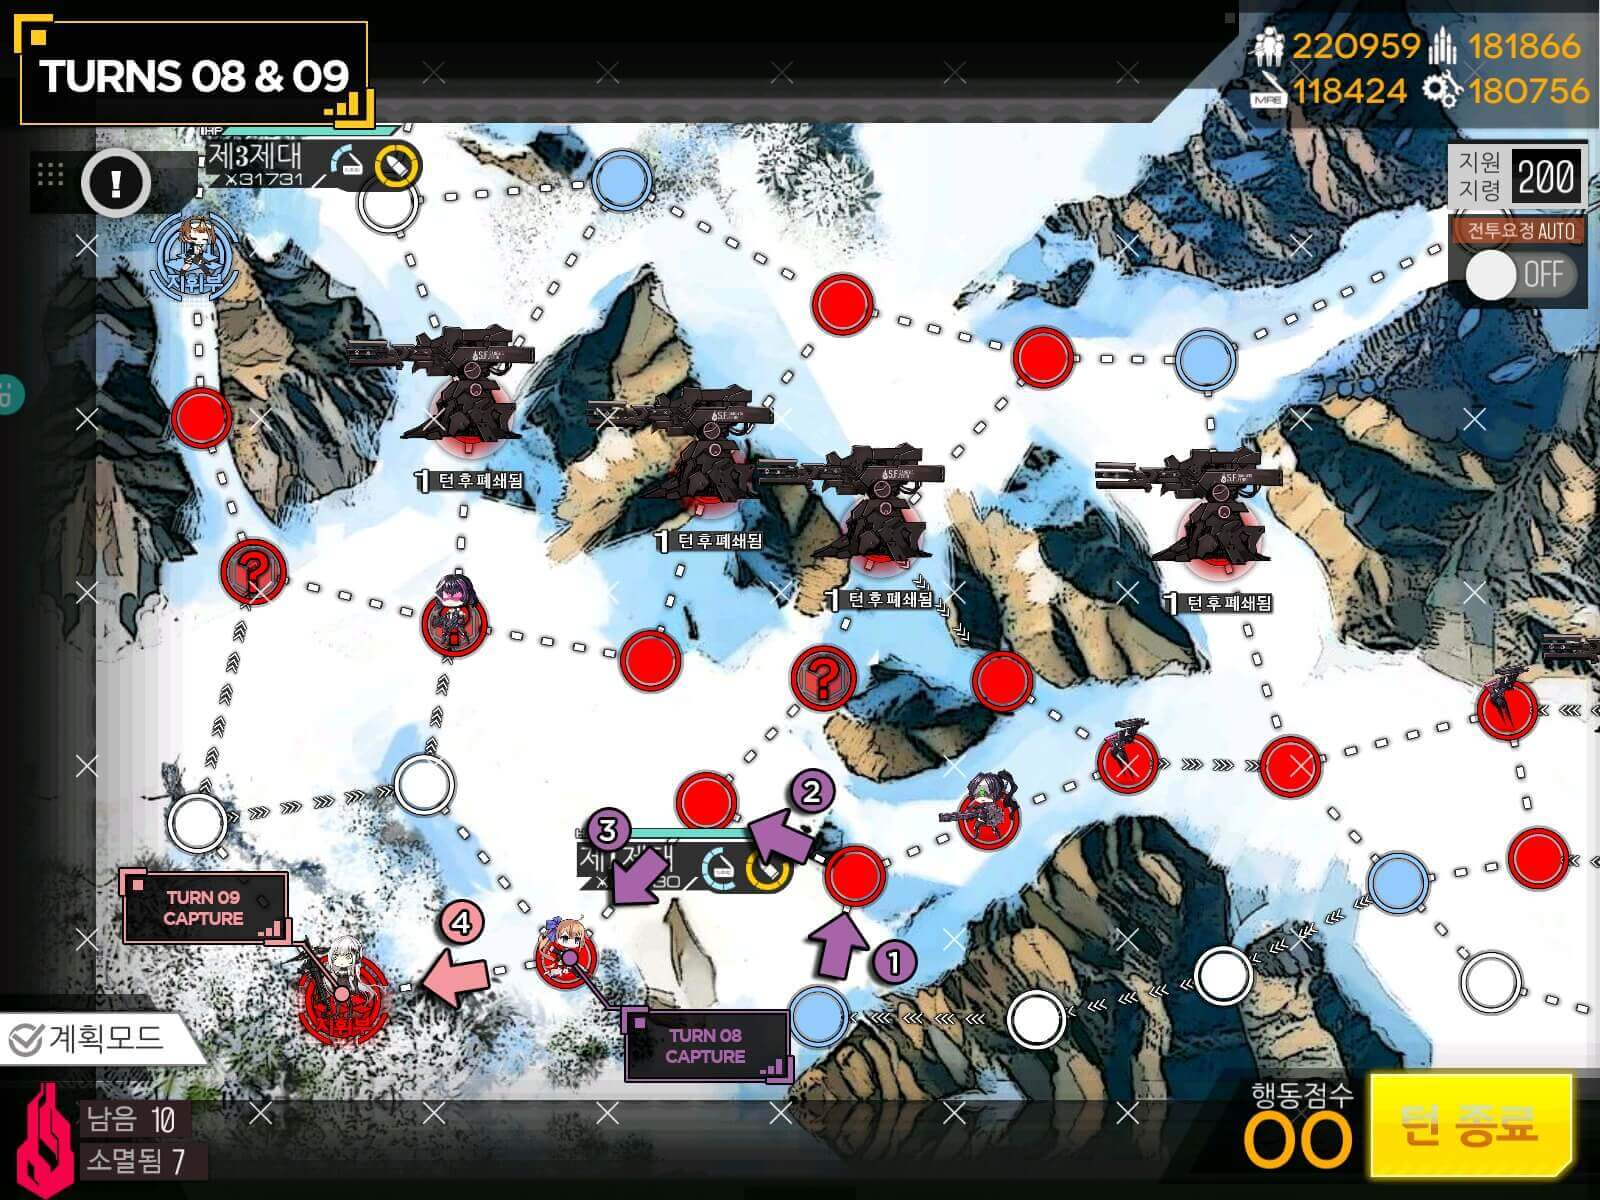
You can take Jupiter in Green Circle to get resupplied if you need to. But if you have enough ammo, move to kill Gager. [She has boss pattern that targets entire row. Watch out for trigger.]
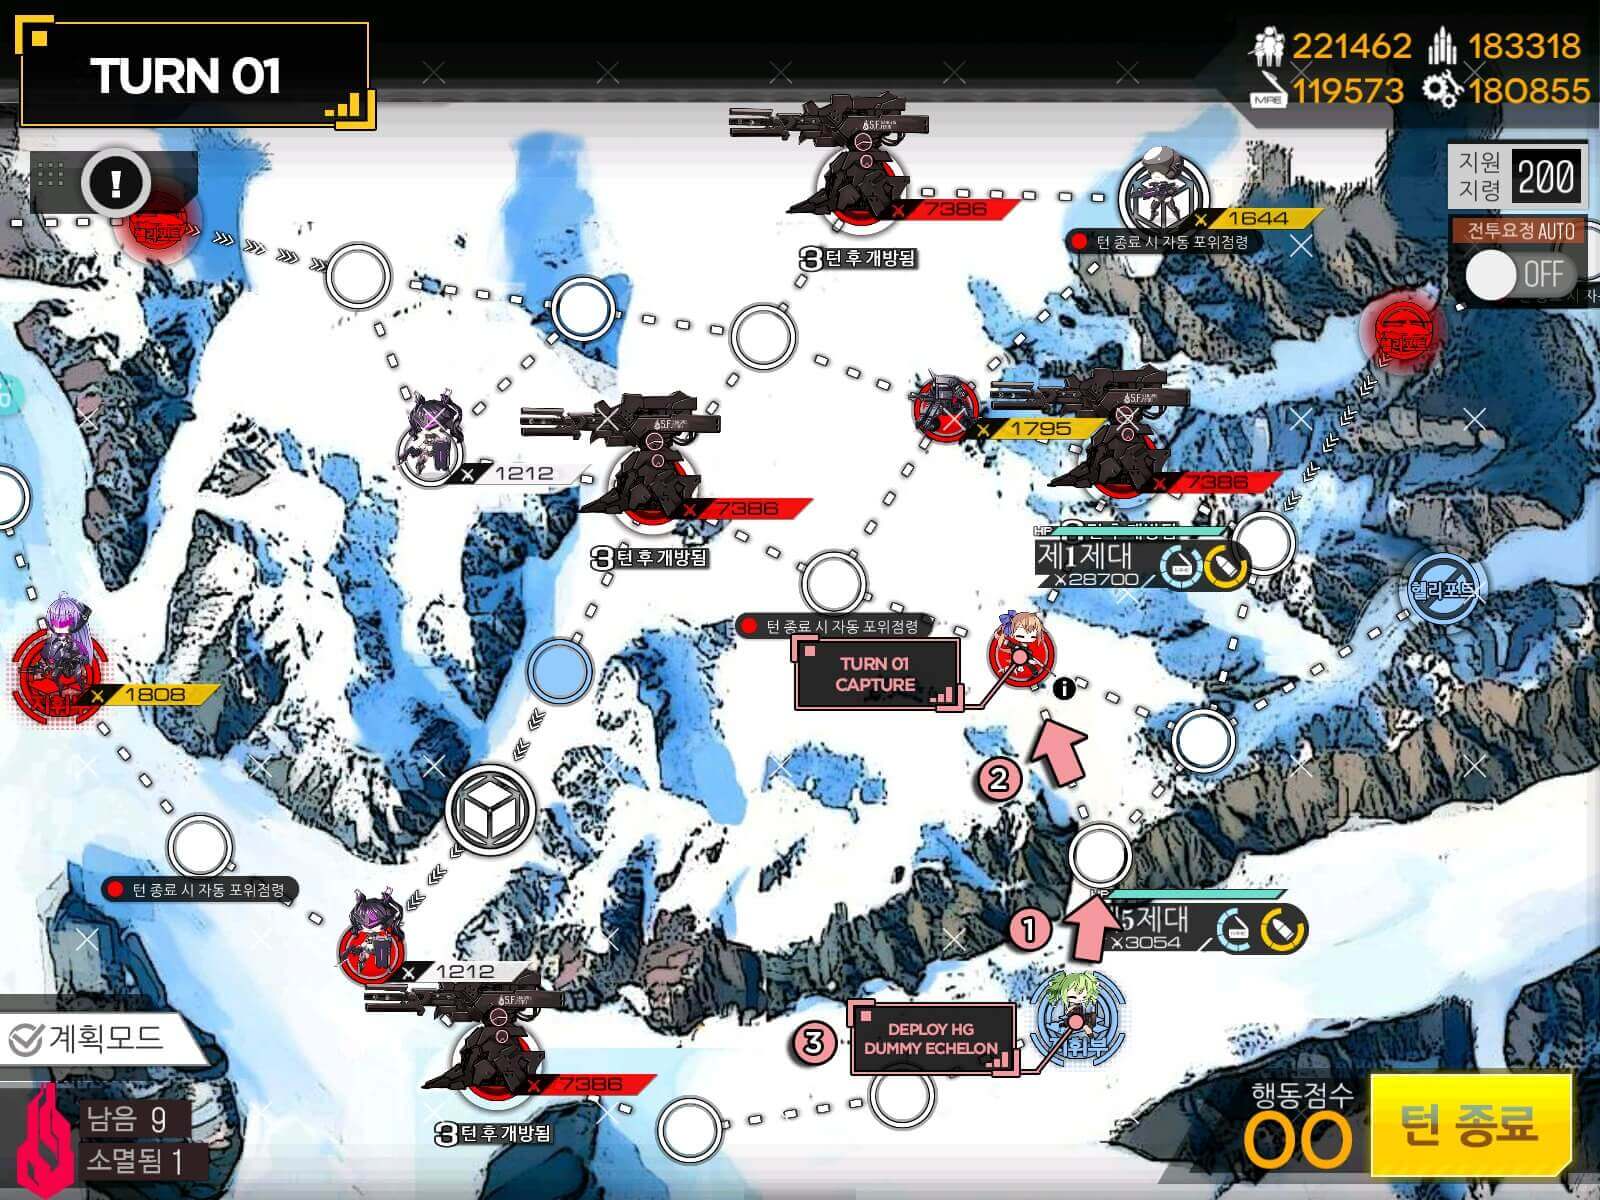
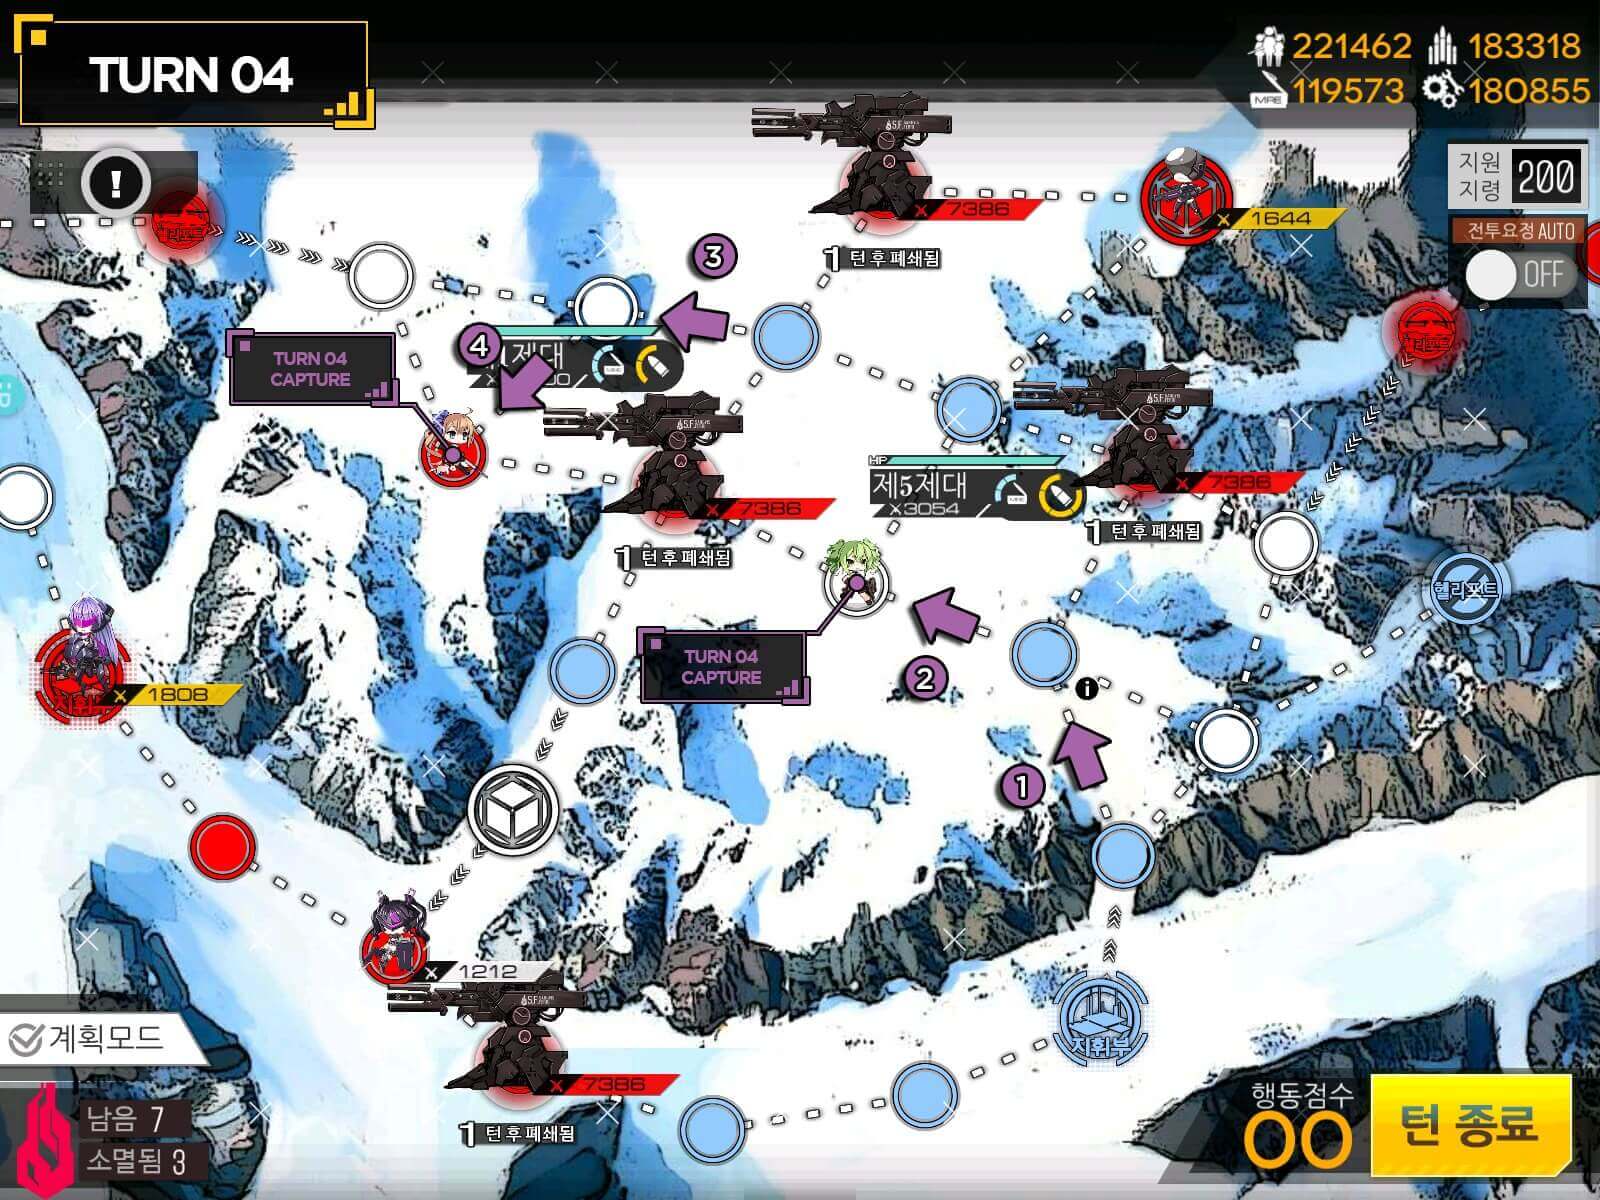
Brute Force Route
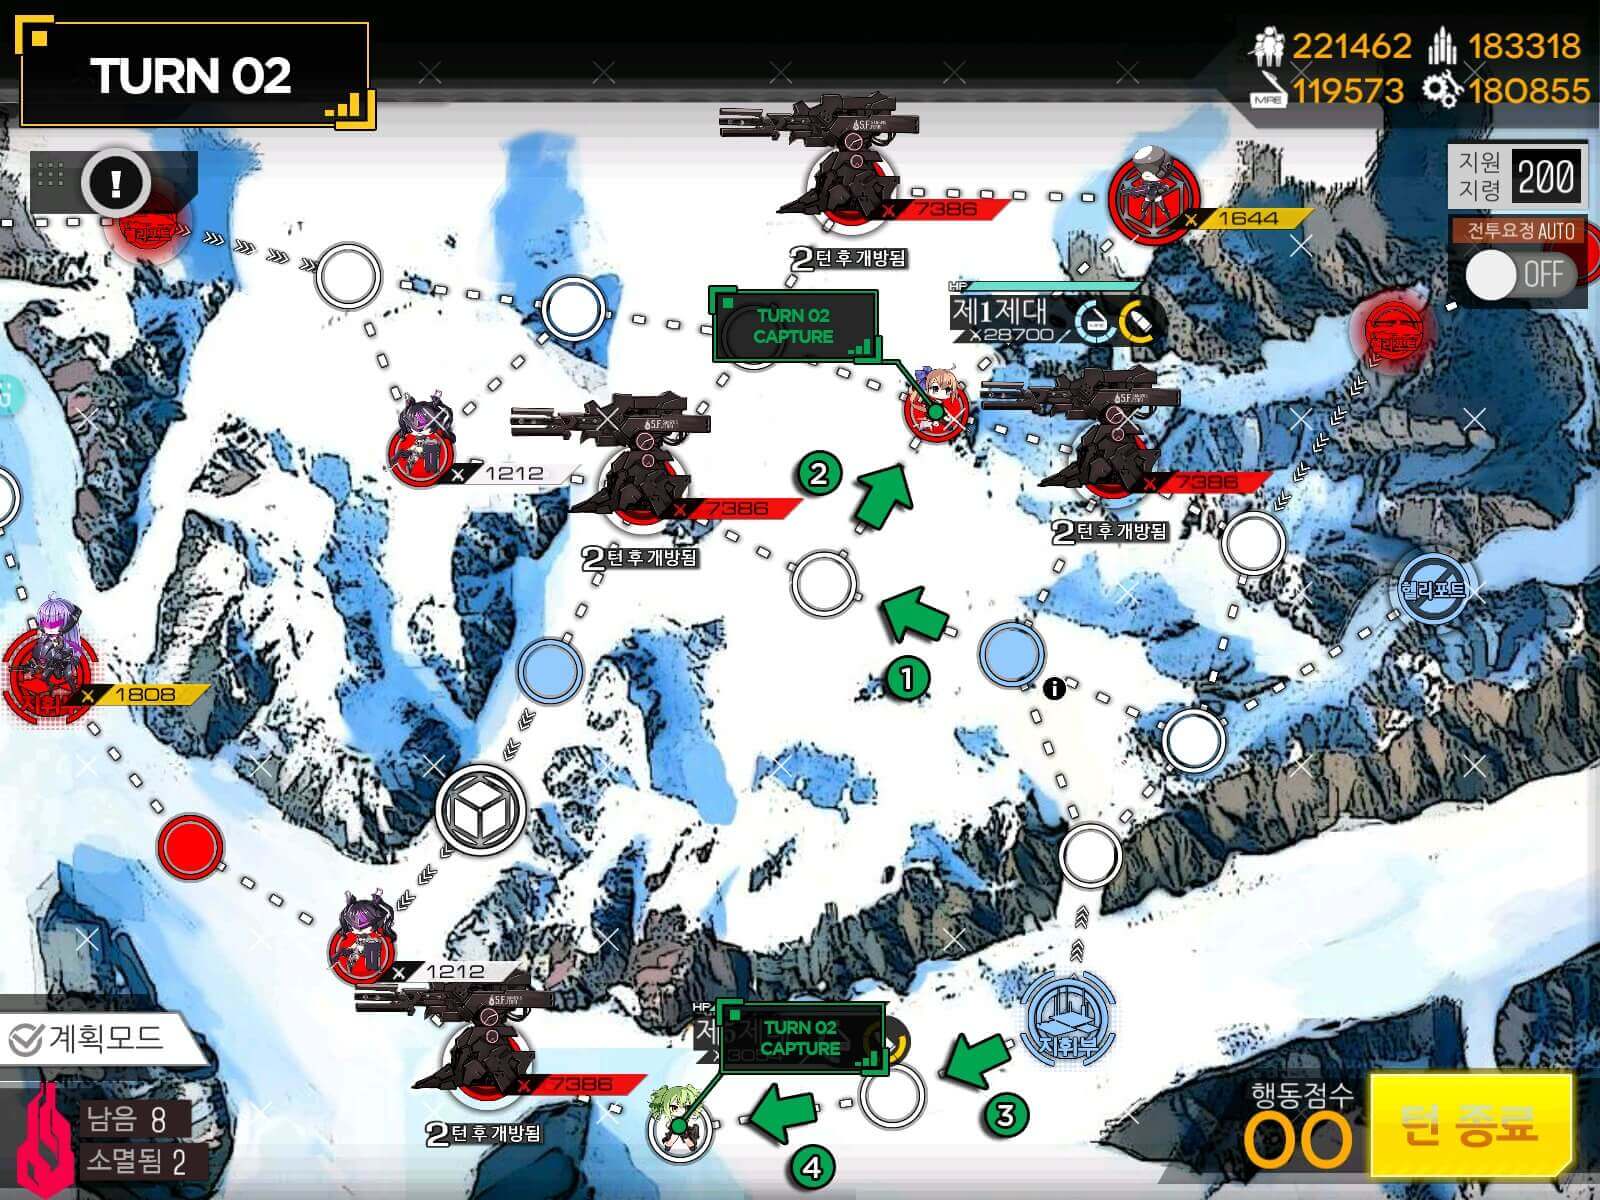
This route kills 2 Jupiter: one weakened and one full strength. Repeat Turn 1 as Normal, and make sure to resupply as well. Then Turn 2 looks little bit different as we are looking to get surround on first Jupiter as resupply point.

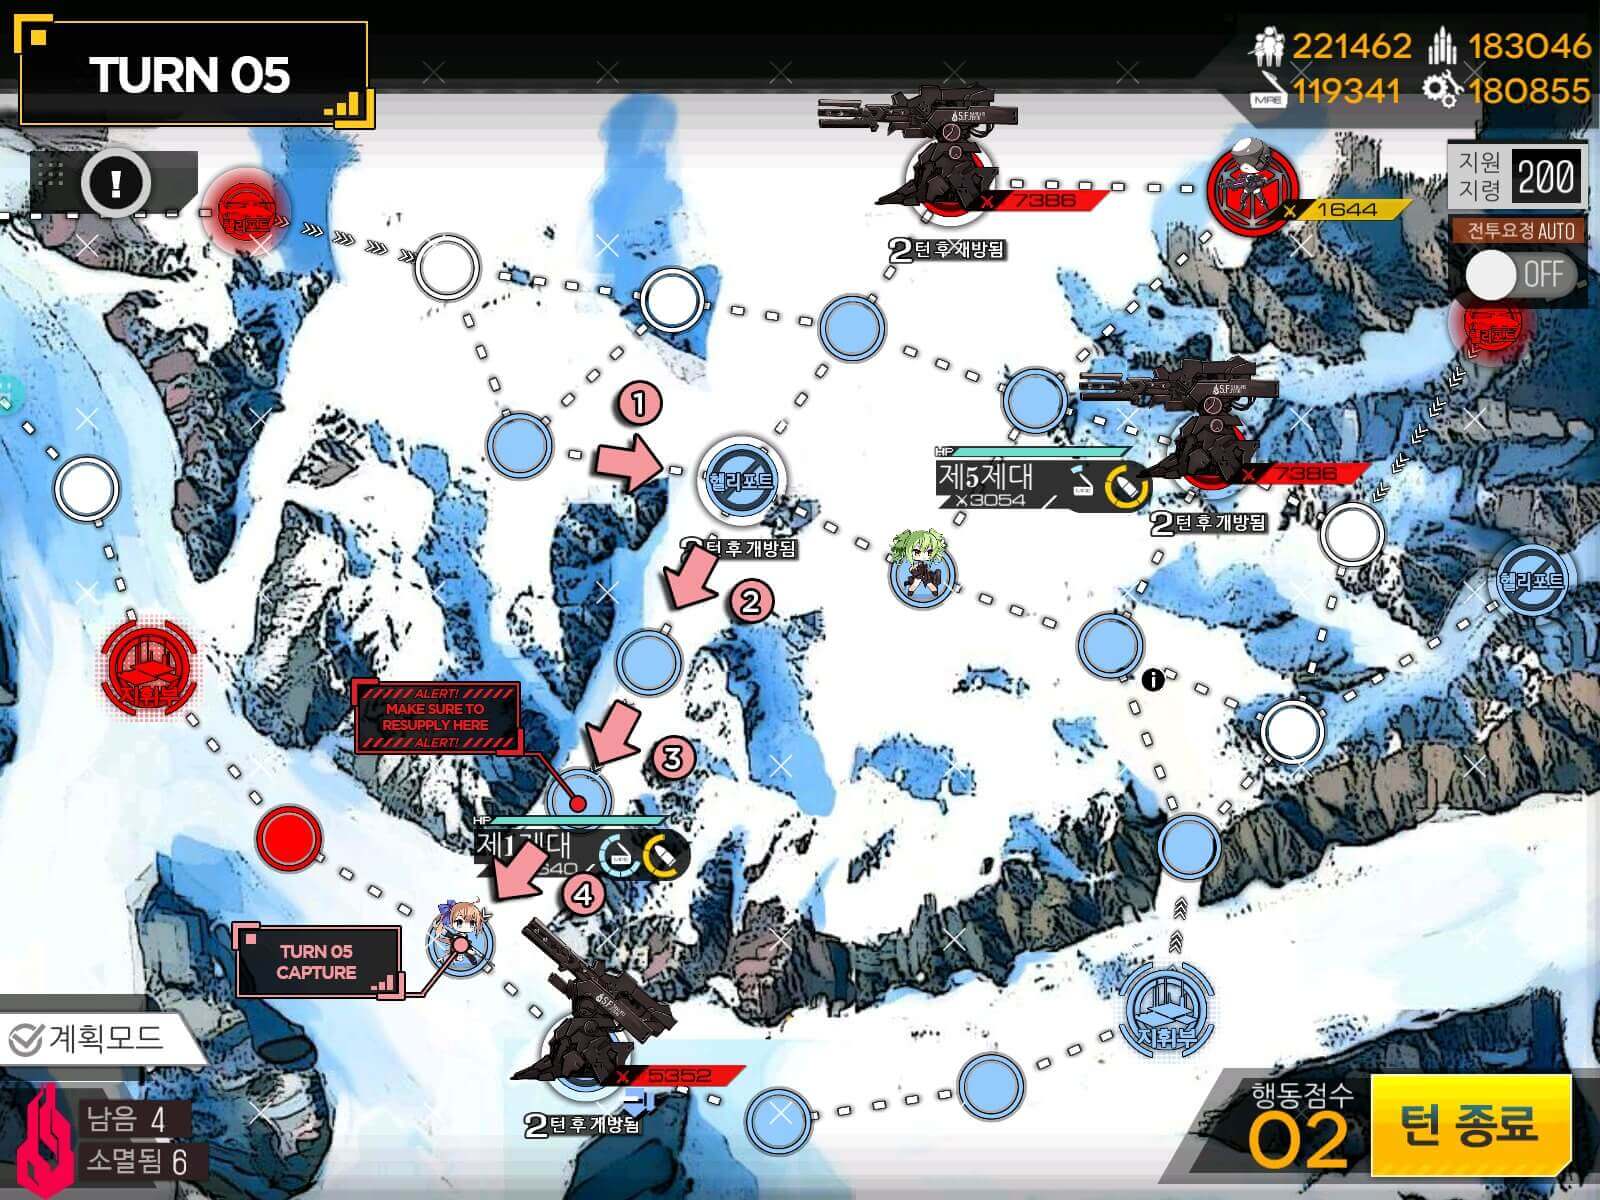
If bottom Echelon can take on weakened Jupiter, you can go ahead and resupply using Swap method and take all they way to brute force the 3rd Jupiter as shown above. If not you will just take 1 extra turn to finish the map like I did. Proceed to Gager to finish the mission.